Vue Lifecycle Hooks
Lifecycle hooks in Vue are certain stages in the lifecycle of a component where we can add code to do things.
Lifecycle Hooks
Every time a component reaches a new stage in its lifecycle, a specific function runs, and we can add code to that function. Such functions are called lifecycle hooks, because we can "hook" our code into that stage.
These are all the lifecycle hooks a component has:
beforeCreatecreatedbeforeMountmountedbeforeUpdateupdatedbeforeUnmountunmountederrorCapturedrenderTrackedrenderTriggeredactivateddeactivatedserverPrefetch
Below are examples of these lifecycle hooks.
The 'beforeCreate' Hook
ThebeforeCreate lifecycle hook happens before the component is initialized, so this is before Vue has set up the component's data, computed properties, methods, and event listeners.
ThebeforeCreate hook can be used to for example set up a global event listener, but we should avoid trying to access elements that belong to the component from thebeforeCreate lifecycle hook, such as data, watchers and methods, because they are not created yet at this stage.
Also, it does not make sense to try to access DOM elements from thebeforeCreate lifecycle hook, because they are not created until after the component ismounted.
Example
CompOne.vue:
<template> <h2>Component</h2> <p>This is the component</p> <p id="pResult">{{ text }}</p></template><script>export default {data() {return {text: '...'}}, beforeCreate() {this.text = 'initial text'; // This line has no effect console.log("beforeCreate: The component is not created yet."); }}</script>App.vue:
<template> <h1>The 'beforeCreate' Lifecycle Hook</h1> <p>We can see the console.log() message from 'beforeCreate' lifecycle hook, but there is no effect from the text change we try to do to the Vue data property, because the Vue data property is not created yet.</p> <button @click="this.activeComp = !this.activeComp">Add/Remove Component</button> <div> <comp-one v-if="activeComp"></comp-one> </div></template><script>export default { data() { return { activeComp: false } }}</script><style>#app > div { border: dashed black 1px; border-radius: 10px; padding: 10px; margin-top: 10px; background-color: lightgreen;}#pResult { background-color: lightcoral; display: inline-block;}</style>In the example above, line 15 inCompOne.vue has no effect because in that line we try to change the text inside the Vue data property, but the Vue data property is actually not created yet. Also, remember to open the browser console to see the result of theconsole.log() call on line 16.
The 'created' Hook
Thecreated lifecycle hook happens after the component is initialized, so Vue has already set up the component's data, computed properties, methods, and event listeners.
We should avoid trying to access DOM elements from thecreated lifecycle hook, because DOM elements are not accessible until the component ismounted.
Thecreated lifecycle hook can be used to fetch data with HTTP requests, or set up initial data values. Like in the example below, the data property 'text' is given an initial value:
Example
CompOne.vue:
<template> <h2>Component</h2> <p>This is the component</p> <p id="pResult">{{ text }}</p></template><script>export default {data() {return {text: '...'}}, created() {this.text = 'initial text'; console.log("created: The component just got created."); }}</script>App.vue:
<template> <h1>The 'created' Lifecycle Hook</h1> <p>We can see the console.log() message from 'created' lifecycle hook, and the text change we try to do to the Vue data property works, because the Vue data property is already created at this stage.</p> <button @click="this.activeComp = !this.activeComp">Add/Remove Component</button> <div> <comp-one v-if="activeComp"></comp-one> </div></template><script>export default { data() { return { activeComp: false } }}</script><style>#app > div { border: dashed black 1px; border-radius: 10px; padding: 10px; margin-top: 10px; background-color: lightgreen;}#pResult { background-color: lightcoral; display: inline-block;}</style>The 'beforeMount' Hook
ThebeforeMount lifecycle hook happens right before the component ismounted, so just before the component is added to the DOM.
We should avoid trying to access DOM elements from thebeforeMount lifecycle hook, because DOM elements are not accessible until the component ismounted.
The example below shows that we cannot access DOM elements in the component yet, line 11 inCompOne.vue does not work, and generates an error in the browser console:
Example
CompOne.vue:
<template> <h2>Component</h2> <p>This is the component</p> <p ref="pEl" id="pEl">We try to access this text from the 'beforeMount' hook.</p></template><script>export default { beforeMount() { console.log("beforeMount: This is just before the component is mounted."); this.$refs.pEl.innerHTML = "Hello World!"; // <-- We cannot reach the 'pEl' DOM element at this stage }}</script>App.vue:
<template> <h1>The 'beforeMount' Lifecycle Hook</h1> <p>We can see the console.log() message from the 'beforeMount' lifecycle hook, but the text change we try to do to the 'pEl' paragraph DOM element does not work, because the 'pEl' paragraph DOM element does not exist yet at this stage.</p> <button @click="this.activeComp = !this.activeComp">Add/Remove Component</button> <div> <comp-one v-if="activeComp"></comp-one> </div></template><script>export default { data() { return { activeComp: false } }}</script><style>#app > div { border: dashed black 1px; border-radius: 10px; padding: 10px; margin-top: 10px; background-color: lightgreen;}#pEl { background-color: lightcoral; display: inline-block;}</style>The 'mounted' Hook
Right after a component is added to the DOM tree, themounted() function is called, and we can add our code to that stage.
This is the first chance we have to do things related to DOM elements that belong to the component, like using theref attribute and$refs object, as we do in the second example below here.
Example
CompOne.vue:
<template> <h2>Component</h2> <p>Right after this component is added to the DOM, the mounted() function is called and we can add code to that mounted() function. In this example, an alert popup box appears after this component is mounted.</p> <p><strong>Note:</strong> The reason that the alert is visible before the component is visible is because the alert is called before the browser gets to render the component to the screen.</p></template><script>export default { mounted() { alert("The component is mounted!"); }}</script>App.vue:
<template> <h1>The 'mounted' Lifecycle Hook</h1> <button @click="this.activeComp = !this.activeComp">Create component</button> <div> <comp-one v-if="activeComp"></comp-one> </div></template><script>export default { data() { return { activeComp: false } }}</script><style scoped> div { border: dashed black 1px; border-radius: 10px; padding: 20px; margin: 10px; width: 400px; background-color: lightgreen; }</style>Note:Themounted stage happens AFTER the the component is added to the DOM, but in the example above thealert() is visible BEFORE we see the component. The reason for this is that first the component is added to the DOM, but before the browser gets to render the component to the screen, themounted stage happens and thealert() becomes visible and pauses the browser rendering the component.
Below is an example that is perhaps more useful: To put the cursor inside the input field after the form component is mounted, so the user can just start typing.
Example
CompOne.vue:
<template> <h2>Form Component</h2> <p>When this component is added to the DOM tree, the mounted() function is called, and we put the cursor inside the input element.</p> <form @submit.prevent> <label> <p> Name: <br> <input type="text" ref="inpName"> </p> </label> <label> <p> Age: <br> <input type="number"> </p> </label> <button>Submit</button> </form> <p>(This form does not work, it is only here to show the mounted lifecycle hook.)</p></template><script> export default { mounted() { this.$refs.inpName.focus(); } }</script>The 'beforeUpdate' Hook
ThebeforeUpdate lifecycle hook is called whenever there is a change in the data of our component, but before the update is rendered to the screen. ThebeforeUpdate lifecycle hook happens right before theupdated lifecycle hook.
Something special about thebeforeUpdate hook is that we can do changes to the application without it triggering a new update, so we avoid the otherwise infinite loop. That is the reason for not doing changes to the application in theupdated lifecycle hook, because with that hook, an infinite loop will be created. Just take a look at the third example below from here, in red.
Example
ThebeforeUpdate() function adds an<li> tag to the document to indicate that thebeforeUpdate() function has run.
CompOne.vue:
<template> <h2>Component</h2> <p>This is the component</p></template>App.vue:
<template> <h1>The 'beforeUpdate' Lifecycle Hook</h1> <p>Whenever there is a change in our page, the application is 'updated' and the 'beforeUpdate' hook happens just before that.</p> <p>It is safe to modify our page in the 'beforeUpdate' hook like we do here, but if we modify our page in the 'updated' hook, we will generate an infinite loop.</p> <button @click="this.activeComp = !this.activeComp">Add/Remove Component</button> <div> <comp-one v-if="activeComp"></comp-one> </div> <ol ref="divLog"></ol></template><script>export default { data() { return { activeComp: true } }, beforeUpdate() { this.$refs.divLog.innerHTML += "<li>beforeUpdate: This happened just before the 'updated' hook.</li>"; }}</script><style>#app > div { border: dashed black 1px; border-radius: 10px; padding: 10px; margin-top: 10px; background-color: lightgreen;}</style>The 'updated' Hook
Theupdated lifecycle hook is called after our component has updated its DOM tree.
Example
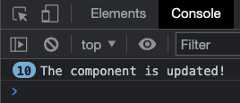
Theupdated() function writes a message withconsole.log(). This happens whenever the page is updated, which in this example is every time the component is added or removed.
CompOne.vue:
<template> <h2>Component</h2> <p>This is the component</p></template>App.vue:
<template> <h1>The 'updated' Lifecycle Hook</h1> <p>Whenever there is a change in our page, the application is updated and the updated() function is called. In this example we use console.log() in the updated() function that runs when our application is updated.</p> <button @click="this.activeComp = !this.activeComp">Add/Remove Component</button> <div> <comp-one v-if="activeComp"></comp-one> </div></template><script>export default { data() { return { activeComp: true } }, updated() { console.log("The component is updated!"); }}</script><style>#app { max-width: 450px;}#app > div { border: dashed black 1px; border-radius: 10px; padding: 10px; margin-top: 10px; width: 80%; background-color: lightgreen;}</style>We can see the result in the browser console after clicking the "Add/Remove Component" button 10 times:
Note:We must be careful not to modify the page itself when theupdated lifecycle hook is called, because then the page will update again and again, creating an infinite loop.
Lets try and see what happens if we do exactly like the note above warn us against. Will the page update indefinitely?:
Example
Theupdated() function adds text to a paragraph, which in turn updates the page again, and the function runs again and again in an infinite loop. Luckily, your browser will stop this loop eventually.
CompOne.vue:
<template> <h2>Component</h2> <p>This is the component</p></template>App.vue:
<template> <h1>The 'updated' Lifecycle Hook</h1> <p>Whenever there is a change in our page, the application is updated and the updated() function is called.</p> <p>The first change that causes the updated hook to be called is when we remove the component by clicking the button. When this happens, the update() function adds text to the last paragraph, which in turn updates the page again and again.</p> <button @click="this.activeComp = !this.activeComp">Add/Remove Component</button> <div> <comp-one v-if="activeComp"></comp-one> </div> <div>{{ text }}</div></template><script>export default { data() { return { activeComp: true, text: "Hello, " } }, updated() { this.text += "hi, "; }}</script><style>#app { max-width: 450px;}#app > div { border: dashed black 1px; border-radius: 10px; padding: 10px; margin-top: 10px; width: 80%; background-color: lightgreen;}</style>When running the code above locally on your machine in dev mode, the Chrome browser console warning looks like this:

The 'beforeUnmount' Hook
ThebeforeUnmount lifecycle hook is called just before a component is removed from the DOM.
As we can see in the example below, we can still access component elements in the DOM in thebeforeUnmount hook.
Example
CompOne.vue:
<template> <h2>Component</h2> <p ref="pEl">Strawberries!</p></template> <script>export default { beforeUnmount() { alert("beforeUnmount: The text inside the p-tag is: " + this.$refs.pEl.innerHTML); }}</script>App.vue:
<template> <h1>Lifecycle Hooks</h1> <button @click="this.activeComp = !this.activeComp">{{ btnText }}</button> <div> <comp-one v-if="activeComp"></comp-one> </div></template><script>export default { data() { return { activeComp: true } }, computed: { btnText() { if(this.activeComp) { return 'Remove component' } else { return 'Add component' } } }}</script><style scoped> div { border: dashed black 1px; border-radius: 10px; padding: 20px; margin: 10px; width: 400px; background-color: lightgreen; }</style>The 'unmounted' Hook
Theunmounted lifecycle hook is called after a component is removed from the DOM.
This hook can for example be used to remove event listeners or cancelling timers or intervals.
When a component isunmounted, theunmounted() function is called, and we can add our code to it:
Example
CompOne.vue:
<template> <h2>Component</h2> <p>When this component is removed from the DOM tree, the unmounted() function is called and we can add code to that function. In this example we create an alert popup box when this component is removed.</p></template><script>export default { unmounted() { alert("The component is removed (unmounted)!"); }}</script>App.vue:
<template> <h1>Lifecycle Hooks</h1> <button @click="this.activeComp = !this.activeComp">{{ btnText }}</button> <div> <comp-one v-if="activeComp"></comp-one> </div></template><script>export default { data() { return { activeComp: true } }, computed: { btnText() { if(this.activeComp) { return 'Remove component' } else { return 'Add component' } } }}</script><style scoped> div { border: dashed black 1px; border-radius: 10px; padding: 20px; margin: 10px; width: 400px; background-color: lightgreen; }</style>Note:Theunmounted stage happens AFTER the the component is removed from the DOM, but in the example above thealert() is visible BEFORE the component disappears. The reason for this is that first the component is removed from the DOM, but before the browser gets to render the removal of the component to the screen, theunmounted stage happens and thealert() becomes visible and pauses the browser from visibly removing the component.
The 'errorCaptured' Hook
TheerrorCaptured lifecycle hook is called when an error happens in a child/descendant component.
This hook can be used for error handling, logging or to display the error to the user.
Example
CompOne.vue:
<template> <h2>Component</h2> <p>This is the component</p> <button @click="generateError">Generate Error</button></template><script>export default { methods: { generateError() { this.$refs.objEl.innerHTML = "hi"; } }}</script>App.vue:
<template> <h1>The 'errorCaptured' Lifecycle Hook</h1> <p>Whenever there is an error in a child component, the errorCaptured() function is called on the parent.</p> <p>When the button inside the component is clicked, a method will run that tries to do changes to a $refs object that does not exist. This creates an error in the component that triggers the 'errorCaptured' lifecycle hook in the parent, and an alert box is displayed with information about the error.</p> <p>After clicking "Ok" in the alert box you can see the error in the browser console.</p> <div> <comp-one></comp-one> </div></template><script>export default { errorCaptured() { alert("An error occurred"); }}</script><style>#app > div { border: dashed black 1px; border-radius: 10px; padding: 10px; margin-top: 10px; background-color: lightgreen;}</style>Information about the error can also be captured as arguments to theerrorCaptured() function and these arguments are:
- the error
- the component that triggered the error
- the error source type
In the example below these arguments are captured in theerrorCaptured() function and written to the console:
Example
CompOne.vue:
<template> <h2>Component</h2> <p>This is the component</p> <button @click="generateError">Generate Error</button></template><script>export default { methods: { generateError() { this.$refs.objEl.innerHTML = "hi"; } }}</script>App.vue:
<template> <h1>The 'errorCaptured' Lifecycle Hook</h1> <p>Whenever there is an error in a child component, the errorCaptured() function is called on the parent.</p> <p>Open the browser console to see the captured error details.</p> <div> <comp-one></comp-one> </div></template><script>export default { errorCaptured(error,compInst,errorInfo) { console.log("error: ", error); console.log("compInst: ", compInst); console.log("errorInfo: ", errorInfo); }}</script><style>#app > div { border: dashed black 1px; border-radius: 10px; padding: 10px; margin-top: 10px; background-color: lightgreen;}</style>The 'renderTracked' and 'renderTriggered' Lifecycle Hooks
TherenderTracked hook runs when a render function is set to track, or monitor, a reactive component. TherenderTracked hook usually runs when a reactive component is initialized.
TherenderTriggered hook runs when such a tracked reactive component changes, and therefore triggers a new render, so that the screen gets updated with the latest changes.
Areactive component is a component that can change.
Arender function is a function compiled by Vue that keeps track of reactive components. When a reactive component changes, the render function is triggered and re-renders the application to the screen.
TherenderTracked andrenderTriggered hooks are meant to be used in debugging, and are only available in development mode.
To see thealert() andconsole.log() from therenderTracked andrenderTriggered hooks, you must copy the code in the example below to your computer and run the application in development mode.
Example
CompOne.vue:
<template> <h2>Component One</h2> <p>This is a component.</p> <button @click="counter++">Add One</button> <p>{{ counter }}</p></template> <script>export default { data() { return { counter: 0 } }, renderTracked(evt) { console.log("renderTracked: ",evt); alert("renderTracked"); }, renderTriggered(evt) { console.log("renderTriggered: ",evt) alert("renderTriggered"); }}</script>App.vue:
<template> <h1>The 'renderTracked' and 'renderTriggered' Lifecycle Hooks</h1> <p>The 'renderTracked' and 'renderTriggered' lifecycle hooks are used for debugging.</p> <p><mark>This example only works in development mode, so to see the hooks run, you must copy this code and run it on you own computer in development mode.</mark></p> <div> <comp-one></comp-one> </div></template><style scoped> div { border: dashed black 1px; border-radius: 10px; padding: 20px; margin-top: 10px; background-color: lightgreen; }</style>Note:The code in the example above is intended to be copied and run locally on your computer in development mode, because therenderTracked andrenderTriggered hooks only works in development mode.
The 'activated' and 'deactivated' Lifecycle Hooks
As we can see above on this page, we have themounted andunmounted lifecycle hooks for when a component is removed or added to the DOM.
Theactivated anddeactivated lifecycle hooks are for when a cached dynamic component is added or removed, but not from the DOM. The<KeepAlive> tag is used in the example below to cache the dynamic component.
Example
CompOne.vue:
<template> <h2>Component</h2> <p>Below is a log with every time the 'mounted' or 'activated' hooks run.</p> <ol ref="olEl"></ol> <p>You can also see when these hooks run in the console.</p></template> <script>export default { mounted() { console.log("mounted"); const liEl = document.createElement("li"); liEl.innerHTML = "mounted"; this.$refs.olEl.appendChild(liEl); }, activated() { console.log("activated"); const liEl = document.createElement("li"); liEl.innerHTML = "activated"; this.$refs.olEl.appendChild(liEl); }}</script><style> li { background-color: lightcoral; width: 5em; }</style>App.vue:
<template> <h1>The 'activated' Lifecycle Hook</h1> <p>In this example for the 'activated' hook we check if the component is cached properly with <KeepAlive>.</p> <p>If the component is cached properly with <KeepAlive> we expect the 'mounted' hook to run once the first time the component is included (must be added to the DOM the first time), and we expect the 'activated' hook to run every time the component is included (also the first time).</p> <button @click="this.activeComp = !this.activeComp">Include component</button> <div> <KeepAlive> <comp-one v-if="activeComp"></comp-one> </KeepAlive> </div></template><script>export default { data() { return { activeComp: false } }}</script><style scoped> div { border: dashed black 1px; border-radius: 10px; padding: 20px; margin-top: 10px; background-color: lightgreen; }</style>Let's expand the example above to see how both theactivated anddeactivated hooks work. Let's also use themounted andunmounted hooks so that we can see that themounted hook runs once the first time the cached component is added, and that theunmounted hook never runs for the cached component.
Example
CompOne.vue:
<template> <h2>Component</h2> <p>Below is a log with every time the 'activated', 'deactivated', 'mounted' or 'unmounted' hooks run.</p> <ol ref="olEl"></ol> <p>You can also see when these hooks run in the console.</p></template> <script>export default { mounted() { this.logHook("mounted"); }, unmounted() { this.logHook("unmounted"); }, activated() { this.logHook("activated"); }, deactivated() { this.logHook("deactivated"); }, methods: { logHook(hookName) { console.log(hookName); const liEl = document.createElement("li"); liEl.innerHTML = hookName; this.$refs.olEl.appendChild(liEl); } }}</script><style> li { background-color: lightcoral; width: 5em; }</style>App.vue:
<template> <h1>The 'activated' and 'deactivated' Lifecycle Hooks</h1> <p>In this example for the 'activated' and 'deactivated' hooks we also see when and if the 'mounted' and 'unmounted' hooks are run.</p> <button @click="this.activeComp = !this.activeComp">Include component</button> <div> <KeepAlive> <comp-one v-if="activeComp"></comp-one> </KeepAlive> </div></template><script>export default { data() { return { activeComp: false } }}</script><style scoped> div { border: dashed black 1px; border-radius: 10px; padding: 20px; margin-top: 10px; background-color: lightgreen; }</style>The 'serverPrefetch' Lifecycle Hook
The 'serverPrefetch' hook is only called during server-side rendering (SSR).
Explaining and creating an example for the 'serverPrefetch' hook would require a relatively long introduction and setup, and that is beyond the scope of this tutorial.