Python Tkinter is a standard GUI (Graphical User Interface) library for Python which provides a fast and easy way to create desktop applications. Tkinter provides a variety of widgets like buttons, labels, text boxes, menus and more that can be used to create interactive user interfaces. Tkinter supports event-driven programming, where actions are taken in response to user events like clicks or keypresses.
Create First Tkinter GUI Application
Tocreate a Tkinter Python app, follow these basic steps:
- Import the tkinter module: Import the tkinter module, which is necessary for creating the GUI components.
- Create the main window (container): Initialize the main application window using the Tk() class.
- Set Window Properties: We can set properties like the title and size of the window.
- Add widgets to the main window: We can add any number of widgets like buttons, labels, entry fields, etc., to the main window to design the interface.
- Pack Widgets: Use geometry managers like pack(), grid() or place() to arrange the widgets within the window.
- Apply event triggers to the widgets: We can attach event triggers to the widgets to define how they respond to user interactions.
There are two main methods used which the user needs to remember while creating the Python application with GUI.
Tk()
To create a main window in Tkinter, we use the Tk() class. The syntax for creating a main window is as follows:
root = tk.Tk(screenName=None, baseName=None, className='Tk', useTk=1)
- screenName: This parameter is used to specify the display name.
- baseName:This parameter can be used to set the base name of the application.
- className:We can change the name of the window by setting this parameter to the desired name.
- useTk: This parameter indicates whether to use Tk or not.
mainloop()
The mainloop() method is used to run application once it is ready. It is an infinite loop that keeps the application running, waits for events to occur (such as button clicks) and processes these events as long as the window is not closed.
Example:
Pythonimporttkinterm=tkinter.Tk()'''widgets are added here'''m.mainloop()
Output

Tkinter Widget
There are a number oftkinter widgets which we can put in our tkinter application. Some of the major widgets are explained below:
It refers to the display box where we display text or image. It can have various options like font, background, foreground, etc. The general syntax is:
w=Label(master, option=value)
- master is the parameter used to represent the parent window.
Example:
Pythonfromtkinterimport*root=Tk()w=Label(root,text='GeeksForGeeks.org!')w.pack()root.mainloop()
Output:

Note: We have a number of options and parameters that we can pass to widgets, only some them are used in the examples given in this article.
A clickable button that can trigger an action. The general syntax is:
w=Button(master, option=value)
Example:
Pythonimporttkinterastkr=tk.Tk()r.title('Counting Seconds')button=tk.Button(r,text='Stop',width=25,command=r.destroy)button.pack()r.mainloop()Output:

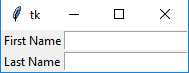
It is used to input the single line text entry from the user. For multi-line text input, Text widget is used. The general syntax is:
w=Entry(master, option=value)
Example:
Pythonfromtkinterimport*master=Tk()Label(master,text='First Name').grid(row=0)Label(master,text='Last Name').grid(row=1)e1=Entry(master)e2=Entry(master)e1.grid(row=0,column=1)e2.grid(row=1,column=1)mainloop()
Output:
A checkbox can be toggled on or off. It can be linked to a variable to store its state. The general syntax is:
w = CheckButton(master, option=value)
Example:
Pythonfromtkinterimport*master=Tk()var1=IntVar()Checkbutton(master,text='male',variable=var1).grid(row=0,sticky=W)var2=IntVar()Checkbutton(master,text='female',variable=var2).grid(row=1,sticky=W)mainloop()
Output:

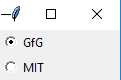
It allows the user to select one option from a set of choices. They are grouped by sharing the same variable. The general syntax is:
w = RadioButton(master, option=value)
Example:
Pythonfromtkinterimport*root=Tk()v=IntVar()Radiobutton(root,text='GfG',variable=v,value=1).pack(anchor=W)Radiobutton(root,text='MIT',variable=v,value=2).pack(anchor=W)mainloop()
Output
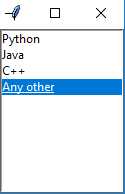
It displays a list of items from which a user can select one or more. The general syntax is:
w = Listbox(master, option=value)
Example:
Pythonfromtkinterimport*top=Tk()Lb=Listbox(top)Lb.insert(1,'Python')Lb.insert(2,'Java')Lb.insert(3,'C++')Lb.insert(4,'Any other')Lb.pack()top.mainloop()
Output
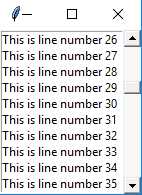
It refers to the slide controller which will be used to implement listed widgets. The general syntax is:
w = Scrollbar(master, option=value)
Example:
Pythonfromtkinterimport*root=Tk()scrollbar=Scrollbar(root)scrollbar.pack(side=RIGHT,fill=Y)mylist=Listbox(root,yscrollcommand=scrollbar.set)forlineinrange(100):mylist.insert(END,'This is line number'+str(line))mylist.pack(side=LEFT,fill=BOTH)scrollbar.config(command=mylist.yview)mainloop()
Output
It is used to create all kinds of menus used by the application. The general syntax is:
window.w = Menu(master, option=value)
Example:
Pythonfromtkinterimport*root=Tk()menu=Menu(root)root.config(menu=menu)filemenu=Menu(menu)menu.add_cascade(label='File',menu=filemenu)filemenu.add_command(label='New')filemenu.add_command(label='Open...')filemenu.add_separator()filemenu.add_command(label='Exit',command=root.quit)helpmenu=Menu(menu)menu.add_cascade(label='Help',menu=helpmenu)helpmenu.add_command(label='About')mainloop()
Output:

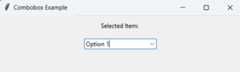
Combobox widget is created using the ttk.Combobox class from the tkinter.ttk module. The values for the Combobox are specified using the values parameter. The default value is set using the set method. An event handler function on_select is bound to the Combobox using the bind method, which updates a label with the selected item whenever an item is selected.
Pythonimporttkinterastkfromtkinterimportttkdefselect(event):selected_item=combo_box.get()label.config(text="Selected Item: "+selected_item)root=tk.Tk()root.title("Combobox Example")# Create a labellabel=tk.Label(root,text="Selected Item: ")label.pack(pady=10)# Create a Combobox widgetcombo_box=ttk.Combobox(root,values=["Option 1","Option 2","Option 3"])combo_box.pack(pady=5)# Set default valuecombo_box.set("Option 1")# Bind event to selectioncombo_box.bind("<<ComboboxSelected>>",select)root.mainloop()Output:
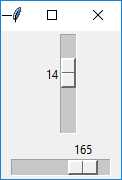
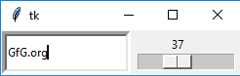
It is used to provide a graphical slider that allows to select any value from that scale. The general syntax is:
w = Scale(master, option=value)
Example:
Pythonfromtkinterimport*master=Tk()w=Scale(master,from_=0,to=42)w.pack()w=Scale(master,from_=0,to=200,orient=HORIZONTAL)w.pack()mainloop()
Output:
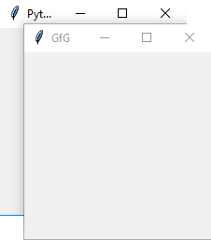
This widget is directly controlled by the window manager. It don't need any parent window to work on.The general syntax is:
w = TopLevel(master, option=value)
Example:
Pythonfromtkinterimport*root=Tk()root.title('GfG')top=Toplevel()top.title('Python')top.mainloop()Output
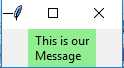
It is a widget to display text messages with word wrapping. The general syntax is:
w = Message(master, option=value)
Example:
Pythonfromtkinterimport*main=Tk()ourMessage='This is our Message'messageVar=Message(main,text=ourMessage)messageVar.config(bg='lightgreen')messageVar.pack()main.mainloop()
Output
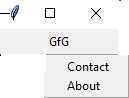
It is a part of top-down menu which stays on the window all the time. Every menubutton has its own functionality. The general syntax is:
w = MenuButton(master, option=value)
Example:
Pythonfromtkinterimport*top=Tk()mb=Menubutton(top,text="GfG")mb.grid()mb.menu=Menu(mb,tearoff=0)mb["menu"]=mb.menucVar=IntVar()aVar=IntVar()mb.menu.add_checkbutton(label='Contact',variable=cVar)mb.menu.add_checkbutton(label='About',variable=aVar)mb.pack()top.mainloop()
Output:
progressbar indicates the progress of a long-running task. When the button is clicked, the progressbar fills up to 100% over a short period, simulating a task that takes time to complete.
Example:
Pythonimporttkinterastkfromtkinterimportttkimporttimedefstart_progress():progress.start()# Simulate a task that takes time to completeforiinrange(101):# Simulate some worktime.sleep(0.05)progress['value']=i# Update the GUIroot.update_idletasks()progress.stop()root=tk.Tk()root.title("Progressbar Example")# Create a progressbar widgetprogress=ttk.Progressbar(root,orient="horizontal",length=300,mode="determinate")progress.pack(pady=20)# Button to start progressstart_button=tk.Button(root,text="Start Progress",command=start_progress)start_button.pack(pady=10)root.mainloop()Output:

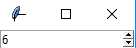
It is an entry of 'Entry' widget. Here, value can be input by selecting a fixed value of numbers. The general syntax is:
w = SpinBox(master, option=value)
Example:
Pythonfromtkinterimport*master=Tk()w=Spinbox(master,from_=0,to=10)w.pack()mainloop()
Output:
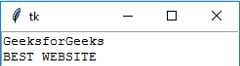
To edit a multi-line text and format the way it has to be displayed. The general syntax is:
w =Text(master, option=value)
Example:
Pythonfromtkinterimport*root=Tk()T=Text(root,height=2,width=30)T.pack()T.insert(END,'GeeksforGeeks\nBEST WEBSITE\n')mainloop()
Output:
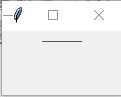
It is used to draw pictures and other complex layout like graphics, text and widgets. The general syntax is:
w = Canvas(master, option=value)
Example:
Pythonfromtkinterimport*master=Tk()w=Canvas(master,width=40,height=60)w.pack()canvas_height=20canvas_width=200y=int(canvas_height/2)w.create_line(0,y,canvas_width,y)mainloop()
Output:
It is a container widget which is used to handle number of panes arranged in it. The general syntax is:
w = PannedWindow(master, option=value)
Example:
Pythonfromtkinterimport*m1=PanedWindow()m1.pack(fill=BOTH,expand=1)left=Entry(m1,bd=5)m1.add(left)m2=PanedWindow(m1,orient=VERTICAL)m1.add(m2)top=Scale(m2,orient=HORIZONTAL)m2.add(top)mainloop()
Output
This example demonstrates the usage of various color options in Tkinter widgets, including active background and foreground colors, background and foreground colors, disabled state colors, and selection colors. Each widget in the example showcases a different color option, providing a visual representation of how these options affect the appearance of the widgets.
Pythonimporttkinterastkroot=tk.Tk()root.title("Color Options in Tkinter")# Create a button with active background and foreground colorsbutton=tk.Button(root,text="Click Me",activebackground="blue",activeforeground="white")button.pack()# Create a label with background and foreground colorslabel=tk.Label(root,text="Hello, Tkinter!",bg="lightgray",fg="black")label.pack()# Create an Entry widget with selection colorsentry=tk.Entry(root,selectbackground="lightblue",selectforeground="black")entry.pack()root.mainloop()Output

Learn more to Improve Font:Tkinter Font
Tkinter Geometry Managers
Tkinter also offers access to the geometric configuration of the widgets which can organize the widgets in the parent windows. There are mainly three geometry manager classes class.
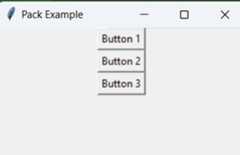
pack() method
It organizes the widgets in blocks before placing in the parent widget. Widgets can be packed from the top, bottom, left or right. It can expand widgets to fill the available space or place them in a fixed size.
Example:
Pythonimporttkinterastkroot=tk.Tk()root.title("Pack Example")# Create three buttonsbutton1=tk.Button(root,text="Button 1")button2=tk.Button(root,text="Button 2")button3=tk.Button(root,text="Button 3")# Pack the buttons verticallybutton1.pack()button2.pack()button3.pack()root.mainloop()Output
grid() method
It organizes the widgets in grid (table-like structure) before placing in the parent widget. Each widget is assigned a row and column. Widgets can span multiple rows or columns using rowspan and columnspan.
Example:
Pythonimporttkinterastkroot=tk.Tk()root.title("Grid Example")# Create three labelslabel1=tk.Label(root,text="Label 1")label2=tk.Label(root,text="Label 2")label3=tk.Label(root,text="Label 3")# Grid the labels in a 2x2 gridlabel1.grid(row=0,column=0)label2.grid(row=0,column=1)label3.grid(row=1,column=0,columnspan=2)root.mainloop()Output

place() method
It organizes the widgets by placing them on specific positions directed by the programmer. Widgets are placed at specific x and y coordinates. Sizes and positions can be specified in absolute or relative terms.
Pythonimporttkinterastkroot=tk.Tk()root.title("Place Example")# Create a labellabel=tk.Label(root,text="Label")# Place the label at specific coordinateslabel.place(x=50,y=50)root.mainloop()Output

Event Handling in Tkinter
In Tkinter, events are actions that occur when a user interacts with the GUI, such as pressing a key, clicking a mouse button or resizing a window. Event handling allows us to define how our application should respond to these interactions.
Events and Bindings
Events in Tkinter are captured and managed using a mechanism called bindings. A binding links an event to a callback function (also known as an event handler) that is called when the event occurs.
Syntax for Binding Events:
widget.bind(event, handler)
- widget:The Tkinter widget you want to bind the event to.
- event:A string that specifies the type of event (e.g., <Button-1> for a left mouse click).
- handler: The callback function that will be executed when the event occurs.
Key and Mouse Events
Key events are triggered when a user presses a key on the keyboard. Mouse events are triggered by mouse actions, such as clicking or moving the mouse.
Example:
Pythonimporttkinterastkdefon_key_press(event):print(f"Key pressed:{event.keysym}")defon_left_click(event):print(f"Left click at ({event.x},{event.y})")defon_right_click(event):print(f"Right click at ({event.x},{event.y})")defon_mouse_motion(event):print(f"Mouse moved to ({event.x},{event.y})")root=tk.Tk()root.title("Advanced Event Handling Example")root.bind("<KeyPress>",on_key_press)root.bind("<Button-1>",on_left_click)root.bind("<Button-3>",on_right_click)root.bind("<Motion>",on_mouse_motion)root.mainloop()Output:
Mouse moved to (182, 41)
Mouse moved to (141, 20)
Mouse moved to (134, 17)
Mouse moved to (128, 15)
Mouse moved to (125, 13)
Mouse moved to (122, 12)
Mouse moved to (120, 12)
Mouse moved to (119, 12)
Mouse moved to (117, 14)
Mouse moved to (117, 18)
In this advanced example, multiple event types are handled simultaneously. The on_mouse_motion function is called whenever the mouse is moved within the window, demonstrating how we can track and respond to continuous events.
Event Object
The event object is passed to the callback function when an event occurs. It contains useful information about the event, such as:
- event.keysym: The key symbol (e.g., 'a', 'Enter').
- event.x and event.y: The x and y coordinates of the mouse event.
- event.widget: The widget that triggered the event.