- Home
- Magazine
- Blogs
- Consulting
- Consulting Home
- Services & Technologies
- Artificial Intelligence (AI)
- AI Success Accelerators
- Cloud Adoption & Development
- Custom Application Development
- Executive Briefing (AI)
- Low-Code/No-Code
- Cyber Security
- Copilots in Your Apps!
- Project Rescue
- CODE Labs
- Business Document Copilot
- Legacy Conversion and Maintenance
- Free Hour of Consulting
- VFP Conversion
- Energy Software
- Contact Us
- Staffing
- Training


 Advertisement:
Introduction to Containerization Using Docker
ByWei-Meng Lee
Published in:CODE Magazine: 2021 - March/April
Last updated: December 26, 2025Syntax Highlight Theme:Published in:
Filed under:
Advertisement:Containerization has been a buzzword in the IT industry for the past several years. The term “containerization” has been increasingly used as an alternative or companion to virtualization. But what exactly is containerization, how does it work and how does it compare with virtualization? In this article, I'll take you on a journey to discover just what exactly containerization is through the use of the Docker platform.
By the end of this article, you'll have a much clearer idea of how Docker works, and how to leverage it in your next development project.
What Docker Is and How It Works
Whenever people talk about containerization, people start to think of something they're already familiar with - virtual machines (VM). Since this is the case, I'll explain Docker by first using VM as an example.
Virtual Machines vs. Docker
Figure 1 shows the various layers in a computer that uses VMs. The bottom layer is the hardware of your computer, with the OS sitting on top of it. On top of the OS is thehypervisor (also known as theVirtual Machine Monitor), which is a software that creates and runs virtual machines. Using the hypervisor, you can host multiple guest operating systems (such as Windows, Linux, etc.). Each VM contains a separate set of libraries needed by your application, and each VM is allocated a specific fixed amount of memory. Therefore, the number of VMs you can host in your computer is limited by the amount of memory you have.

Figure 1: How a virtual machine works Figure 2 shows how Docker fits in the picture. Instead of a hypervisor, you now have aDocker engine. The Docker engine manages a number ofcontainers, which host your application and the libraries that you need. Unlike VMs, each container doesnot have a copy of the OS - instead it shares the resources of the host's operating system.

Figure 2: How Docker works As mentioned, a Docker container doesn't have any operating system installed and running on it. But it does have a virtual copy of the process table, network interface(s), and the file system mount point(s) (seeFigure 3). These are inherited from the operating system of the host on which the container is hosted and running.

Figure 3: Docker virtualizes the operating system of the host on which it's installed and running, rather than virtualizing the hardware components. The kernel of the host's operating system is shared across all the containers that are running on it. Docker virtualizes the operating system of the host on which it's installed and running, rather than virtualizing the hardware components.
Docker virtualizes the OS of your computer and simplifies the building, running, managing, and distribution of applications.
Docker is written to run natively on the Linux platform, and the host and container OS must be the same.
Wait a minute. If the host and container OS must be the same (that is, Linux), how do you run Docker on operating systems such as Windows and macOS? Turns out that if you're using Windows or Mac OS, Docker creates a Linux virtual machine, which itself hosts the containers (seeFigure 4). This is why, if you use Windows, you'll need to install WSL2 (Windows Subsystems for Linux is a full Linux kernel built by Microsoft). For Mac, Docker uses the macOS's Hypervisor framework (HyperKit) to create a virtual machine to host the containers.

Figure 4 : On operating systems such as macOS and Windows, Docker creates a virtual machine to host all the containers. At the time of writing, Docker doesn't officially support the latest M1 Mac from Apple (it's currently in preview). Docker is in the process of transiting from HyperKit to the new high-level Virtualization Framework provided by Apple for creating virtual machines on Apple silicon- and Intel-based Macs. Docker also needs to recompile the binaries of Docker Desktop to the native ARM platform.
Each container is isolated from the other containers present on the same host. Thus, multiple containers with different application requirements and dependencies can run on the same host.
Uses of Docker
The first question that you might ask is: “Okay, now that I know how Docker works, give me a good reason to use Docker.” Here's one that I usually use to answer this question. Say you have three different Python applications that you need to test on your development computer. Each of these apps uses a specific version of Python, as well as libraries and dependencies. If you're a Python developer, you know that installing different versions of Python in one single computer is problematic. Of course, you can create virtual environments, but you might be reluctant to do that as you don't want to really mess up the configuration of your current computer.
To solve your dilemma, you can:
- Use three different physical machines
- Use three different virtual machines (VM), running on a single physical machine.
Neither solution is cheap. For the first solution, you need to have three physical machines, and the second option requires you to have a computer that's powerful enough to run three VMs. A much better way would be to run three Docker containers, each with a different version of Python installed.
Another good use case of Docker is when you want to experiment with different database servers in your development environment. Instead of installing multiple database servers on your computer, simply use Docker containers to run each database server. Docker hub (https://hub.docker.com/search?q=database&type=image) has a list of database servers that you can try using with Docker.
Downloading and Installing Docker
With all the theory behind us, it's time to get your hands dirty and experience for yourself how Docker works.
Using a Web browser, go tohttps://docs.docker.com/docker-for-windows/install/ and download Docker for the OS you're using. Follow the installation instructions and when you're done, you should see theDocker Desktop icon (the dolphin logo) in the system tray (for Windows). Clicking on the icon launches Docker for Windows (seeFigure 5).

Figure 5 : Docker Desktop for Windows A number of administrative tasks in Docker can be accomplished through the Docker Desktop app, but you can do more with the Docker CLI. For the rest of this article, I'll demonstrate the various operations through the CLI.
Docker Images and Containers
In Docker, there are two terminologies that are important:
- Docker Image: A Docker image is a read-only file containing libraries, tools, and dependencies that are required for an application to run. Examples of Docker images are MySQL Docker image, Python Docker image, Ubuntu Docker image, and so on. Each Docker image can be customized by adding layers (with additional tools, libraries added on each layer, for example; seeFigure 6) on it. A Docker image can't run by itself. To do so, you need to create a Docker Container.
- Docker Container: A Docker Container uses a Docker Image and adds a container layer on top of it to create a run-time environment (seeFigure 7). The container layer is now read-write capable and can now be used to run your application.

Figure 6 : A Docker image contains a number of read-only layers (containing tools and libraries). 
Figure 7 : A Docker container adds a container layer on top of an image to create a run-time environment. Think of Docker Images as templates containing the various libraries and tools that are needed to run your application. In order to actually run the application, you need to create a container based on that image. If you're a developer, the closest analogy I can think of is that a Docker image is like a class, while a Docker container is an object.
Creating Your First Docker Container from a Docker Image
The best way to understand the difference between an image and a container is to try a very simple example. In the command prompt, type the following command:docker run hello-world. You should see the output as shown inFigure 8.

Figure 8 : Trying Docker for the first time Thedocker run hello-world command downloads (or in Docker-speak,pulls) thehello-worldDocker Image fromDocker Hub and then creates aDocker Container using this image; it then assigns a random name to the container and starts it. Immediately, the container exits.
Thehello-world image, as much as it's useless, allows you to understand a few important concepts of Docker. Rest assured that you'll do something useful after this.
Viewing the Docker Container and Image
If you go to the Docker Desktop app and click on theImages item on the left (seeFigure 9), you'll see thehello-world image listed.

Figure 9 : Locating the hello-world image in the Docker Desktop app If you now click on theContainers / Apps items on the left (seeFigure 10), you should now see a container namedelated_bassi (you'll likely see a different name, as names are randomly assigned to a container) based on thehello-world image. If you click on it, you'll be able to see logs generated by the container, as well as inspect the environment variables associated with the container and the statistics of the running container.
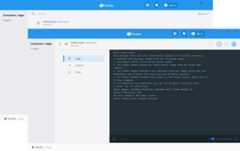
Figure 10 : Viewing the container created as well as the logs generated by the container You can also view the Docker container and image using the command prompt. To view the currently running container, use thedocker ps command. To view all containers (including those already exited), use thedocker ps -a command (seeFigure 11).

Figure 11 : Using the docker ps -a command to view all containers To explicitly name the container when running it, use the–name option, like this:
$ docker run --name helloworld hello-worldTo view all the Docker images on your computer, you can use thedocker images command (seeFigure 12).

Figure 12: Viewing the Docker images on your computer Once a docker image is on your local computer, you can simply create another container based on it using the samedocker run command:
C:>docker run hello-worldWhen you now use thedocker ps -a command, you'll see a new container that ran and then exited most recently:
C:\>docker ps -aCONTAINER ID IMAGE COMMAND CREATED STATUS PORTS NAMES138cd9c6bc5c hello-world "/hello" 24 seconds ago Exited (0) 23 seconds ago jovial_borg0099984a5fc2 hello-world "/hello" 29 minutes ago Exited (0) 29 minutes ago elated_bassiWhen you use the docker run command to create a container from an image, a new container is always created.
Removing a Container
When a container has finished running and is no longer needed, you can delete it using thedocker rm command. To delete a container, you need to first get thecontainer ID of the container that you want to delete using thedocker ps -a command, and then specify the container ID with thedocker rm command:
C:\>docker rm 138cd9c6bc5c138cd9c6bc5cIf you now use thedocker ps -a command to view all the containers, you should find that the specified container no longer exists:
C:\>docker ps -aCONTAINER ID IMAGE COMMAND CREATED STATUS PORTS NAMES0099984a5fc2 hello-world "/hello" 37minutes ago Exited (0) 37 minutes ago elated_bassiStopping a Container
If you need to stop a container that's running, you can use thedocker stop command together with thecontainer ID of the container you wish to stop. Although thehello-world container ran and exited immediately, you'll find this command useful later on when you need to manually stop a running container.
Removing a Docker Image
If you no longer need a particular Docker image (especially when you need to free up some space on your computer), use thedocker rmi command, like this:
C:\>docker imagesREPOSITORY TAG IMAGE ID CREATED SIZEhello-world latest bf756fb1ae65 12 months ago 13.3kBC:\>docker rmi bf756fb1ae65Error response from daemon: conflict: unable to delete bf756fb1ae65 (must be forced) –image is being used by stopped container 0099984a5fc2In the above commands, you first try to get theImage ID of the Docker image that you want to delete. Then, you use thedocker rmi command to try to delete the image using its Image ID. However, notice that in the above example, you're not able to delete it because the image is in use by another container. You can verify this by using thedocker ps -a command:
C:\>docker ps -aCONTAINER ID IMAGE COMMAND CREATED STATUS PORTS NAMES0099984a5fc2 hello-world "/hello" 2 hours ago Exited (0) 2 hours ago elated_bassiTrue enough, there is a container named (
0099984a5fc2) that's using the image. In this case, you need to remove the container first before you can remove the image:C:\>docker rm 0099984a5fc2C:\>docker rmi bf756fb1ae65Untagged: hello-world:latestUntagged: hello-world@sha256:1a523af650137b8accdaed439c17d684df61ee4d74feac151b5b337bd29e7eecDeleted: sha256:bf756fb1ae65adf866bd8c456593cd24beb6a0a061dedf42b26a993176745f6bDeleted: sha256:9c27e219663c25e0f28493790cc0b88bc973ba3b1686355f221c38a36978ac63A Docker image can only be removed when there's no container associated with it.
Sometimes you might have a lot of images on your computer and you just want to remove all the images that aren't used by any containers. In this case, you can use thedocker image prune -a command:
C:\>docker image prune -aWARNING! This will remove all images without at least one container associated to them.Are you sure you want to continue? [y/N] yAll unused Docker images will now be removed.
Using the Ubuntu Docker Image
Now that you're comfortable with the basics of Docker images and containers, it's time to do something useful! The first example that I want to demonstrate is the Ubuntu image. Using the Ubuntu image, you can create a container that allows you to write and host applications on a Linux environment.
A great place to find Docker images is Docker Hub (seeFigure 13).

Figure 13 : Using the Docker Hub to search for images that you need You can search for images that are of interest to you.Figure 14 shows the page for the Ubuntu Docker image.

Figure 14 : The page for the Ubuntu Docker image Let's now pull and run the Ubuntu image from Docker hub:
C:\>docker run -it ubuntu bashThe-it option instructs Docker to allocate a pseudo-TTY connected to the container's stdin and then run aninteractivebash shell in the container.Figure 15 shows the Ubuntu container running with the shell running.

Figure 15 : Running the Ubuntu Docker image as a container You're now in the shell prompt of Ubuntu. You can now use it like you're using a computer running the Ubuntu OS (albeit without the GUI components). Because the Ubuntu image contains the bare-minimum tools and libraries, to do anything useful, you need to install the tools yourself. Let's now run theapt-get update command to update the package cache on the container:
root@80f6a4603277:/# apt-get updateGet:1 http://archive.ubuntu.com/ubuntufocal InRelease [265 kB]Get:2 http://security.ubuntu.com/ubuntufocal-security InRelease [109 kB]Get:3 http://archive.ubuntu.com/ubuntufocal-updates InRelease [114 kB]...Get:17 http://archive.ubuntu.com/ubuntufocal-backports/universe amd64 Packages[4250 B]Fetched 16.8 MB in 40s (416 kB/s)Reading package lists... DoneThen, install thecurl utility:
root@80f6a4603277:/# apt-get install -y curlReading package lists... DoneBuilding dependency treeReading state information... DoneThe following additional packages will be installed: ca-certificates krb5-locales libasn1-8- heimdal libbrotli1 libcurl4 libgssapi-krb5-2 libgssapi3-heimdal libhcrypto4-heimdal...Running hooks in /etc/ca-certificates/update.d... done.You can now test to see ifcurl is installed correctly:
root@80f6a4603277:/# curlcurl: try 'curl --help' or 'curl --manual' for more informationFinally, you can exit the container by using theexit command in Ubuntu:
root@80f6a4603277:/#The container has now exited (no longer running). It's important to note that all the changes you've made to a container are only persisted for that particular container. If you use thedocker run -it ubuntu bash command again, you'll create anew Ubuntu container without all the updates that you made earlier.
To run that previously running container, first use thedocker ps -a command to get its Container ID:
C:\>docker ps -aCONTAINER ID IMAGE COMMAND CREATED STATUS PORTS NAMES80f6a4603277 ubuntu "bash" 42 minutes ago Exited (2) 35 minutes ago eager_wozniakThen use thedocker start command to start the existing container:
C:\>docker start 80f6a4603277Instead of using the Container ID to start a container, you can also use its user-friendly name.
Notice that after you've started the container, control is returned back to you (the container is running but you're not interacting with it) - you're not in the Ubuntu's interactive shell.
To connect to the running container interactively, use the following command:
C:\>docker exec -i -t 80f6a4603277 bash root@80f6a4603277:/#Thedocker exec command runs a command in a running container. You should now be able to use thecurl application on the container:
root@80f6a4603277:/# curlcurl: try 'curl --help' or 'curl --manual' for more informationUsing the NginX Docker Image
Although the idea of running an Ubuntu OS on your computer may not sound very exciting to you, how about running a Web server? Suppose you need to deploy a Web application on your computer for a project, but you don't want to install a Web server on your current work computer. The easiest way is, of course, to run the Web server using Docker! You can use the
NginX(pronounced asengine-ex) Web server, an open source Web server that's often used as a reverse proxy, HTTP cache, and load balancer.To pull and run a Docker container using the
nginximage, type the following command:C:\>docker run -d -p 88:80 --name webserver nginxUnable to find image 'nginx:latest' locallylatest: Pulling from library/nginx6ec7b7d162b2: Pull completecb420a90068e: Pull complete2766c0bf2b07: Pull completee05167b6a99d: Pull complete70ac9d795e79: Pull completeDigest: sha256:4cf620a5c81390ee209398ecc18e5fb9dd0f5155cd82adcbae532fec94006fb9Status: Downloaded newer image for nginx:latest469be21874e7c80398b0499159a76ee14d9e420d5c9f89234f5747eac008fe2bHere's a list of the uses for the various options in the above command:
- The-d option (or–detach) runs the container in background.
- The-p option maps the exposed port to the specified port; here88:80 means all traffic to port88 on the local computer is forwarded to port80 in the container.
- The–name option assigns a name to the container.
- Thenginx is a Docker image from Docker Hub.
Once the container has been created, you can verify the mapping of the ports using thedocker port command:
C:\>docker port webserver 80/tcp -> 0.0.0.0:88You're ready to test the Web server to see if it works. Use your Web browser and enter the following URL: http://localhost:88 (seeFigure 16). If the container is running properly, you should see the welcome message.

Figure 16 : Testing the NginX server in a Docker container Modifying the Docker Container
Although being able to run the Web server through a Docker container is cool, you want to be able to customize the content of your Web pages. To do that, type in the following commands in bold:
C:\>**docker exec -it 469be21874e7 bash**root@469be21874e7:/# **apt-get update**Get:1 http://security.debian.org/debian-security buster/updates InRelease [65.4 kB]Get:2 http://deb.debian.org/debian buster InRelease [121 kB]Get:3 http://deb.debian.org/debian buster-updates InRelease [51.9 kB]Get:4 http://security.debian.org/debian-security buster/updates/main amd64 Packages[260 kB]Get:5 http://deb.debian.org/debian buster/mainamd64 Packages [7907 kB]Get:6 http://deb.debian.org/debian buster-updates/main amd64 Packages [7860 B]Fetched 8414 kB in 2s (3929 kB/s)Reading package lists... Doneroot@469be21874e7:/# **apt-get -y install vim**The above command:
- Connects to thenginx container interactively and executes thebash shell
- Updates the package cache on the container
- Installs thevim editor on the container
Once the vim editor is installed on the container, let's change to the Web publishing directory and edit theindex.html file, with the content, as shown inListing 1.
root@469be21874e7:/# **cd usr/share/nginx/html/**root@469be21874e7:/usr/share/nginx/html# **vim****index.html**Listing 1: Modifying the content of index.html
<!DOCTYPE html><html lang="en"><head> <meta charset="UTF-8"> <meta name="viewport" content="width=device-width, initial-scale=1.0"> <meta http-equiv="X-UA-Compatible" content="ie=edge"> <title>Hello World</title> <style> h1{ font-weight:lighter; font-family: Helvetica, sans-serif; } </style></head><body> **<h1>** **Hello, Docker!** **</h1>**</body></html>You're ready to test the Web server to see if it works. Use your Web browser and enter the following URL: http://localhost:88 (seeFigure 17). You should now see the “Hello, Docker!” message.

Figure 17: Viewing the modified Web page on the nginx container What if you want to transfer an image into the container? Easy. Use thedocker cp command:
C:\>**docker cp docker.png 469be21874e7:/usr/share/nginx/html**In that snippet,469be21874e7 is the container ID of thenginx container. The above command copies the file nameddocker.png into the container's/usr/share/nginx/html directory.
In the interactive shell of the container, edit theindex.html file again:
root@469be21874e7:/usr/share/nginx/html# **vim****index.html**Add the additional line in bold inListing 2 to theindex.html file.
Listing 2: The content of index.html
<!DOCTYPE html><html lang="en"><head> <meta charset="UTF-8"> <meta name="viewport" content="width=device-width, initial-scale=1.0"> <meta http-equiv="X-UA-Compatible" content="ie=edge"> <title>Hello World</title> <style> h1{ font-weight:lighter; font-family: Helvetica, sans-serif; } </style></head><body> <h1> Hello, Docker! </h1> **<img width="100" src="docker.png"/>**</body></html>Refreshing the Web browser, you should now see the image of the Docker logo (seeFigure 18).

Figure 18 : The Web page now shows the Docker logo Modifying the Docker Image
In the previous section, you saw how to modify a container so that you can customize it to your own use. What if you want to run multiple containers, with all requiring the same software already pre-installed? In this case, it's very time consuming to modify each container one by one. A better way would be to modify the Docker image so that all containers based on it will have the same prerequisites installed.
First, create a file namedindex.html and save it in, say,C:\MyDocker. Populate it with the content shown earlier inListing 1.
Next, create a file namedDockerfile and save in it the same folder asindex.html -C:\MyDocker. Populate it with the content shown inListing 3.
Listing 3: Content of the Dockerfile
FROM nginxCOPY index.html /usr/share/nginx/html/index.htmlThe Dockerfile contains all the instructions that you specify in the command line in order to build a Docker image. The filename “Dockerfile” is case-sensitive.
The commands in theDockerfile copy the localindex.html file and save it into thenginx image's/usr/share/nginx/html/ directory asindex.html.
You can now build a new Docker image and call itnginx (same as the originalnginx image name):
C:\MyDocker>docker build -t nginx .Remember to change into the directory that you have previously saved yourDockerfile (which, in this example, isC:\MyDocker). The changes are made to the Docker image, and it will affect all containers created from this image.
You can now start a new container based on the modifiednginx image:
C:\>docker run -d -p 88:80 nginxWhen you refresh the Web browser, you'll now see the same page as shown earlier inFigure 17.
Using the MySQL Docker Image
As mentioned earlier in this article, if you want to experiment with the various database servers, Docker is a good solution. For this section, you'll learn how to use the MySQL Docker image.
Type the following command in bold to download and run a MySQL Docker container:
C:\>docker run --name My-mysql -p 3306 -eMYSQL_ROOT_PASSWORD=password -d mysql:latestUnable to find image 'mysql:latest' locallylatest: Pulling from library/mysqla076a628af6f: Pull completef6c208f3f991: Pull complete88a9455a9165: Pull complete406c9b8427c6: Pull complete7c88599c0b25: Pull complete25b5c6debdaf: Pull complete43a5816f1617: Pull complete69dd1fbf9190: Pull complete5346a60dcee8: Pull completeef28da371fc9: Pull completefd04d935b852: Pull complete050c49742ea2: Pull completeDigest: sha256:0fd2898dc1c946b34dceaccc3b80d38b1049285c1dab70df7480de62265d6213Status: Downloaded newer image for mysql:latest8a0496aaca1864846c91915875bdf394bd8fb9e23c2986c5e8c372cee4fc1f69The above command loads the latest version of the MySQL Docker image, creates a container, and then runs it. The use of the various options are:
- -d: the name of the Docker image (mysql) as well as its tag (latest)
- –name: gives the container the name ofMy-mysql
- -e: sets the environment variableMYSQL_ROOT_PASSWORD topassword, which is the password of the root account (in real-life, please set the password to a more secure one)
- -p: exposes port 3306 so that you can interact with MySQL through this port
Docker images use tags for version control. The latest tag is simply a tag for an image that doesn't have a tag.
Once the MySQL Docker image is downloaded and run as a container, you can use thedocker ps command to confirm that it is indeed up and running:
C:\>docker psCONTAINER ID IMAGE COMMAND CREATED STATUS PORTS NAMES8a0496aaca18 mysql:latest "docker-entrypoint.s..." About a minute ago Up About a minute 33060/tcp, 0.0.0.0:49153->3306/tcp My-mysqlObserve that the port49153 (randomly assigned) is mapped to3306 (“0.0.0.0:49153->3306/tcp”). This means that if you want to interact with MySQL running in the container, you need to connect to this port –49153. Note that you're likely to see a different number on your end.
If you want to explicitly map the running container to a specific port, specify the port mapping through the-p option when starting the container. For example:
C:\>docker run --name My-mysql-p 32769:3306 -e MYSQL_ROOT_PASSWORD=password-d mysql:latestThe above-p option maps the port32769 to3306. You can use thedocker port command to list the port mappings on theMy-mysql container:
C:\>docker port My-mysql3306/tcp -> 0.0.0.0:49153Inspecting the Docker Container
Now that you've started the MySQL container running, you may be wondering where all the database's data are stored. This is a good opportunity to dive deeper into the container to learn how directories are mapped.
You can examine your container in more detail using thedocker inspect command:
C:\>docker inspect My-mysqlThe above command will yield something like the results shown inListing 4 (the important part highlighted):
Listing 4: The partial result of the docker inspect command
[ { "Id": "8a0496aaca1864846c91915875bdf394bd8fb9e23c2986c5e8c372cee4fc1f69", "Created": "2021-01-13T03:09:33.345744Z", "Path": "docker-entrypoint.sh", "Args": [ "mysqld" ], ... ... "Mounts": [ { "Type": "volume", "Name": "68b5c16eb9f33bdf7e7756e27873d9a4abb1d043e2c0be49a1ca2b8562b214d6", "Source": "/var/lib/docker/volumes/68b5c16eb9f33bdf7e7756e27873d9a4abb1d043e2c0be49a1ca2b8562b214d/_data", "Destination": "/var/lib/mysql", "Driver": "local", "Mode": "", "RW": true, "Propagation": "" } ], ...]The result is quite a lengthy bunch of information. For this discussion, let's just focus on three specific keys –“Type”,“Source” and“Destination”.
The value of the“Source” key refers to the physical directory used by MySQL to store its data; if you run Docker on a Linux computer, this directory refers to an actual directory on the local computer; on a Mac and Windows computer, this is a directory on the virtual machine created by Docker.
The value of the“Destination” key refers to the (logical) directory used by MySQL in the Docker container. This is to say, if you connect to the MySQL container interactively, you will be able to change into the/var/lib/mysql directory and examine its content within:
C:>docker exec -it My-mysql bash bashroot@8a0496aaca18:/# cd /var/lib/mysqlroot@8a0496aaca18:/var/lib/mysql# ls...Finally, the value of the“Type” key is“volume”. This means that all the changes you made to the/var/lib/mysql directory will not be persisted later on when you commit the container as a Docker image. When that happens, all the data that you have previously stored in that MySQL will be lost. To resolve this, it's always good to map the/var/lib/mysql directory to a directory on your local computer (so that it can be backed up independently). This topic is beyond the scope of this article, but if you want to know more details, check out the-v option in thedocker run command.
Connecting to the MySQL Container Using a Local MySQL Client
Now that your MySQL server in the container is up and running, it's time to create a database in it, add a table, and insert some records. For this, you can make use of themysql client that ships with the MySQL installer. You can download the MySQL Community Edition from:https://dev.mysql.com/downloads/mysql/ and install themysql client onto your local computer (during the installation stage, you can choose to only install the client).
For Windows user, themysql utility is, by default, located inC:\Program FilesMySQL\MySQL Server 8.0\bin, so you need to change into that directory before running themysql client:
C:\Program Files\MySQL\MySQL Server 8.0\bin>mysql -P 49153 --protocol=tcp -u root -pEnter password: ********Welcome to the MySQL monitor. Commands end with ; or \g.Your MySQL connection id is 8Server version: 8.0.22 MySQL Community Server - GPLCopyright (c) 2000, 2020, Oracle and/or its affiliates. All rights reserved.Oracle is a registered trademark of Oracle Corporation and/or its affiliates. Other names may be trademarks of their respective owners.Type 'help;' or '\h' for help. Type '\c' to clear the current input statement.The above command connects to the MySQL server on the container using the port49153 (replace this with the port number assigned to your own MySQL container) and log in asroot. Once you enter the password, you should be able to see the MySQL prompt:
mysql>Creating a Database, Table, and Inserting a Row
In the MySQL prompt, enter the following commands:
mysql> CREATE database my_db;Query OK, 1 row affected (0.02 sec)mysql> USE my_db;Database changedmysql> CREATE TABLE Persons (ID varchar (5)NOT NULL PRIMARY KEY, FirstName VARCHAR(30),LastName VARCHAR(30), Age INT);Query OK, 0 rows affected (0.07 sec)mysql> INSERT INTO Persons (ID, FirstName, LastName, Age) VALUES ("0001", "Wei-Meng", "Lee", 25);Query OK, 1 row affected (0.03 sec)mysql> SELECT * FROM Persons;+------+-----------+----------+------+| ID | FirstName | LastName | Age |+------+-----------+----------+------+| 0001 | Wei-Meng | Lee | 25 |+------+-----------+----------+------+1 row in set (0.00 sec)The above commands first create a database namedmy_db. It then adds a table namedPersons to this database and inserts a record into the table. Finally, you retrieve the records from the table to verify that the record has been correctly inserted.
Writing a Python Program to Use the MySQL Database
You want now to write a program to connect to the MySQL server on the container. For this, I created a simple Python program namedmysql.py, as shown inListing 5.
Listing 5. Content of the mysql.py file
import MySQLdbdb = MySQLdb.connect (user='root', passwd='password', port=49153, host='127.0.0.1', db='my_db')cur = db.cursor()def get_allrecords() : cur.execute("SELECT * FROM Persons") for row in cur.fetchall() : print (row[0]) print (row[1]) print (row[2]) print (row[3])get_allrecords()db.close()To connect to a MySQL database in Python, I'm using themysqlclient package. To install it, use thepip install command:
C:>pip install mysqlclientTo run the program shown inListing 5, type the following command:
C:\>python mysql.py0001Wei-MengLee25If you see the above output, your Python has successfully connected to the MySQL server on the container!
Summary
I hope this article has provided a clearer picture of how containerization works. In particular, I used Docker as an example and provided a few examples of how to use the Docker images to create containers. Let me know how you're using Docker in your own development environment.
Need FREE Project Advice? CODE Can Help!
No strings free advice on new or existing software development projects. CODE Consulting experts have experience in cloud, Web, desktop, mobile, microservices, containers, and DevOps projects. Schedule your free hour of CODE call with our expert consultants today. For more information, visitwww.codemag.com/consulting or email us atinfo@codemag.com.
This article was filed under:
This article was published in:

Have additional technical questions?
Get help from the experts atCODE Magazine - sign up for our free hour of consulting!
Contact CODE Consulting attechhelp@codemag.com.
We use cookies to make this site work properly. For more information, see ourPrivacy Policy. Do you agree to us using cookies?Sure, I know how this works! -No way. Get me out of here!
[8]ページ先頭
©2009-2026 Movatter.jp
