Signed Distance Field
Fonts
Shortcuts ⌨️
SPACEto play / pauseARROW RIGHTorLto go forwardARROW LEFTorJto go backwardARROW UPto increase volumeARROW DOWNto decrease volumeFto toggle fullscreenMto toggle mute0 to 9to go to the corresponding part of the videoSHIFT+,to decrease playback speedSHIFT+.or;to increase playback speed
⚠️ Update
Use version10.0 of@react-three/drei:
npm install @react-three/drei@10.0⚠️ Update
In the latest versions of@react-three/drei,PivotControls also supports scaling.
Use the dots at the extremities of the arrows.
⚠️ Update
In the latest versions of@react-three/drei, the default size of<Text> is bigger.
Don’t worry, we are going to change it anyway.
Unlock content 🔓
Want to learn more? 👍
That's the end of the free part 😔
Introduction00:00
Creating a Three.js scene is already super simple with R3F, but it’s going to get even simpler.
One of the advantages of React is the ability to make things reusable. R3F took advantage of that and developers are creating many components (called helpers) ready to be used in your R3F application.
It could be about almost anything. Here are some examples:
- Camera Controls
- Complex geometries
- Post-processing
- HTML implementation
- Loaders
- Environment settings
- Complex calculations
- Etc.
Some of those helpers can be added as components (<theHelper>), some as hooks (useHelper) and you can find most of them regrouped indrei (Three in german, pronounced/dʁaɪ̯/).
First, you should pause the lesson and check them all (no kidding).
You don’t have to test them in depth. The idea is that you discover them so that, at some point, if you need one, you’ll know these possibilities exist. Otherwise, you might end up re-inventing the wheel.
Still, we are going to discover some of them right now to get a good idea of the potential and we are going to use some more in the next lessons.
Setup03:16
The setup is very similar to the previous lesson with a sphere, a cube and a floor.
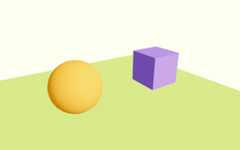
There is also a directional light source and an ambient light source.
The cube isn’t animated and the camera is being handled by the<orbitControls>.
OrbitControls03:51
The first helper we are going to install, isOrbitControls.
You might think that we already have it, and while that’s true, using this helper will make things easier and will grant us access to features that we haven’t activated yet.
InExperience.jsx, remove the currentOrbitControls, theextend, the<orbitControls> component anduseThree:
export default function Experience(){ return <> <directionalLight position={ [ 1, 2, 3 ] } intensity={ 4.5 } /> <ambientLight intensity={ 1.5 } /> <mesh position-x={ - 2 }> <sphereGeometry /> <meshStandardMaterial color="orange" /> </mesh> <mesh position-x={ 2 } scale={ 1.5 }> <boxGeometry /> <meshStandardMaterial color="mediumpurple" /> </mesh> <mesh position-y={ - 1 } rotation-x={ - Math.PI * 0.5 } scale={ 10 }> <planeGeometry /> <meshStandardMaterial color="greenyellow" /> </mesh> </>}The starter could have been set like this, but I wanted you to see how much easier it’s going to be.
That's the end of the free part 😔
To get access to93 hours of video, amembers-only Discord server andfuture updates, join us for only$95!
How to use it 🤔
- Download theStarter pack orFinal project
- Unzip it
- Open your terminal and go to the unzip folder
- Run
npm installto install dependencies
(if your terminal warns you about vulnerabilities, ignore it) - Run
npm run devto launch the local server
(project should open on your default browser automatically) - Start coding
- The JS is located insrc/script.js
- The HTML is located insrc/index.html
- The CSS is located insrc/style.css
If you get stuck and need help, join the members-only Discord server: