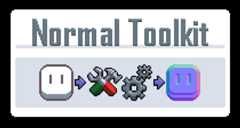
Aseprite Normal Toolkit
A downloadable aseprite extension for Windows, macOS, and Linux
Creating Normal Maps can be tricky, especially when you're just getting started. This Aseprite extension features a few tools to support you in the creation of Normal Maps!
Features:
- Generate Normal Maps
- Mirror Normal Maps
You can find the tools under Edit > FX > Normal Tools
Requirements
Requires Aseprite Version 1.3+
If you've bought Aseprite onitchio, you can find the latest 1.3 build there. For steam users, make sure Aseprite is updated to the latest version.
What is a Normal Map?
A Normal Map is a special texture that tells a shader which direction each pixel of the regular texture is facing. In Aseprite, you can select the Normal Color Wheel in the Options Menu directly above the Color Palette. Using this Color Wheel, the further you pick a color on there in 1 direction, the more the pixel is pointing in that direction.
With this Aseprite extension, I'm aiming to make creating normal maps easier. If you want to put your Normal Map to use, consider trying out my Aseprite Normal Shading extension.
Known Issues:
- Using the plugin on Aseprite's built-in Tilemap Layer causes Aseprite to crash
How It Works:
0. Installation
Aseprite Extensions are installed by either double-clicking the *.aseprite-extension file or via Edit > Preferences > Extensions > Add Extension
1. Generate Normal Maps
Using an existing sprite, automatically generate a normal map using a variation of the Sobel Operator algorithm.
For the best result, duplicate your texture and create agrayscale image / height map of it (See the examples on the right). The closer the color is towhite, the "higher up" that part of the texture is going to be. The difference between the shades of gray next to each other is the more intense the edge is going to be.
Edge Intensity controls how "hard" the edge between an "empty" pixel and its neighbors its going to be.
Selecting discrete colors limits the amount of colors the algorithm is going to use for generating the normal map. It is recommended to use an odd number, otherwise you won't have any even surfaces
2. Mirror Normal Maps
Normal Maps are direction-dependent. This tool allows you to mirror your normal map along a vertical or horizontal axis.
If you have any questions, feel free to leave a comment or send me a message on Twitter
Download
Click download now to get access to the following files:
Development log
Comments
Log in with itch.io to leave a comment.

Currently, the extension does not support isometric textures as it assumes the "default" direction is forward and does not know the intended direction in which your parts of your texture are facing.
If you are trying to work with this in a game engine, you could paint a very rough secondary normal texture serving as a directional vector for your texture. You could then calculate the correct direction using a TBN matrix (https://learnopengl.com/Advanced-Lighting/Normal-Mapping). I will keep this in mind as a feature for the future.
However, if you're using this simply for artwork, I would recommend drawing the texture by hand for now, using left/right-facing values for the corresponding parts of the texture. That might be easier :)
In my opinion, the grayscale technique works best when you're using just 2-3 shades of gray, as not all detail has to come from the normal map; It can come from the underlying colors themselves.
I hope this helps :)
I forgot to mention that, generally, isometric textures often have lighting "baked" in (your tree is already in shadow on the right). This will inevitably make the right appear much darker than the left (because it uses darker colors by default.
You could try making the texture flat/forward-facing and introducing the isometric direction solely through the normal map. However, this is entirely up to you as the artist :)
Hey, I have been searching for long time on how to achieve eastward like lighting in top-down rpg Pixelart. And never properly understood normal map approach. Can you please help me and show the quick way? I want to create believable lighting, so hand painted Normal map method, but want to save time. What tools or method should i follow
Hi, while I haven't played Eastward, looking at a few trailers I don't think the game uses Normal Maps. You may be able to achieve a similar look using just 2D lighting, there are plenty of tutorials for that, but one I used in the past wasthis tutorial by Brackeys for Unity. It essentially boils down to making the scene dark by default and only adding color where there is light, depending on the intensity and color of the light itself.
Normal Maps are not required for lighting in 2D, but if you want your textures to be affected by light based on its direction, you need normal maps. There is anotherUnity tutorial by Brackeys that goes into normal maps.
If you do want to use Normal Maps, you can try out my Normal Shading extension. It adds basic lighting to Aseprite and allows you to get an idea of what your texture will look like with a normal map applied :)
I've heard that eastward uses 3d lighting (don't know how's that possible) and textures are affected by lights. But still they made sprites with some basic shadows and highlights. But I think I could get a good result by adding unity 2d lights on dark scene with little ambient lighting, making lights from custom Sprite shapes and animating them and then few Effects like bloom over it. I will also try adding basic normal maps like only 5 color map for (left, right, front, top and down) direction to test if looks better.
Thank you so much man! And cool extension BTW :)
Hey, thank you, and good luck with your project!
I did a little more digging andfound this video. It seems like they built the whole game as a 3d environment and placed everything precisely to make it look just right when looked at from the front through an orthographic camera :o
Well that's probably where the issue comes from. 1.3 adds alot of features to the aseprite api and I've potentially used some of them. I will look into this asap.
I personally never had any issues with the 1.3 beta, so if you don't rely on plugins only compatible with 1.2.4, I'd recommend you give the beta a shot :)
Thanks for bringing this to my attention!
Thank you for the extension! I have been enjoying it so far. However, I do have a couple of suggestions:
- It appears that the extension does not currently support multiple frames. When I click the "Generate" button, a normal map is only generated for the first frame. It would be nice if normal maps could be generated for all frames of an animation.
- It would be immensely helpful if the extension could support layer groups as a source. This way, I wouldn't have to create a separate layer with all layers combined.
Thank you again for your hard work!
Hey, thank you for your comment! Regarding your feedback:
1. This was actually already supposed to work but I somehow didn't notice it when releasing the extension. I've uploaded a fix just now
2. This is a feature I haven't even considered yet, thank you for the suggestion. I'm a little busy with other work right now but I'm going to look into this as soon as I can
If you notice any issues with the new version, please let me know :)


