How to speed up development with GitHub CLI
Wait, what?!#
I was today years old when I found out that GitHub has a command line interface 🤯.
In theofficial docs the instructions to install and use it are quite clear to follow.
Installation#
I usebrew to install GitHub CLI, so
brewinstall ghdid the magic in less then a minute.
Authorization#
You have to authorize this application in order to use your GitHub account from the CLI:
gh auth loginAnswer few questions about CLI configuration, here's mines:
? What accountdo you want to log into? GitHub.com
? What is your preferred protocolfor Git operations? SSH
? Upload your SSH public key to your GitHub account? /Users/giulia/.ssh/id_ed25519.pub
? Titlefor your SSH key: GitHub CLI
? How would you like to authenticate GitHub CLI? Login with a web browser
! First copy your one-time code: XXXX-XXXX
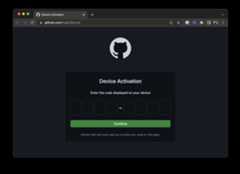
Press Enter toopen github.comin your browser...In your browser will appear this screen to confirm the authorization

and you have to add yourone-time code: XXXX-XXXX the prompt just gived to you
Just few confirmation from the shell and we are almost done:
Press Enter toopen github.comin your browser...
✓ Authentication complete.
- gh configset-h github.com git_protocolssh
✓ Configuredgit protocol
Ok, awesome! ✨
Let's run some commands!#
To see all CLI configurations and options, just type
ghthat returns a list of useful commands divided into subgroups
CORE COMMANDS
  auth:        Authenticate gh andgit with GitHub
  browse:      Open the repositoryin the browser
  codespace:   Connect to and manage codespaces
  gist:        Manage gists
  issue:       Manage issues
  pr:          Manage pull requests
  release:     Manage releases
  repo:        Manage repositories
As you can see above, you can managelot of things from command line 😈 Below I listed my favourite ones.
Create a new repo#
To create a new GitHub repository, run
gh repo create test-repository--private

✓ Created repository giuliachiola/test-repository on GitHub
Note: you have to specify if you want the repo private or public.
GitHub repo list#
gh repo listThis is useful when you need to check on the fly a repo slug, url, or if it is private or not
Showing30 of47 repositoriesin @giuliachiola

giuliachiola/super-blog-11ty                       Blog built using 11ty static site generator, based on super-styleguide               public   2d
giuliachiola/super-blog-content                    Blog markdown content where documentation rules 📚                                    public   2d
giuliachiola/giuliachiola                                                                                                                public   9d
giuliachiola/eleventy-styleguide                   Custom pattern library tool using 11ty static site generator.                         public   9d
giuliachiola/super-notes                           Personal tech notes, not always well organized 😇                                     public   9d
giuliachiola/super-styleguide                      Personal blog styleguide built using UIengine as presentation layer                   public   Mar5,2022
giuliachiola/react-ts-ecommerce                    📒 Step by step from tutorial"React shopping cart with TypeScript | React Ecomme...  public   Mar  5, 2022
giuliachiola/dotfiles                              🛠.files - for fast MacBook setup                                                     public   Mar  5, 2022
giuliachiola/react-movies                          📒 Step by step from tutorial "React JS Coursefor Beginners2021 Tutorial - free...  public   Oct7,2021
giuliachiola/react-ts-quiz-app                     📒 Step by step from tutorial"React / Typescript Tutorial - Build a Quiz App - W...  public   Oct  1, 2021
giuliachiola/react-typescript-herrington           📒 Step by step from tutorial "Typescriptfor React Components From Beginners to...  public   Oct1,2021
...
Change repo visibility#
Change repo visibility is quite annoying from the browser, as you have to sift through lots of tabs and panels on the UI. Change visibility from the CLI instead, is nearly instantaneous:
gh repo edit<repo-name>--visibility<visibility-string>For instance:
gh repo edit giuliachiola/super-blog-11ty--visibility private

✓ Edited repository giuliachiola/super-blog-11ty
Sync repo#
To pull everything in one go, you can also sync all your repo branches and config:
gh reposync

✓ Synced the"main" branch from giuliachiola/super-blog-11ty tolocal repository
Create new gist#
Gist are a sort of "snippet" you can store on your GitHub account. They are quite useful to save one-shot configurations, and you can also save others gists in your favourites!
gh create gist📚 More info
How to add generic styles in Vue Styleguidist
At work, recently we worked on a styleguide project usingvue Styleguidist, the Vue little brother ofreact-styleguidist, and we would like to organize components styles in this way:
- component specific styles would be inside the
[ComponentName].vuefile - while all generic styles (colors, typography, and so on) would be inside a generic
styles.scssfile.
The first (bad) idea#
If we hadn't been in a Styleguidist app, but in a "normal" Vue app instead, we could have add a sass@import with all our generic styles at the highiest component, theApp.vue:
// App.vue

<template>
<divid="app">
    ...
</div>
</template>

<script>
exportdefault{
name:'App',
}
</script>

<stylelang="scss">
// generic styles
@import'styles/styles.scss'
</style>
In this way, all components will have inherited our generic styles.
But in a Styleguidist project we have not such an high-level Vue component 😩
If we would want to import a generic file in that way, we would have to add it intoall our components, like this:
// components/MyComponent.vue

<template>
  ...
</template>

<script>
exportdefault{
name:'MyComponent',
}
</script>

<stylelang="scss">
// generic styles
@import'styles/styles.scss'

// my components custom styles
.c-my-component{
background: red;
}

...
</style>
Not such a great idea! 🧐
The second (I think good?) idea#
Probably there is a better way to do it, but for the moment we'll go with this! 😅
Adding avue.conifg.js file to the Styleguidist project, we can tell to Styleguidistsass-loader which style content it has to prependbefore the actual component<style> content. This can be achieved usingsass-loaderadditionalData option
// vue.config.js

module.exports={
css:{
sourceMap:true,
loaderOptions:{
scss:{
additionalData:`
        @import "assets/styles/styles.scss";
`,
},
},
},
}🧨!important
In these examples I have assumed that we are using SASS (.scss) files and not simple CSS files.
Thesass-loadernode package I mentioned before is already installed in our project because we wrote styles in SASS using the<style lang="scss">syntax.
⚡️ Bonus tip#
Since we have just added thevue.config.js file, we also added mypostcss configuration there:
const postcssNormalize=require('postcss-normalize')
const postcssPresetEnv=require('postcss-preset-env')

module.exports={
css:{
sourceMap:true,
loaderOptions:{
scss:{
additionalData:`
        @import "assets/styles/styles.scss";
`,
},
postcss:{
plugins:()=>[
postcssPresetEnv({
features:{
'logical-properties-and-values':{
dir:'ltr',
},
},
}),
postcssNormalize(),
],
},
},
},
}
Et voilà! 🇫🇷
With this configuration:
- component specific styles are inside the
[ComponentName].vuefile - while all generic styles are inside a generic
styles.scssfile
Please let me know if you found a better way to import general styles in Vue Styleguidist components! 😇
Find element in array and move it to the first position
Surely there are several way to do it, this is just one of them. Let me know if you know a better way to do it 💪🏻
To find an element into an array and move to be the first, you have to:
- get the index of the founded item using
findIndex()
📚 The
findIndex()method returns the index of thefirst element in the array that satisfies the provided testing function.
const arr=[1,2,3,'🐱',4,5,6,7,8,9,10]
const itemToFind='🐱'

const foundIdx= arr.findIndex(el=> el== itemToFind)// -> foundIdx = 3- remove the item in that specific position using
splice()
📚 The
splice()method changes the contents of an array by removing or replacing existing elements and/or adding new elements in place.
arr.splice(foundIdx,1)

// splice(start[, deleteCount[, item1[, item2[, ...]]]])
// start = foundIdx
// deleteCount = 1 = number of elements in the array to remove from start- add the item to the 1st position using
unshift()
📚 The
unshift()method adds one or more elements to the beginning of an array and returns the new length of the array.
arr.unshift(itemToFind)Output
console.log(arr)

// (11) ["🐱", 1, 2, 3, 4, 5, 6, 7, 8, 9, 10]
To sum up:
const arr=[1,2,3,'🐱',4,5,6,7,8,9,10]
const itemToFind='🐱'

const foundIdx= arr.findIndex(el=> el== itemToFind)
arr.splice(foundIdx,1)
arr.unshift(itemToFind)
📚 More info
How to add Google Fonts in Vue Styleguidist
Few days ago I worked on avue-styleguidist project and I had to use a Google Font.
Side note:vue-styleguidist is the "Vue version" of the more famousreact-styleguidist,a component development environment with hot reloaded dev server and a living style guide.
In a static page, I would add the font in a classic way using a<link> tag:
<html>
<head>
<linkrel="stylesheet"
href="https://fonts.googleapis.com/css?family=Raleway:100,400,800">
<style>
h1{
font-family:'Raleway', sans-serif;
font-size: 48px;
}
</style>
</head>
<body>
<h1>Whoa! I'm in Raleway 📝</h1>
</body>
</html>
But hey, in Styleguidist we are writing components into the "Styleguidist box" 📦!
Styleguidist takes care of creating the fancy and functional box around our components, while we only have to write what is strictly necessary for the component (its structure, its styles, and its logic)
To add a<head> property to the "Styleguidist box" we have to use thereact-styleguidisttemplate property which lets us change the HTML of the Styleguidist application.
To find outtemplate supported properties, I deep dive intomini-html-webpack-template-pluginextended options. There I found that it is possible to add anhead property with an array oflinks... awesome! 😼
| Name | Type | Default | Description |
|---|---|---|---|
head.links | {Array} | undefined | Array of objects with key + value pairs |
So, to add Raleway Google Font in our project we have to add to thestyleguide.config.js file atemplate object:
// styleguide.config.js

module.exports={
title:'My awesome styleguide',
components:'components/**/[A-Z]*.vue',
...
template:{
head:{
links:[{
key:'stylesheet',
value:'https://fonts.googleapis.com/css?family=Raleway:100,400,800',
},],
},
},
}
that turns out in
<head>
<linkrel="stylesheet"
href="https://fonts.googleapis.com/css?family=Raleway:100,400,800">
</head>
Now, in our components files we can use the Google Font 😏
// My component.vue

<template>
<h1>My awesome title</h1>
</template>

<script>
exportdefault{
name:'MyComponent',
}
</script>

<style>
h1{
font-family:'Raleway', sans-serif;
font-size: 48px;
}
</style>Add a class in Nunjucks using a conditional statement
InNunjucks we can use a conditional statement in two ways:
- explicit using the
{% if %}keyword, - orimplicit using the
{{ }}expression.
Note: I did not find any reference about these names – implicit/explicit – in the Nunjucksofficial documentation 📚, I just named to easily distinguish the two syntax in this tutorial 😇.
Syntax n.1: explicit#
Using an explicit{% if %} keyword, Nunjucks checks if the condition is met
{% set arr = ['🐱', '🐶', '🐺'] %}

<p>{% if '🐶' in arr %}{% endif %}</p>
HTML output
<p>true</p>Using this method, we can add an HTML class when a specific condition is met
{%set arr=['🐱','🐶','🐺']%}

<divclass="c-animals{%if'🐶'in arr%}has-dog{%endif%}">...</div>
HTML output
<divclass="c-animals has-dog">...</div>Syntax n.2: implicit#
Using double curly braces, Nunjucks evalued its content:
{% set arr = ['🐱', '🐶', '🐺'] %}

<p>{{ if '🐶' in arr }}</p>
HTML output
<p>true</p>Using this method, we can add an HTML class when a specific condition is met
{%set arr=['🐱','🐶','🐺']%}

<divclass="c-animals{{'has-dog'if'🐶'in arr}}">...</div>
HTML output
<divclass="c-animals has-dog">...</div>Note that the HTML output is exactly the same! 🚀
To sum up#
{%set arr=['🐱','🐶','🐺']%}

{# 1. explicit #}
<divclass="c-animals{%if'🐶'in arr%}has-dog{%endif%}">...</div>

{# 2. implicit #}
<divclass="c-animals{{'has-dog'if'🐶'in arr}}">...</div>
Personally, I use both syntaxes in my Nunjucks files, and to choose which one to use I go with this logic:
- if there is just one condition to met and it is quite simple, I use theimplicit syntax
- else I use theexplicit one 🤓
Npm cheatsheet
Fewnpm commands I found very useful during development.
| Command | Description |
|---|---|
npm -v | show currentnpm version installed |
npm init | inizialize npm project into the current folder, createspackage.json |
npm --help | show npm help manual page |
npm list | show a tree of every package found in the current folder |
npm list -g | same as above ^^, but search also in global packages |
npm list -g --depth=0 | same as above ^^, but do not show every package’s dependencies |
npm list [package name] | show a tree of every instance found in the current folder of that specific package |
npm install | install all packages inpackage.json |
npm install [package name] | install a package as dependency* |
npm install [package name] --save | install a package as dependency (same as above) |
npm install [package name] --save-dev | install a package as dev dependency |
npm install --save username/repo#branch-name-or-commit-or-tag | install package from GitHub repository |
npm uninstall [package name] | uninstall a package |
npm update | update top level packages |
npm update --depth [number of levels] | update dependencies of dependencies packages |
npm update [package name] -g | update global package installation |
npm docs [package name] | show README, official website, of the given package |
npm outdated | show packages that should be updated |
🧨!important
By default, in node@5 the--saveflag is implicit.
Therefore running these two commands you will have the same result:
npm i lodash

# is the same as
npm i lodash--save
they add a new line in yourpackage.json into thedependecies object:
{
"name":"test-project",
"version":"1.0.0",
"description":"",
"main":"index.js",
"scripts":{
"test":"echo \"Error: no test specified\" && exit 1"
},
"author":"Giulia Chiola",
"license":"ISC",
"dependencies":{
"lodash":"^4.17.21"
}
}Aliases#
| Alias | Command |
|---|---|
npm i | npm install |
npm i [package name] -D | npm install [package name] --save-dev |
npm ls | npm list |
npm up [package name] | npm update [package name] |
npm un [package name] | npm uninstall [package name] |
Config#
Set initial values for npm projects:
npm configset init-author-name"Your name"
npm configset init-author-email"your@email.com"
npm configset init-license MIT
⚡️ Bonus tip#
npm-check is a useful tool tocheck for outdated, incorrect, and unused dependencies
📚 More info
Git cheatsheet
Few commands I found very useful during development.
| Command | Description |
|---|---|
git commit -am "message" | add and commit all trakced files |
git fetch --all --prune | fetch all remotes, delete remote branches which are dead |
git reset --merge | abort merge, reset as before (also if there are local commit not pushed yet) |
git merge --strategy-option theirs [branch] | merge branch into current branch, keeping their work in conflicts |
git branch --unset-upstream | remove upstream branch |
git reset myfile.js | remove from staging area |
git commit --amend --no-edit | amend without edit message |
git commit --amend --no-edit --patch | amend without edit message + choose interactively which changes to commit |
git checkout - | switch to previous branch |
git checkout [branch] -- path/to/file.scss | get file from another branch and copy to current branch |
git stash -u | stash all files (also untracked ones) |
git reset --soft A | remove files, but still available in staging area |
git reset --mixed A | git reset A (default) remove files also in staging area |
git reset --hard | remove files as they never existed |
git stash clear | delete all stashes |
git fetch origin; git reset --hard origin/main | restore as remote main branch |
git log --tags --simplify-by-decoration --pretty="format:%ci %d" | show tags details |
git log --graph --abbrev-commit --decorate | show commits with decorative branches |
git log --decorate --oneline --graph --date-order master@{"4 days ago"}..master | show commits of the last 4 days in a compact graph |
git diff --name-only | uniq | xargs $EDITOR | open all modified files |
git push origin :feature/branchname | delete remote branch |
git push origin --delete feature/branchname | delete remote branch |
git push origin --all | push all local branches |
git fetch --prune --prune-tags | remove local tags, align tags to remotes |
git ls-remote --tags origin | list all remote tags |
⚡️ Bonus tip#
If there is a command you use often, you can save it as aglobal git alias.
git config--global alias.fixup'commit --amend --no-edit'and then using it
git fixupThanks toDarkWiiPlayer for pointing that out. 😎
Rename a git tag#
git tag[new][old]
git tag-d[old]
git push origin :refs/tags/[old]
git push--tags
When you fetch remote tags, be sure you have the updated tags
git pull--prune--tagsGitLab branch compare#
- Open the left sidebar
- Click on
Repository>Compare
https://github.com/giuliachiola/super-blog-11ty/compare/[source]...[target]Example:
https://github.com/giuliachiola/super-blog-11ty/compare/main...developFix developer path after upgrade to MacOS Catalina
After MacOS system upgrade toCatalina, on my computergit did not work anymore. If you happened the same, the following steps resolve it for me!
Running any of git commands, you would probably got this error
xcrun: error: invalid active developer path(/Library/Developer/CommandLineTools), missing xcrun at: /Library/Developer/CommandLineTools/usr/bin/xcrunTo fix it, you had to run
xcode-select--installThe "xcode-select" command requires the command line developer tools.
A prompt will appear asking you to install it now.

When installation is completed, git should work as expected! 😎
📚 More info