Note
Access to this page requires authorization. You can trysigning in orchanging directories.
Access to this page requires authorization. You can trychanging directories.
Quickstart: Create a Linux virtual machine in the Azure portal
In this article
Applies to: ✔️ Linux VMs
Azure virtual machines (VMs) can be created through the Azure portal. The Azure portal is a browser-based user interface to create Azure resources. This quickstart shows you how to use the Azure portal to deploy a Linux virtual machine (VM) running Ubuntu Server 22.04 LTS. To see your VM in action, you also SSH to the VM and install the NGINX web server.
If you don't have an Azure subscription, create afree account before you begin.
Sign in to Azure
Sign in to theAzure portal.
Create virtual machine
Entervirtual machines in the search.
UnderServices, selectVirtual machines.
In theVirtual machines page, selectCreate and thenVirtual machine. TheCreate a virtual machine page opens.
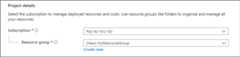
In theBasics tab, underProject details, make sure the correct subscription is selected and then choose toCreate new resource group. EntermyResourceGroup for the name.*.
UnderInstance details, entermyVM for theVirtual machine name. UnderAvailability options, selectNo infrastructure redundancy required. UnderSecurity type, selectStandard. ChooseUbuntu Server 22.04 LTS - Gen2 for yourImage. Leave the other defaults. The default size and pricing is only shown as an example. Size availability and pricing are dependent on your region and subscription.

Note
Some users will now see the option to create VMs in multiple zones. To learn more about this new capability, seeCreate virtual machines in an availability zone.

UnderAdministrator account, forAuthentication type, selectSSH public key.
InUsername enterazureuser.
ForSSH public key source, leave the default ofGenerate new key pair, and then entermyKey for theKey pair name.

UnderInbound port rules >Public inbound ports, chooseAllow selected ports and then selectSSH (22) andHTTP (80) from the drop-down.

Leave the remaining defaults and then select theReview + create button at the bottom of the page. A final validation runs.
On theCreate a virtual machine page, review the details about the VM you're about to create. When you're ready, selectCreate.
When theGenerate new key pair window opens, selectDownload private key and create resource. Your key file will be download asmyKey.pem. Make sure you know where the
.pemfile was downloaded; you'll need the path to it in the next step.When the deployment is finished, selectGo to resource.
On the page for your new VM, select the public IP address and copy it to your clipboard.

Connect to virtual machine
Create anSSH connection with the VM.
If you're on a Windows machine, open a PowerShell prompt. If you're on a Mac or Linux machine, open a Bash prompt and set read-only permission on the .pem file using
chmod 400 ~/Downloads/myKey.pem.At your prompt, open an SSH connection to your virtual machine. Replace the IP address with the one from your VM, and replace the path to the
.pemwith the path to where the key file was downloaded.
ssh -i ~/Downloads/myKey.pem azureuser@10.111.12.123Tip
The SSH key you created can be used the next time your create a VM in Azure. Just select theUse a key stored in Azure forSSH public key source the next time you create a VM. You already have the private key on your computer, so you won't need to download anything.
Install web server
To see your VM in action, install the NGINX web server. From your SSH session, update your package sources and then install the latest NGINX package.
sudo apt-get -y updatesudo apt-get -y install nginxWhen done, typeexit to leave the SSH session.
View the web server in action
Use a web browser of your choice to view the default NGINX welcome page. Type the public IP address of the VM as the web address. The public IP address can be found on the VM overview page or as part of the SSH connection string you used earlier.

Clean up resources
Delete resources
When no longer needed, you can delete the resource group, virtual machine, and all related resources.
- On the Overview page for the VM, underEssentials, select the link to the resource group you created for this Quickstart.
- At the top of the page for the resource group, selectDelete resource group.
- A page will open warning you that you are about to delete resources. Type the name of the resource group, selectDelete, and confirm deletion to finish deleting the resources and the resource group.
Auto-shutdown
If the VM is still needed, Azure provides an Auto-shutdown feature for virtual machines to help manage costs and ensure you aren't billed for unused resources.
- On theOperations section for the VM, select theAuto-shutdown option.
- A page will open where you can configure the auto-shutdown time. Select theOn option to enable and then set a time that works for you.
- Once you have set the time, selectSave at the top to enable your Auto-shutdown configuration.
Note
Remember to configure the time zone correctly to match your requirements, as (UTC) Coordinated Universal Time is the default setting in the Time zone dropdown.
For more information seeAuto-shutdown.
Next step
In this quickstart, you deployed a Linux virtual machine and installed a basic web server.
To learn more about Azure virtual machines, continue to the tutorial for Linux VMs.
Feedback
Was this page helpful?
Need help with this topic?
Want to try using Ask Learn to clarify or guide you through this topic?
Additional resources
- Last updated on
2025-12-10
In this article
Was this page helpful?
Want to try using Ask Learn to clarify or guide you through this topic?
[8]ページ先頭