
Get started with Python
This tutorial is intended for those new to building apps in the cloud, such asengineers and web developers, who want to learn key app development concepts asthey apply to Google Cloud.
Objectives
- Learn basic Google Cloud tools, such as theGoogle Cloud console and
gcloud. - Deploy your app toCloud Run.
- Persist your data withFirestore.
- Store file uploads inCloud Storage.
- Monitor your app usingGoogle Cloud Observability.
Costs
In this document, you use the following billable components of Google Cloud:
The instructions in this document are designed to keep your resource usage within the limits of Google Cloud'sAlways Free tier. To generate a cost estimate based on your projected usage, use thepricing calculator.
When you finish the tasks that are described in this document, you can avoid continued billing by deleting the resources that you created. For more information, seeClean up.
Before you begin
- Sign in to your Google Cloud account. If you're new to Google Cloud, create an account to evaluate how our products perform in real-world scenarios. New customers also get $300 in free credits to run, test, and deploy workloads.
In the Google Cloud console, on the project selector page, select or create a Google Cloud project.
Roles required to select or create a project
- Select a project: Selecting a project doesn't require a specific IAM role—you can select any project that you've been granted a role on.
- Create a project: To create a project, you need the Project Creator role (
roles/resourcemanager.projectCreator), which contains theresourcemanager.projects.createpermission.Learn how to grant roles.
Verify that billing is enabled for your Google Cloud project.
- To create a Firestore database in Native mode, complete the following steps:
- In the Google Cloud console, go to theFirestore create database page.
- From theSelect a Cloud Firestore mode screen, clickSelect Native Mode.
- Select alocation for your Firestore database. This location setting is the default Google Cloud resource location for your Google Cloud project. This location is used for Google Cloud services in your Google Cloud project that require a location setting, specifically, your defaultCloud Storage bucket and yourCloud Run app. Warning: After you set the default resource location for your Google Cloud project, you cannot change it.
- ClickCreate Database.
- In the Google Cloud console, go to theFirestore create database page.
Enable the Cloud Run Admin, Cloud Storage, Cloud Logging, and Error Reporting APIs.
Roles required to enable APIs
To enable APIs, you need the Service Usage Admin IAM role (
roles/serviceusage.serviceUsageAdmin), which contains theserviceusage.services.enablepermission.Learn how to grant roles.Clone the sample repo and open the sample application in Cloud Shell:
Go to Cloud ShellCloud Shell provides command-line access to your Google Cloud resources directly from the browser.
- To download the sample code and change into the app directory, clickProceed.
In Cloud Shell, configure the
gcloudtool to use your new Google Cloud project:# Configure gcloud for your projectgcloudconfigsetprojectPROJECT_ID
ReplacePROJECT_ID with the Google Cloud project ID that you created using the Google Cloud console.
TheGoogle Cloud CLI is the primary way you interact with your Google Cloud resources from the command line. In this tutorial, you use the
gcloudtool to deploy and monitor your app.
Run your app
- In Cloud Shell, install your app dependencies using
pip:pip3 install -r requirements.txt --user
- Run the Gunicorn HTTP server:
~/.local/bin/gunicorn -b :8080 main:app
- In Cloud Shell, clickWeb preview, and selectPreview on port 8080. This opens a new window with your running app.
Deploy your app to Cloud Run
Google Cloud offersseveral options for running your code. For thisexample, you useCloud Runto deploy a scalable app to Google Cloud. Cloud Run doesn't require you to manage servers and automatically scales to support traffic spikes.
- Use Cloud Build to build a Docker container and publish to Container Registry:
gcloud builds submit --tag gcr.io/
PROJECT_ID/bookshelf .Replace
PROJECT_IDwith the Google Cloud project ID that you created. - Run the container with Cloud Run:
gcloud run deploy bookshelf --image gcr.io/
PROJECT_ID/bookshelf \--platform managed --region us-central1 --allow-unauthenticatedYour app is now viewable at the URL displayed in the output of
gcloud run:Service[bookshelf]revision[bookshelf-00001]hasbeendeployedandisserving100percentoftraffic.ServiceURL:https://bookshelf-swsmmh5s5a-uc.a.run.app
- Copy the URL into your web browser to view the app.
Note: This SSL-protected domain is created automatically, andis useful for development. You canset up a custom domain with Cloud Run as well.
For more information on deploying to Cloud Run, see theCloud Run documentation.
Persist your data with Firestore
You cannot store information on your Cloud Run instances, because itis lost if the instance is restarted, and doesn't exist when newinstances are created. Instead, you use a database that all your instancesread from and write to.
Google Cloud offersseveral options for storing your data. In thisexample, you use Firestore to store the data for each book.Firestore is a fully managed, serverless, NoSQL documentdatabase that lets you store and query data. Firestoreauto scales to meet your app needs, and scales to zero when you're not using it.Add your first book now.
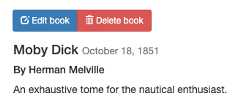
To create a book for your deployed app, clickAdd book.

- In theTitle field, enter
Moby Dick. - In theAuthor field, enter
Herman Melville. ClickSave. There is now an entry to your Bookshelf app.
- In the Google Cloud console, to refresh the Firestore page, clickRefreshrefresh.The data appears in Firestore. The Bookshelf app stores each bookas aFirestore documentwith a unique ID, and all these documents are stored in aFirestore collection.For the purposes of this tutorial, the collection is called books.

Firestore stores the books by using theFirestore Client Library.Here is an example of fetching a Firestore document:
fromgoogle.cloudimportfirestoredb=firestore.Client()book_ref=db.collection(u'Book').document(book_id)snapshot=book_ref.get()For more information on using Firestore, seeAdding data to Firestore.
Store file uploads in Cloud Storage
Now that you've added a book, it's time to add the book cover image. You cannotstore files on your instances. A database isn't the right choice for image files. Instead, you use Cloud Storage.
Cloud Storage is the primaryblob store for Google Cloud. You can use Cloud Storage tohost app assets that you want to share across Google Cloud. To useCloud Storage, you need to create aCloud Storage bucket,a basic container to hold your data.
- In the Google Cloud console, go to theCloud Storage Browser page.
- ClickCreate bucket.
- In theCreate bucket dialog, enter a name for your bucket by appending your Google Cloud project ID to the string
_bucketso the name looks likeYOUR_PROJECT_ID_bucket. This name is subject to thebucket name requirements. All other fields can remain at their default values. - ClickCreate.
- After your bucket is created, objects must be made publicly accessible to be viewed by users. Tomake your objects publicly accessible seeMaking Data Public.
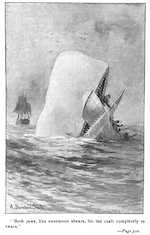
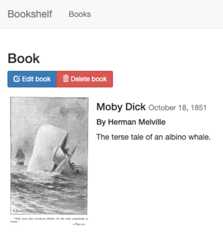
- ClickEdit book, and select animage to upload as your book's cover. For example, you can use this publicdomain image:
- ClickSave. You're redirected to thehomepage, where there is an entry to your Bookshelf app.
The bookshelf app sends uploaded files to Cloud Storage by using theCloud Storage Client Library.
client=storage.Client()bucket=client.bucket(bucketname)blob=bucket.blob(filename)blob.upload_from_string(file_stream,content_type=content_type)# Ensure the file is publicly readable.blob.make_public()url=blob.public_url$bucketId variable in thepreceding code to a different name and redeploying your app by running thegcloud app deploy command.For more information on using Cloud Storage, see theCloud Storage introduction.
Monitor your app using Google Cloud Observability
You've deployed your app and created and modified books. To monitor these events for your users,use Application Performance Management.
Monitor logs with Cloud Logging
In the Google Cloud, go to theLogs Explorer
Go to Logs ExplorerYou can monitor your app in real time. If you have any issues with your app,this is one of the first places to look.

- In theResource drop-down list, selectCloud Run Revision, bookshelf.
Monitor errors with Error Reporting
- In the Google Cloud console, go to theError Reporting page.
Go to Error Reporting page
Error Reporting highlights errors and exceptions in your app andlets you set up alerting around them. - In your browser, go to the
/errorsURL in your app.YOUR_CLOUD_RUN_URL/errors
This generates a new test exception and sends it to Google Cloud Observability.
In the Google Cloud console, return to theError Reporting page, and in a few moments thenew error is visible. ClickAuto Reload so you don'tneed to manually refresh the page.

Clean up
To avoid incurring charges to your Google Cloud account for the resources used in this tutorial, either delete the project that contains the resources, or keep the project and delete the individual resources.
Delete the project
What's next
Except as otherwise noted, the content of this page is licensed under theCreative Commons Attribution 4.0 License, and code samples are licensed under theApache 2.0 License. For details, see theGoogle Developers Site Policies. Java is a registered trademark of Oracle and/or its affiliates.
Last updated 2025-12-17 UTC.