
Managing infrastructure as code with Terraform, Cloud Build, and GitOps
This tutorial explains how to manage infrastructure as code withTerraform andCloud Build using the popular GitOps methodology. The termGitOps wasfirst coined by Weaveworks,and its key concept is using a Git repository to store the environmentstate that you want. Terraform is aHashiCorp tool that enables you to predictably create, change, and improveyour cloud infrastructure by using code. In this tutorial, you useCloud Build (a Google Cloud continuous integration service) to automaticallyapply Terraform manifests to your environment.
This tutorial is for developers and operators who are looking for an elegantstrategy to predictably make changes to infrastructure. The article assumes youare familiar with Google Cloud, Linux, and GitHub.
TheState of DevOpsreports identified capabilities that drive software delivery performance. Thistutorial will help you with the following capabilities:
Architecture
To demonstrate how this tutorial applies GitOps practices for managingTerraform executions, consider the following architecture diagram. Note that ituses GitHub branches—dev andprod—to represent actual environments. Theseenvironments are defined by Virtual Private Cloud (VPC) networks—dev andprod, respectively—into a Google Cloud project.
dev andprodenvironments using VPCs. You can extend this behavior to deploy to moreenvironments and to create projects under yourorganization hierarchy if needed.
The process starts when you push Terraform code to either thedev orprodbranch. In this scenario, Cloud Build triggers and then appliesTerraform manifests to achieve the state you want in the respective environment.On the other hand, when you push Terraform code to any other branch—for example,to a feature branch—Cloud Build runs to executeterraform plan, butnothing is applied to any environment.
Ideally, either developers or operators must make infrastructure proposals tonon-protected branches and then submit them throughpull requests.TheCloud Build GitHub app,discussed later in this tutorial, automatically triggers the build jobs andlinks theterraform plan reports to these pull requests. This way, you candiscuss and review the potential changes with collaborators and add follow-upcommits before changes are merged into the base branch.
If no concerns are raised, you must first merge the changes to thedevbranch. This merge triggers an infrastructure deployment to thedevenvironment, allowing you to test this environment. After you have tested andare confident about what was deployed, you must merge thedev branch into theprod branch to trigger the infrastructure installation to the productionenvironment.
Objectives
- Set up your GitHub repository.
- Configure Terraform to store state in a Cloud Storage bucket.
- Grant permissions to your Cloud Build service account.
- Connect Cloud Build to your GitHub repository.
- Change your environment configuration in a feature branch.
- Promote changes to the development environment.
- Promote changes to the production environment.
Costs
In this document, you use the following billable components of Google Cloud:
To generate a cost estimate based on your projected usage, use thepricing calculator.
When you finish the tasks that are described in this document, you can avoid continued billing by deleting the resources that you created. For more information, seeClean up.
Prerequisites
- Sign in to your Google Cloud account. If you're new to Google Cloud, create an account to evaluate how our products perform in real-world scenarios. New customers also get $300 in free credits to run, test, and deploy workloads.
In the Google Cloud console, on the project selector page, select or create a Google Cloud project.
Roles required to select or create a project
- Select a project: Selecting a project doesn't require a specific IAM role—you can select any project that you've been granted a role on.
- Create a project: To create a project, you need the Project Creator role (
roles/resourcemanager.projectCreator), which contains theresourcemanager.projects.createpermission.Learn how to grant roles.
Verify that billing is enabled for your Google Cloud project.
In the Google Cloud console, activate Cloud Shell.
At the bottom of the Google Cloud console, aCloud Shell session starts and displays a command-line prompt. Cloud Shell is a shell environment with the Google Cloud CLI already installed and with values already set for your current project. It can take a few seconds for the session to initialize.
- In Cloud Shell, get the ID of the project you just selected:
gcloud config get-value project
PROJECT_IDwith your projectID.gcloud config set projectPROJECT_ID
- Enable the required APIs:
gcloud services enable cloudbuild.googleapis.com compute.googleapis.com
- If you've never used Git in Cloud Shell, configure it with yourname and email address:
git config --global user.email "YOUR_EMAIL_ADDRESS"git config --global user.name "YOUR_NAME"
Setting up your GitHub repository
In this tutorial, you use a single Git repository to define your cloudinfrastructure. You orchestrate this infrastructure by having differentbranches corresponding to different environments:
- The
devbranch contains the latest changes that are applied to thedevelopment environment. - The
prodbranch contains the latest changes that are applied to theproduction environment.
With this infrastructure, you can always reference the repository to know whatconfiguration is expected in each environment and to propose new changes byfirst merging them into thedev environment. You then promote the changes bymerging thedev branch into the subsequentprod branch.
To get started, you fork thesolutions-terraform-cloudbuild-gitops repository.
- On GitHub, navigate tohttps://github.com/GoogleCloudPlatform/solutions-terraform-cloudbuild-gitops.git.
In the top-right corner of the page, clickFork.

Now you have a copy of the
solutions-terraform-cloudbuild-gitopsrepository with source files.
In Cloud Shell, clone this forked repository, replacing
YOUR_GITHUB_USERNAMEwith your GitHub username:cd ~git clone https://github.com/YOUR_GITHUB_USERNAME/solutions-terraform-cloudbuild-gitops.gitcd ~/solutions-terraform-cloudbuild-gitops
The code in this repository is structured as follows:
The
environments/folder contains subfolders that represent environments,such asdevandprod, which provide logical separation between workloadsat different stages of maturity, development and production, respectively.Although it's a good practice to have these environments as similar aspossible, each subfolder has its own Terraform configuration to ensure theycan have unique settings as necessary.The
modules/folder contains inline Terraform modules. These modulesrepresent logical groupings of related resources and are used to share codeacross different environments.The
cloudbuild.yamlfile is a build configuration file that containsinstructions for Cloud Build, such as how to perform tasks basedon a set of steps. This file specifies a conditional execution depending onthe branch Cloud Build is fetching the code from, for example:For
devandprodbranches, the following steps are executed:terraform initterraform planterraform apply
For any other branch, the following steps are executed:
terraform initfor allenvironmentssubfoldersterraform planfor allenvironmentssubfolders
To ensure that the changes being proposed are appropriate for every environment,terraform init andterraform plan are run for allenvironmentssubfolders. Before merging the pull request, you can review the plansto make sure that access isn't being granted to an unauthorized entity, forexample.
Configuring Terraform to store state in a Cloud Storage bucket
By default, Terraform storesstate locally in a file namedterraform.tfstate. This default configuration canmake Terraform usage difficult for teams, especially when many users runTerraform at the same time and each machine has its own understanding of thecurrent infrastructure.
To help you avoid such issues, this section configures aremote state that points to a Cloud Storage bucket. Remote state is a feature ofbackends and, in this tutorial, is configured in thebackend.tf files—for example:
# Copyright 2019 Google LLC## Licensed under the Apache License, Version 2.0 (the "License");# you may not use this file except in compliance with the License.# You may obtain a copy of the License at## https://www.apache.org/licenses/LICENSE-2.0## Unless required by applicable law or agreed to in writing, software# distributed under the License is distributed on an "AS IS" BASIS,# WITHOUT WARRANTIES OR CONDITIONS OF ANY KIND, either express or implied.# See the License for the specific language governing permissions and# limitations under the License.terraform{backend"gcs"{bucket="PROJECT_ID-tfstate"prefix="env/dev"}}In the following steps, you create a Cloud Storage bucket and change afew files to point to your new bucket and your Google Cloud project.
In Cloud Shell, create the Cloud Storage bucket:
PROJECT_ID=$(gcloudconfigget-valueproject)gcloudstoragebucketscreategs://${PROJECT_ID}-tfstate```shgcloudstoragebucketsupdategs://${PROJECT_ID}-tfstate --versioning```EnablingObjectVersioningincreases[storage costs](https://cloud.google.com/storage/pricing){: track-type="tutorial" track-name="internalLink" track-metadata-position="body" },whichyoucanmitigatebyconfiguring[ObjectLifecycleManagement](/storage/docs/lifecycle){:track-type="tutorial" track-name="internalLink" track-metadata-position="body"}todeleteoldstateversions.Replace the
PROJECT_IDplaceholder with the projectID in both theterraform.tfvarsandbackend.tffiles:cd ~/solutions-terraform-cloudbuild-gitopssed -i s/PROJECT_ID/$PROJECT_ID/g environments/*/terraform.tfvarssed -i s/PROJECT_ID/$PROJECT_ID/g environments/*/backend.tf
On OS X/MacOS, you might need to add two quotation marks (
"") aftersed -i, as follows:cd ~/solutions-terraform-cloudbuild-gitopssed -i "" s/PROJECT_ID/$PROJECT_ID/g environments/*/terraform.tfvarssed -i "" s/PROJECT_ID/$PROJECT_ID/g environments/*/backend.tf
Check whether all files were updated:
gitstatusThe output looks like this:
On branch devYour branch is up-to-date with 'origin/dev'.Changes not staged for commit: (use "git add <file>..." to update what will be committed) (use "git checkout -- <file>..." to discard changes in working directory) modified: environments/dev/backend.tf modified: environments/dev/terraform.tfvars modified: environments/prod/backend.tf modified: environments/prod/terraform.tfvarsno changes added to commit (use "git add" and/or "git commit -a")
Commit and push your changes:
gitadd--allgitcommit-m"Update project IDs and buckets"gitpushorigindevDepending on your GitHub configuration, you will have to authenticate topush the preceding changes.
Granting permissions to your Cloud Build service account
To allowCloud Build service account to run Terraform scripts with the goal of managing Google Cloud resources,you need to grant it appropriate access to your project. For simplicity,project editor access is granted in this tutorial. But when the project editor role has awide-range permission, in production environments you must follow your company'sIT security best practices, usually providingleast-privileged access. For security best practices, seeVerify every access attempt explicitly.
In Cloud Shell, retrieve the email for your project'sCloud Build service account:
CLOUDBUILD_SA="$(gcloudprojectsdescribe$PROJECT_ID\--format'value(projectNumber)')@cloudbuild.gserviceaccount.com"Grant the required access to your Cloud Build service account:
gcloudprojectsadd-iam-policy-binding$PROJECT_ID\--memberserviceAccount:$CLOUDBUILD_SA--roleroles/editor
Directly connecting Cloud Build to your GitHub repository
This section shows you how to install theCloud Build GitHub app.This installation allows you to connect your GitHub repository with yourGoogle Cloud project so that Cloud Build can automatically applyyour Terraform manifests each time you create a new branch or push code toGitHub.
The following steps provide instructions for installing the app only for the
solutions-terraform-cloudbuild-gitopsrepository, but you can choose toinstall the app for more or all of your repositories.Go to the GitHub Marketplace page for the Cloud Buildapp:
- If this is your first time configuring an app in GitHub: ClickSetupwith Google Cloud Build at the bottom of the page. Then clickGrantthis app access to your GitHub account.
- If this is not the first time configuring an app in GitHub: ClickConfigure access. TheApplications page of your personalaccount opens.
ClickConfigure in the Cloud Build row.
SelectOnly select repositories, then select
solutions-terraform-cloudbuild-gitopsto connect to the repository.ClickSave orInstall—the button label changes depending onyour workflow. You are redirected to Google Cloud to continue theinstallation.
Sign in with your Google Cloud account. If requested, authorizeCloud Build integration with GitHub.
On theCloud Build page, select your project. Awizard appears.
In theSelect repository section, select your GitHub account and the
solutions-terraform-cloudbuild-gitopsrepository.If you agree with the terms and conditions, select the checkbox, then clickConnect.
In theCreate a trigger section, clickCreate a trigger:
- Add a trigger name, such as
push-to-branch. Note this trigger namebecause you will need it later. - In theEvent section, selectPush to a branch.
- In theSource section, select
.*in theBranch field. - ClickCreate.
- Add a trigger name, such as
The Cloud Build GitHub app is now configured, and your GitHubrepository is linked to your Google Cloud project. From now on, changes tothe GitHub repository trigger Cloud Build executions, which reportthe results back to GitHub by usingGitHub Checks.
Changing your environment configuration in a new feature branch
By now, you have most of your environment configured. So it's time to make somecode changes in your development environment.
On GitHub, navigate to the main page of your forked repository.
https://github.com/YOUR_GITHUB_USERNAME/solutions-terraform-cloudbuild-gitops
Make sure you are in the
devbranch.To open the file for editing, go to the
modules/firewall/main.tffile andclick the pencil icon.On line 30, fix the
"http-server2"typo intarget_tagsfield.The value must be
"http-server".Add a commit message at the bottom of the page, such as "Fixing httpfirewall target", and selectCreate a new branch for this commit andstart a pull request.
ClickPropose changes.
On the following page, clickCreate pull request to open a new pullrequest with your change.
After your pull request is open, a Cloud Build job isautomatically initiated.
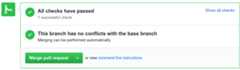
ClickShow all checks and wait for the check to become green.

ClickDetails to see more information, including the output of the
terraform planatView more details on Google Cloud Build link.
Don't merge your pull request yet.
Note that the Cloud Build job ran the pipeline defined in the
cloudbuild.yamlfile. As discussed previously, this pipeline has differentbehaviors depending on the branch being fetched. The build checks whether the$BRANCH_NAMEvariable matches any environment folder. If so,Cloud Build executesterraform planfor that environment.Otherwise, Cloud Build executesterraform planfor all environmentsto make sure that the proposed change is appropriate for all of them. If any ofthese plans fail to execute, the build fails.-id:'tfplan'name:'hashicorp/terraform:1.0.0'entrypoint:'sh'args:-'-c'-|if [ -d "environments/$BRANCH_NAME/" ]; thencd environments/$BRANCH_NAMEterraform planelsefor dir in environments/*/docd ${dir}env=${dir%*/}env=${env#*/}echo ""echo "*************** TERRAFORM PLAN ******************"echo "******* At environment: ${env} ********"echo "*************************************************"terraform plan || exit 1cd ../../donefiSimilarly, the
terraform applycommand runs for environment branches, but itis completely ignored in any other case. In this section, you have submitted acode change to a new branch, so no infrastructure deployments were applied toyour Google Cloud project.-id:'tfapply'name:'hashicorp/terraform:1.0.0'entrypoint:'sh'args:-'-c'-|if [ -d "environments/$BRANCH_NAME/" ]; thencd environments/$BRANCH_NAMEterraform apply -auto-approveelseecho "***************************** SKIPPING APPLYING *******************************"echo "Branch '$BRANCH_NAME' does not represent an official environment."echo "*******************************************************************************"fiEnforcing Cloud Build execution success before merging branches
To make sure merges can be applied only when respective Cloud Buildexecutions are successful, proceed with the following steps:
On GitHub, navigate to the main page of your forked repository.
https://github.com/YOUR_GITHUB_USERNAME/solutions-terraform-cloudbuild-gitops
Under your repository name, clickSettings.
In the left menu, clickBranches.
UnderBranch protection rules, clickAdd rule.
InBranch name pattern, type
dev.In theProtect matching branches section, selectRequire statuschecks to pass before merging.
Search for your Cloud Build trigger name created previously.
ClickCreate.
Repeat steps 3–7, settingBranch name pattern to
prod.
This configuration is important toprotect both the
devandprodbranches. Meaning, commits must first be pushed toanother branch, and only then they can be merged to the protected branch. Inthis tutorial, the protection requires that the Cloud Build executionbe successful for the merge to be allowed.Promoting changes to the development environment
You have a pull request waiting to be merged. It's time to apply the state youwant to your
devenvironment.On GitHub, navigate to the main page of your forked repository.
https://github.com/YOUR_GITHUB_USERNAME/solutions-terraform-cloudbuild-gitops
Under your repository name, clickPull requests.
Click the pull request you just created.
ClickMerge pull request, and then clickConfirm merge.
Check that a new Cloud Build has been triggered:
Open the build and check the logs.
When the build finishes, you see something like this:
Step #3 - "tf apply": external_ip =EXTERNAL_IP_VALUEStep #3 - "tf apply": firewall_rule = dev-allow-httpStep #3 - "tf apply": instance_name = dev-apache2-instanceStep #3 - "tf apply": network = devStep #3 - "tf apply": subnet = dev-subnet-01
Copy
EXTERNAL_IP_VALUEand open the address in a webbrowser.http://EXTERNAL_IP_VALUE
This provisioning might take a few seconds to boot the VM and to propagatethe firewall rule. Eventually, you seeEnvironment: dev in theweb browser.
Navigate to your Terraform state file in your Cloud Storage bucket.
https://storage.cloud.google.com/PROJECT_ID-tfstate/env/dev/default.tfstate
Promoting changes to the production environment
Now that you have your development environment fully tested, you can promoteyour infrastructure code to production.
On GitHub, navigate to the main page of your forked repository.
https://github.com/YOUR_GITHUB_USERNAME/solutions-terraform-cloudbuild-gitops
Under your repository name, clickPull requests.
ClickNew pull request.
For thebase repository, select your just-forked repository.
Forbase, select
prodfrom your own base repository. Forcompare, selectdev.
ClickCreate pull request.
Fortitle, enter a title such as
Promoting networking changes, andthen clickCreate pull request.Review the proposed changes, including the
terraform plandetails fromCloud Build, and then clickMerge pull request.ClickConfirm merge.
In the Google Cloud console, open theBuild History page to seeyour changes being applied to the production environment:
Wait for the build to finish, and then check the logs.
At the end of the logs, you see something like this:
Step #3 - "tf apply": external_ip =EXTERNAL_IP_VALUEStep #3 - "tf apply": firewall_rule = prod-allow-httpStep #3 - "tf apply": instance_name = prod-apache2-instanceStep #3 - "tf apply": network = prodStep #3 - "tf apply": subnet = prod-subnet-01
Copy
EXTERNAL_IP_VALUEand open the address in a webbrowser.http://EXTERNAL_IP_VALUE
This provisioning might take a few seconds to boot the VM and to propagatethe firewall rule. Eventually, you seeEnvironment: prod in theweb browser.
Navigate to your Terraform state file in your Cloud Storage bucket.
https://storage.cloud.google.com/PROJECT_ID-tfstate/env/prod/default.tfstate
You have successfully configured a serverless infrastructure-as-code pipeline onCloud Build. In the future, you might want to try the following:
- Add deployments for separate use cases.
- Create additional environments to reflect your needs.
- Use a project per environment instead of a VPC per environment.
Cleanup
After you've finished the tutorial, clean up the resources you created onGoogle Cloud so you won't be billed for them in the future.
Deleting the project
Deleting the GitHub repository
To avoid blocking new pull requests on your GitHub repository, you can deleteyour branch protection rules:
- In GitHub, navigate to the main page of your forked repository.
- Under your repository name, clickSettings.
- In the left menu, clickBranches.
- Under theBranch protection rules section, click theDelete buttonfor both
devandprodrows.
Optionally, you can completely uninstall the Cloud Build app fromGitHub:
Go to your GitHubApplications settings.
In theInstalled GitHub Apps tab, clickConfigure in theCloud Build row. Then, in theDanger zone section,click theUninstall button in theUninstall Google Cloud Builderrow.
At the top of the page, you see a message saying "You're all set. A job has been queued to uninstall Google Cloud Build."
In theAuthorized GitHub Apps tab, click theRevoke button in theGoogle Cloud Build row, thenI understand, revoke access in thepopup.
If you don't want to keep your GitHub repository:
- In GitHub, go to the main page of your forked repository.
- Under your repository name, clickSettings.
- Scroll down to theDanger Zone.
- ClickDelete this repository, and follow the confirmation steps.
What's next
- Consider usingCloud Foundation Toolkit templates to quickly build a repeatable enterprise-ready foundation inGoogle Cloud.
- WatchRepeatable Google Cloud Environments at Scale With Cloud Build Infra-As-Code Pipelines from Next' 19 about the GitOps workflow described in this tutorial.
- Check out theGitOps-style continuous delivery with Cloud Build tutorial.
- Take a look at more advanced Cloud Build features:Configuring the order of build steps,Building, testing, and deploying artifacts,andCreating custom build steps.
- Check out the blog onEnsuring scale and compliance of your Terraform Deployment with Cloud Build.
- Read our resources aboutDevOps.
- Learn more about the DevOps capabilities related to this tutorial:
- Take theDevOps quick check to understand where you stand in comparison with the rest of the industry.
Except as otherwise noted, the content of this page is licensed under theCreative Commons Attribution 4.0 License, and code samples are licensed under theApache 2.0 License. For details, see theGoogle Developers Site Policies. Java is a registered trademark of Oracle and/or its affiliates.
Last updated 2025-12-15 UTC.