


For those who don't know, WebExtension is a new Add-on architecture/specification that can be used even across browsers (to some extend). It is a browser native API interface with which you can write extensions with just web technologies. The core of the WebExtension API is meant to be standardized for ease of development in the future. For this article, I will be writing in the context of extension development for Firefox but some things may also be true for other browsers.
Getting started
At the heart and at the start of an extension is itsmanifest. The manifest is a JSON file that contains all sorts of information about the Add-on: Name, version, description, permissions, UI elements, icons, etc.
To create the simplest WebExtension that is possibly possible this is what amanifest.json could look like:
{"manifest_version":2,"name":"Super Awesome Extension 👓","version":"1"}The 3 JSON keys shown above are the only mandatory keys in your manifest. But, before you add some fancy functionality to it, let me show you how you can actually get to install a local Add-on in the browser:
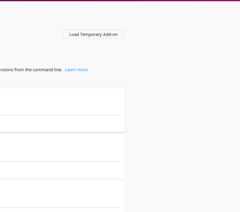
Go to 'about:debugging' using your URL bar:

Click 'Load Temporary Add-on' and choose the manifest.json from your local Add-on:


Your extension will now be displayed in Firefox' Add-on page ('about:addons' in the URL bar or hamburger menu on the top right and then 'Add-ons') and is ready to use! That is all you need to know to get you Add-on up 'n running. You can go and try it out right now, I'll wait here. Note: When you make any changes to you Add-on during development, don't forget to hit theReload button on theabout:debugging page.
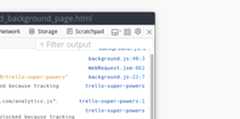
If you want to see potential errors and/orlog statements from your Add-on, there is a separate debug window for that (you will need it).
To open it, go to 'about:debugging' (as shown above) and load your Add-on (also shown above). From there, check the 'Enable Add-on Debugging' checkbox and then click on 'Debug' for your Add-on:

Nearly all debugging information will be displayed in this window, we will see later why onlynearly.
Links:
>Web-ext tool
>Debugging on MDN
JavaScript!
For WebExtensions, all APIs live in thebrowser namespace. This means, that your scripts have access to an JavaScript object calledbrowser which has methods for all default APIs and for all APIs that you have granted permissions to through the manifest. So, for example, if you would want to open a new tab from one of your scripts you could writebrowser.tabs.create({});
Note: Google Chrome uses the non-standardchrome namespace for its APIs.browser uses JavaScript promises as return values for asynchronous APIs,chrome uses callbacks. For cross-browser extensions there is a polyfill for thebrowser namespace that you can use in Google Chrome. Firefox supports bothbrowser andchrome to make it easier to port extensions from Google Chrome. If you develop a new extension with cross-browser compatibility, use thebrowser namespace with the polyfill for Google Chrome.
There are three types of scripts in the WebExtension world:
Background Scripts are the highest level of script your extension can run. It has access to all default APIs and all APIs that you have granted through your manifest (such scripts are called 'privileged scripts'). Background Scripts runindependent of of any tabs (in fact they even have their own content process in the new Firefox), meaning that it starts its life on browser start-up (or Add-on installation) and ends its life when you close the browser (or uninstall the Add-on). The Background Script also runs across multiple browser instances (e.g. you have more than one Firefox window open at the same time). So, Background Scripts are your go to choice for 1) heavy lifting (there is an API to detect if the user is idle, which could be a good time for heavy tasks!(Please, do not do crypto mining. Ups.) ), 2) enure features that work independent of websites, and 3) use privileged APIs. From Background Scripts you can also register to events such as website visits, and then programmatically insert a script.
Content Scripts are either inserted programmatically (e.g. through a Background Script) or inserted automatically (using the
content_scriptsmanifest key) into a website. Once in, they can directly interact with the site's DOM. Content Scripts are not privileged scripts, that means they have only limited access to WebExtension APIs. Note: If you are unsure what your options are, you can find all APIs that are available to Content Scriptsin this MDN article or you can always use aconsole.info(browser);statement and inspect its attached methods in the console.Scripts from WebExtension UIs. These include pages from Sidebars, Page and Browser Action popups and Developer Tools. They share a similarity with Content Scripts in that they get terminated as soon as the popup/panel/sidebar is closed. Their debugging information is displayed in the debug window alongside your Background Scripts, and they are also privileged scripts. The fact that scripts that are executed within popups only live as long as the popup is open is a limiting factor. So, depending on your use case, it is very likely that you will also need a Background Script page.
You can access the scope of other priviledged scripts withbrowser.extension.getViews(), or the scope of the background script(s) only withbrowser.extension.getBackgroundPage()
Links:
>Differences betweenbrowser andchrome
>Anatomy of an extension overview (Background Scripts, Content Scripts, Sidebars, popups, option pages)
>More on Content Scripts
The number of APIs you can use is limited by 1) the permissions that you granted through the manifest and 2) if the script in question is either a privileged script (Background Scripts, Sidebar, Popups) or a Content Script.
Content Scripts can only usecertain WebExtension APIs, but have also access to the DOM of the page they were injected in.
Privileged scripts have access to all WebExtension APIs (except for these that require permission, in that case only if you have specified the corresponding manifest key). In case of privileged scripts that have a HTML page with them (Sidebar, Popups) they have access to their DOM. Background Scripts can also access their own DOM, but it won't be rendered anywhere.
To get permissions in addition to the default ones, you can include them in the manifest and are then shown to users when they install the Add-on.

With added permissions, icons and a description, your manifest may look like this:
{"manifest_version":2,"name":"Super Awesome Extension 👓","version":"1","description":"Super awesome Add-on for super awesome people.","icons":{"16":"assets/logos/logo_small.svg","32":"assets/logos/logo_small.svg","48":"assets/logos/logo_small.svg","64":"assets/logos/logo.svg","128":"assets/logos/logo.svg"},"permissions":["tabs","storage","https://awesome.com/*/","notifications","downloads"]}UIs
Your Add-on can fully operate withoutany user interface elements (e.g. only a Background Script) but there is a good chance you will need some. Luckily the browser helps us with this. Here's a list of UI elements you can use in your Add-on:
Browser Action. This is an icon that is displayed in the toolbar, right next to other toolbar icons. When the icon gets clicked, an event is fired on your Background Script which you can subscribe to using
browser.browserAction.onClicked.addListener(). Optionally you can also choose to display a popup when the icon gets clicked.Page Action. This is an icon that is displayed in theURL bar. In difference to the Browser Action, it is only displayed on certain websites (that you can define). When the icon gets clicked, an event is fired on your Background Script which you can subscribe to using
browser.pageAction.onClicked.addListener(). Optionally you can also choose to display a popup when the icon gets clicked.Sidebar. This adds a sidebar (default on the left) and displays a normal HTML page (just as you would do with a normal website). In case of Firefox, threre is a global sidebar which has a dropdown for switching between sidebars. If you use this UI element, you side bar gets added to that dropdown.
Dev Tools panel. Yes, if you want to enhance Firefox' Developer Tools, you can.
Content Script. This is not directly a user interface component but nonetheless, it is a way to interact with you users. As explained further down, Content Scripts are injected into websites and can directly interact with the site's DOM.
Notification. Does what it says.
Address bar suggestion. This let's you listen for inputs in the address bar and then suggest links or actions. Pretty cool.
Browser Actions, Page Actions, Content Scripts (optionally), Sidebars, and Dev Tools are defined in the manifest and can then interact with your extension's (background) scripts.
Debugging popups
If you use a popup you will soon wonder how you can debug it, because itcloses itself when it loses focus. That is, when you want to switch to the debug window while having the popup open, it will not work as you want. To overcome this we can "pin" the popups to where they are:
On your previously opened debug window, click the 'Disable popup auto hide' button. This ensures that the popups always stay on top (and do not close themselves as they normally would).Note that it literally always stays atop, even when you switch to a different application.Don't forget to disable this option again when you are done, (it is even saved across restarts), otherwise you will end up withlots of popups_.
On the button to the left from the previous, choose your popup target:
(The button says 'Select an iframe as the currently targeted document')


You can now inspect popups without a hassle.
Let's add a sample Page Action to our manifest:
{"manifest_version":2,"name":"Super Awesome Extension 👓","version":"1","description":"Super awesome Add-on for super awesome people.","icons":{"16":"assets/logos/logo_small.svg","32":"assets/logos/logo_small.svg","48":"assets/logos/logo_small.svg","64":"assets/logos/logo.svg","128":"assets/logos/logo.svg"},"permissions":["tabs","storage","https://awesome.com/*/","notifications","downloads"],"page_action":{"browser_style":true,"default_icon":{"16":"/assets/page-action/page-action-16.svg","19":"/assets/page-action/page-action-19.svg","32":"/assets/page-action/page-action-32.svg","38":"/assets/page-action/page-action-38.svg"},"default_title":"Awesome Page Action!","default_popup":"/page-action/index.html"}}Links:
>UI best practices
> UI elements:
Content Scripts only have access to limited APIs, but sometimes you need functionality that only privileged scripts can offer from within a Content Script. This is where the Messaging API comes in. The Messaging API is a simple way to communicate with your scripts. It doesn't matter if it is a Background Script, a Content Script, a popup or a sidebar.
To get started, you can use the following APIs:
// Sends a message to all privileged scripts (can be used by Content Scripts, but can't be used to send to Content Scripts)browser.runtime.sendMessage(optionalID,messageData);// Sends a message to a Content Script (from a privileged script)browser.tabs.sendMessage(tabId,optionalObject);// Receive messages sent via methods abovebrowser.runtime.onMessage(function);Note: you can not communicate between background scripts because they all share the same scope (like a website). You can include multiple, but they are all executed in the same background context
If I useruntime.sendMessage() from a Content Script, then all privileged scripts (such as Background Scripts) will receive this message. But, if I have to send two different messages for two different tasks, how can I know which one is which?
You can also send objects in messages, so this is how I solved this issue:
/* EXAMPLE *//* contentScript.js */// Send a message. In this case, we send an objectbrowser.runtime.sendMessage({type:"notification",// Include a 'type' property so the receiving scripts know what to dodata:{url:"example.com",numbers:[1,2,3,4,5]}// Some data you want to send});// ==================/* background.js */// Listen for messagesbrowser.runtime.onMessage(handleMessage);// Handle received messagesfunctionhandleMessage(message){console.log(message.type)// "notification"console.log(message.data.url)// "example.com"console.log(message.data.numbers)// Array[1, 2, 3, 4, 5]}By sending an object and giving it atype property, I can easily distinguish the notification from other messages the script may get.(Usingtype anddata are just made-up properties, I could have used anything instead)
For more advanced communication needs, you can also useruntime.connect() andtabs.connect() which lets you build up a long term communication channel where you always know who sent the message.
Additionally you have the option to send a return value back to the sender:
/* EXAMPLE *//* contentScript.js */// Send a message. Assuming async function context, otherwise we would get a promise backvarreturnValue=awaitbrowser.runtime.sendMessage({type:"notification",data:{url:"example.com",numbers:[1,2,3,4,5]}});// ==================/* background.js */// Listen for messagesbrowser.runtime.onMessage(handleMessage);// Handle received messagesfunctionhandleMessage(message){// Do something with received message...// Return a "response" and fulfill the promise for the message senderreturn42;}Links:
>JavaScript API overview
>runtime.sendMessage()
>runtime.onMessage()
>tabs.sendMessage()
Publishing
For you to be able topermanently install a Firefox extension you first have to sign it. This can be done on Mozilla's Add-on website. To get your Add-on used by people (a.k.a. publishing it) you have two options:
Upload it toMozilla's Add-on site. This is probably the choice for most people. Your extension gets reviewed and is then listed and searchable on the site and you also get handy usage statistics.
Distribute it yourself. On addons.mozilla.org (AMO) you have the option to only sign your extension and not have it listed on the site. You can then distribute the signed Add-on yourself (e.g. from your website). To provide updates to the extension you then have to provide an
update_urlmanifest key.
Notes about AMO
AMO only uses the icons from your manifest onfirst submission for their Add-on pages. This means if you want to change your icon that is displayed on AMO after that, you can only change it through their web interface. If you first uploaded your Add-on without an icon and then added them later via an update, you also have to add them manually through AMO (I really hope this changes sometime in the future.This only applies to the icons used for the AMO website, not for Firefox' Add-on manager or other places).
Also, I suggest you to have a well-fed 'More Information' panel. It really helps people with your Add-on and leaves a good impression on visitors. Provide a website (if your Add-on is open source, leave a link to the repository (e.g. GitHub)), support E-Mail, support website (e.g. bug tracker, forums, or 'issues' page on GitHub). Furthermore, you can add a license (MIT, GPL, etc.) and a Privacy Policy (this you will need if your Add-on gets bigger). Everything of these mentioned information can be added through the AMO web interface.

One last note, you can also have Beta releases of your Add-on on AMO.
"A file with a version ending with a|alpha|b|beta|pre|rc and an optional number is detected as beta."
So if your manifest'sversion is "1.2" and it is a pre-release version you can add one of the mentioned letters, e.g. "1.2a". AMO will then show you this option when uploading it:

Links:
>More info on publishing
>Mozilla's Add-on site (AMO)
Notes on self distributing
When you choose the self distributing route, you will very likely need aupdate_url key in your manifest. This is done in thegecko key in theapplications key, as shows below:
{"applications":{"gecko":{"update_url":"https://example.com/updates.json"}}The specified URL is a update manifest. This is a JSON file specifically used to tell the browser what the newest version is and where to get it.
Links:
>More on self-distribution
>'applications' manifest key
>Update Manifest
More stuff
Internationalization (i18n)
Depending on the scope of your Add-on you may want to translate it to other languages, so that more users can use it in their native language. This is possible with WebExtensions. I suggest you to readthis guide to get started, but the TL;DR is this:
- All locales are located in a folder called
_localesthat is in the Add-on's root directory - Every language has its own folder within the
_localesfolder that is named with itsappropriate language short code - In each language folder is a file called
messages.jsonthat contains all the strings for that language - You can get a localized string by calling
browser.i18n.getMessage('yourStringYouWantLocalised')from a script.
Note that you have to translate your UIs (HTML pages) yourselves. This means, when an HTML page is loaded you will need some mechanism toapply the translated strings to your HTML. With my Add-on I solved this problem by giving each element in my HTML that is translatable adata-translate attribute. When the HTML page is loaded I have a small helper function calledtranslate() that replaces the text contents of every element with adata-translate attribute. The function uses the value ofdata-translate to get the corresponding translated string that are specified in themessages.json files.
Forums
If you sometimes feel out of luck and can't find a way around, there is also an official AMO forum. I have no idea how I initially found it, as it is not something that is not easy to find.
You can go and have a lookhere.
Settings page
You may find yourself in a position where you want to make a settings page for your Add-on. The first step is to specify anoptions_ui key in your manifest. In that you can put apage key and specify an HTML page like so:
{"options_ui":{"page":"settings/options.html",}}Now when you visit your Add-on's page in the Add-on manager, you will see your specified HTML page at the bottom. In here you can add some form elements to let the user choose their preferences. Two things to note:
- You will have to actually save the settings. This can be done with the Storage API:
browser.storage.set()). - When loading the settings HTML page you will have to initialize the input elements to their stored values. To get values from storage you can use
browser.storage.get().
Links:
>AMO forums
>Storage API
>Settings page guide
>My approach to translation
>Link to mytranslate() helper function
In Firefox 57, Mozilla dropped legacy extension support completely in favor of this new architecture. Before WebExtensions - as a developer making Firefox extensions - you could also use browser internal stuff. This led to a poor compatibility experience as things could easily break with updates and oftentimes there was no documentation for these internal functions. Mozilla tried to ease the development by providing an SDK, but it still wasn't perfect. So nowadays, writing a WebExtension is the only way to get a working Firefox Add-on.
Phew! If you made it this far, congratulations! Writing this article was not easy but also lots of fun. If you have any question or I left something unclear, please leave a comment and I will gladly answer. Thank you.
There is much more possible with WebExtensions than I could have possibly show in this post, so be sure to check out all the APIs and manifest keyson MDN.
The Add-on I was talking about in the beginning (and that is shown in the GIFs) isTrello Super Powers. It is a simple extension that adds some nifty features to your Trello boards. And by the way, it is open source, so you can check it outon GitHub
Top comments(0)
For further actions, you may consider blocking this person and/orreporting abuse

