Tutorial: Get started with Visual Studio Code
In this tutorial, you learn about the key features of Visual Studio Code to help you get started with coding quickly. You learn about the different components of the user interface and how to customize it to your liking. You then write some code and use the built-in code editing features, such as IntelliSense and Code Actions, and you learn about running and debugging your code. By installing a language extension, you add support for a different programming language.
If you prefer to follow along with a video, you can watch theGetting Started video, which covers the same steps as this tutorial.
Prerequisites
Open a folder in VS Code
You can use VS Code to work on individual files to make quick edits, or you can open a folder, also known as aworkspace.
Let's start by creating a folder and opening it in VS Code. You'll use this folder throughout the tutorial.
Open Visual Studio Code.
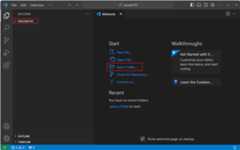
When you first open VS Code, you should see theWelcome page with different actions to get started.
SelectFile >Open Folder... from the menu to open a folder.
SelectNew Folder, create a new folder named
vscode101, and then selectSelect Folder (Open on macOS).The folder you create is the root of your workspace.
On the Workspace Trust dialog, selectYes, I trust the authors to enable all features in the workspace.

Because you created the folder on your computer, you can trust the code in the folder.
ImportantWorkspace Trust lets you decide whether code in your project folder can be executed by VS Code. When you download code from the internet, you should first review it to make sure it's safe to run. Get more info aboutWorkspace Trust.
You should now see theExplorer view on the left, showing the name of the folder.
You'll use the Explorer view to view and manage the files and folders in your workspace.
When you open a folder in VS Code, VS Code can restore the UI state for that folder, such as the open files, the active view, and the layout of the editor. You can also configure settings that only apply to that folder, or define debug configurations. Get more info aboutworkspaces.
Explore the user interface
Now that you have a folder open in VS Code, let's take a quick tour of the user interface.
Switch between views with the Activity Bar
Use the Activity Bar to switch between different views.
 Tip
TipHover over the Activity Bar to see the name of each view and the corresponding keyboard shortcut. You can toggle a view open and closed by selecting the view again or pressing the keyboard shortcut.
When you select a view in the Activity Bar, thePrimary Side Bar opens to show view-specific information.
For example, the Run and Debug view enables you to configure and start debugging sessions.

View and edit files with the Editor
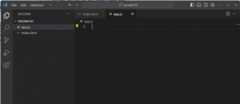
Select the Explorer view in the Activity Bar, and select theNew File... button to create a new file in your workspace.

Enter the name
index.htmland pressEnter.A file is added to your workspace and an Editor opens in the main area of the window.
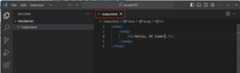
Start typing some HTML code in the
index.htmlfile.As you type, you should see suggestions popping up that help you complete your code (IntelliSense). You can use theUp andDown keys to navigate the suggestions, andTab to insert the selected suggestion.
Add more files to your workspace and notice that each file opens a new Editor tab.
You can open as many editors as you like and view them side by side vertically or horizontally. Learn more aboutside by side editing.
Access the terminal from the Panel area
VS Code has an integrated terminal. Open it by pressing⌃` (Windows, LinuxCtrl+`).
You can choose between different shells, such as PowerShell, Command Prompt, or Bash, depending on your operating system configuration.

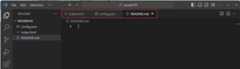
In the terminal, enter the following command to create a new file in your workspace.
echo "Hello, VS Code" >greetings.txtThe default working folder is the root of your workspace. Notice that the Explorer view automatically picks up and shows the new file.

You can open multiple terminals simultaneously. Select theLaunch Profile dropdown to view the available shells and choose one.

Access commands with the Command Palette
Open theCommand Palette by pressing⇧⌘P (Windows, LinuxCtrl+Shift+P). You can also use theView >Command Palette... menu item.
Many of the commands in VS Code are available through the Command Palette. When you install extensions, they can also add commands to the Command Palette.
 Tip
TipNotice that the Command Palette shows the default keyboard shortcut for commands that have one. You can use the keyboard shortcut to run the command directly.
The Command Palette supports different modes of operation:
After the
>symbol, start typing to filter the command list. For example, typemove terminalto find commands to move the terminal to a new window.
Remove the
>character and start typing to search for files in your workspace. You can use the⌘P (Windows, LinuxCtrl+P) keyboard shortcut to open the Command Palette and start searching for files directly.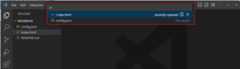
VS Code uses fuzzy matching to find files or commands. For example, typingodks returns theOpen Default Keyboard Shortcuts command.
Configure VS Code settings
You can customize almost every part of VS Code by configuring settings. You can use theSettings Editor to modify the settings in VS Code or directly modify thesettings.json file.
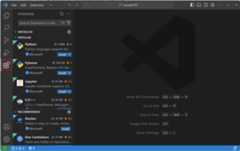
Press⌘, (Windows, LinuxCtrl+,) to open the Settings Editor (or select theFile >Preferences >Settings menu item).
 Tip
TipUse the search box to filter the list of settings that are shown.
By default, VS Code doesn't automatically save modified files. Select a value from the Auto Save dropdown to change this behavior.
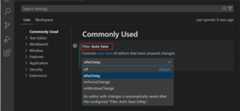
VS Code automatically applies changes to settings. When you modify a file in your workspace, it should now be automatically saved.
To revert a setting to its default value, select the gear icon next to the setting and selectReset Setting.
 Tip
TipYou can quickly find all modified settings by typing
@modifiedin the search box or selecting theModified filter.You can use the tabs in the Settings Editor to switch betweenUser settings andWorkspace settings.
User settings apply across all your workspaces. Workspace settings only apply to the current workspace. Workspace settings override user settings. Get more information aboutsettings in VS Code.
Write some code
VS Code has built-in support for JavaScript, TypeScript, HTML, CSS, and more. In this tutorial, you create a sample JavaScript file and use some of the code editing features that VS Code offers.
VS Code supports many programming languages and in a next step, you'llinstall a language extension to add support for a different language, namely Python.
In the Explorer view, create a new file
app.js, and start typing the following JavaScript code:function sayHello(name) { console.log('Hello, ' +name);}sayHello('VS Code');As you type, you should see suggestions popping up that help you complete your code (IntelliSense). You can use theUp andDown keys to navigate the suggestions, andTab to insert the selected suggestion.
Notice also the formatting of the code (syntax highlighting), to help you distinguish between different parts of the code.
When you put the cursor on the string
Hello,, you should see a lightbulb icon appear to indicate there's a Code Action.You can also use the⌃Space (Windows, LinuxCtrl+Space) keyboard shortcut to open the lightbulb menu.
Select the lightbulb icon, and then selectConvert to template string.
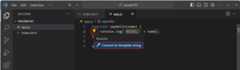
Code Actions are suggestions to apply quick fixes to your code. In this case, the Code Action converts
""Hello, " + nameinto atemplate string`Hello, ${name}`, which is a special JavaScript construct to embed expressions in strings.
Learn more about codeediting features,IntelliSense,code navigation, andrefactoring in VS Code.
Use source control
Visual Studio Code has integrated source control management (SCM) and includesGit support out-of-the-box.
Let's use the built-in Git support to commit the changes you've made previously.
Select theSource Control view in the Activity Bar to open the Source Control view.
Make sure you haveGit installed on your computer. If you don't have Git installed, you'll see a button in the Source Control view to install it on your machine.
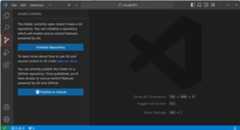
SelectInitialize Repository to create a new Git repository for your workspace.

After you initialize a repository, the Source Control view shows the changes you've made in your workspace.
You can stage individual changes by hovering over a file and selecting
+next to a file. Tip
TipTo stage all changes, hover overChanges and select theStage All Changes button.
Enter a commit message, for example
Add hello function, and then select theCommit to commit the changes to your Git repository. Tip
TipSelectGraph in the Source Control view to show a visual representation of the commit history of your Git repository.
There's a lot more to discover about source control in VS Code. Get more info aboutsource control in VS Code.
Install a language extension
VS Code has a rich ecosystem of extensions that let you add languages, debuggers, and tools to your installation to support your specific development workflow. There are thousands of extensions available in theVisual Studio Marketplace.
Let's install a language extension to add support for Python, or any other programming language you are interested in.
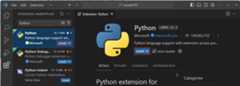
Select theExtensions view in the Activity Bar.
The Extensions view enables you to browse and install extensions from within VS Code.
EnterPython in the Extension view search box to browse for Python-related extensions. Select thePython extension published by Microsoft, and then select theInstall button.
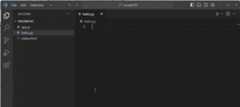
Now, create a new Python file
hello.pyin your workspace, and start typing the following Python code:def say_hello(name): print("Hello, " + name)say_hello("VS Code")Notice that you now also get suggestions and IntelliSense for the Python code.
Run and debug your code
VS Code has built-in support for running and debugging Node.js applications. In this tutorial, you use the Python extension you installed in the previous step to debug a Python program.
Let's debug thehello.py program that you created in the previous step.
Make sure thatPython 3 is installed on your computer.
If there's no Python interpreter installed on your computer, you'll see a notification in the lower right corner of the window. SelectSelect Interpreter to open theCommand Palette and select the Python interpreter you want to use or install one.
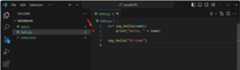
In the
hello.pyfile, place the cursor on theprintline and pressF9 to set a breakpoint.A red dot appears in the left margin of the editor, indicating that a breakpoint is set. With a breakpoint, you can pause the execution of your program at a specific line of code.
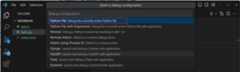
PressF5 to start a debugging session.
Select the Python debugger:
Choose to run the current Python file:
Notice that the program starts and that the execution stops at the breakpoint you set.
 Tip
TipInspect the value of the
namevariable by hovering over it in the editor while the execution is paused. You can view the value of variables at any time in theVariables view in theRun and Debug view.Press theContinue button in the Debug toolbar or pressF5 to continue the execution.

There are many more debugging features in VS Code, such as watch variables, conditional breakpoints, and launch configurations. Dive into the details ofdebugging in VS Code.
Enhance your coding with AI and GitHub Copilot
GitHub Copilot is an AI-powered assistant that helps you write code faster, and can help you with a wide range of tasks, such as code completion, code refactoring, and fixing errors.
Let's get started by getting code suggestions from Copilot.
Make sure you have set up Copilot in VS Code. Follow the steps in ourCopilot Setup guide.
TipIf you don't have a Copilot subscription yet, you can use Copilot for free by signing up for theCopilot Free plan and get a monthly limit of inline suggestions and chat interactions.
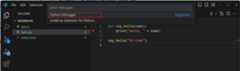
In the
hello.pyfile, place the cursor at the end of the file and type this function header.def say_day_of_week(date)GitHub Copilot will automatically suggest the rest of the function. Accept the code suggestion by pressingTab.
Next, let's invoke our new function.
say_day_of_week(date.today())Notice that there's a squiggle on the
datekeyword, indicating that there's an error.Put the cursor, on the
datekeyword, select thelightbulb icon, and then selectFix with Copilot.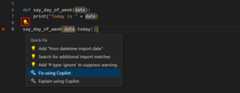
GitHub Copilot will suggest a fix for the error. SelectAccept if you're happy with the suggestion.
TipYou can also use the⌘. (Windows, LinuxCtrl+.) keyboard shortcut to manually trigger a quick fix.
There's a lot more you can do with Copilot in VS Code. Discover more about GitHub Copilot in VS Code with ourCopilot Quickstart.
Next steps
Congratulations! You've completed the tutorial and explored some of the key features of Visual Studio Code. Now that you've learned the basics of Visual Studio Code, get more info about how to: