Edit Jupyter notebooks with AI in VS Code
Visual Studio Code supports working withJupyter notebooks natively, and throughPython code files. The AI features in VS Code can help you in creating and editing notebooks, as well as analyzing and visualizing data. In this article, you learn how to use the AI features in VS Code to work with Jupyter notebooks.
Scaffold a new notebook
To accelerate getting started with a new notebook, you can use the AI features in VS Code to scaffold a new notebook. Use natural language to provide details about what functionality you want to add and which libraries you want to use.
To create a new notebook with AI, choose either of these options:
Type the
/newNotebookslash command in the chat input box, followed by the details of the notebook to create.ChooseAgent and type a natural language prompt asking to create a new notebook.
See thePrompt examples article for effective notebook prompts.
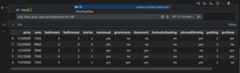
The following screenshot shows how the output from the agent to the promptCreate a Jupyter notebook to read data from #housing.csv (you can get this dataset fromKaggle):

Notice that a new.ipynb file is created, which contains Markdown and code cells for reading the CSV file and displaying the first few rows of the data.
You can now further edit the notebook manually, or use AI to make inline edits or send follow-up chat requests to modify the notebook.
Make inline edits in notebook cells
If you already have a notebook and want to make some inline changes in a cell, you can use inline chat, like you would in a code file.
To make inline edits in a cell, press⌘I (Windows, LinuxCtrl+I). This opens the inline chat view, where you can enter your prompt.
You can reference kernel variables in your chat prompt. Type# followed by the variable name to reference it. For example, if you have a variable nameddf, you can type#df in your chat prompt to reference it.
When the response is generated, notice that the code is updated in the notebook cell. You canAccept the changes and decide toAccept and Run the cell changes.
To generate a new cell with AI, select theGenerate button in the notebook view, or don't focus on a cell and press⌘I (Windows, LinuxCtrl+I) to open the inline chat view for a new cell.
Make edits across multiple cells
To make larger edits, across multiple cells, you can switch to useagents in the Chat view. Provide a prompt to request changes to the notebook and the agent will iterate through the tasks to implement the changes.
Notice that you can use the overlay controls to navigate between the different edit suggestions, and to keep or undo the changes.
Ask questions about notebook content
You can use the chat interface to ask questions about the content of your notebook. This is useful for getting explanations of code, data, or visualizations. You can add extra context to your chat request, such as the cell output, graphs, or errors.
The following example shows how to ask questions about a visualization in a notebook.
Select
...next to the graph, and selectAdd Cell Output to Chat to add the chart as context to your chat request.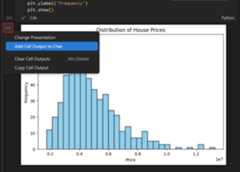
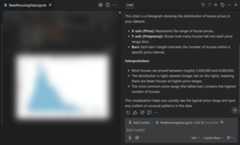
Enter the promptExplain this chart in the chat input field.
Notice that you get a detailed explanation of the chart.
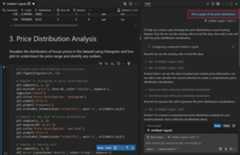
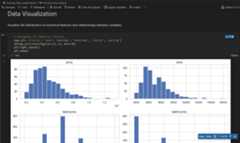
Perform data analysis and visualization
You can do a full data analysis and visualization notebook of a dataset by using agents in chat. The agent analyzes the dataset, and then scaffolds a new notebook, implements the code for performing the data analysis, and runs the cells to process and visualize the data. As needed, the agent invokes relevant tools and terminal commands to complete its tasks.
For example, to perform a data analysis of the housing dataset:
SelectAgent from the agent picker in the Chat view.
Enter the following prompt in the chat input field:Perform data analysis of the data in #housing.csv.
Notice that the agent iterates through the different tasks. When needed, approve the tool and command invocations.
The result is a new notebook with a complete data analysis of the dataset, including data cleaning, data visualization, and statistical analysis.
You can now further edit the notebook manually, or use AI to make inline edits or send follow-up chat requests to modify the notebook.
Next steps
- Learn more about Jupyter notebooks in VS Code
- Learn more about the AI features in VS Code
- Learn more about chat in VS Code