Webview API
The webview API allows extensions to create fully customizable views within Visual Studio Code. For example, the built-in Markdown extension uses webviews to render Markdown previews. Webviews can also be used to build complex user interfaces beyond what VS Code's native APIs support.
Think of a webview as aniframe within VS Code that your extension controls. A webview can render almost any HTML content in this frame, and it communicates with extensions using message passing. This freedom makes webviews incredibly powerful, and opens up a whole new range of extension possibilities.
Webviews are used in several VS Code APIs:
- With Webview Panels created using
createWebviewPanel. In this case, Webview panels are shown in VS Code as distinct editors. This makes them useful for displaying custom UI and custom visualizations. - As the view for acustom editor. Custom editors allow extensions to provide a custom UI for editing any file in the workspace. The custom editor API also lets your extension hook into editor events such as undo and redo, as well as file events such as save.
- InWebview views that are rendered in the sidebar or panel areas. See thewebview view sample extension for more details.
This page focuses on the basic webview panel API, although almost everything covered here applies to the webviews used in custom editors and webview views as well. Even if you are more interested in those APIs, we recommend reading through this page first to familiarize yourself with the webview basics.
Links
VS Code API Usage
Should I use a webview?
Webviews are pretty amazing, but they should also be used sparingly and only when VS Code's native API is inadequate. Webviews are resource heavy and run in a separate context from normal extensions. A poorly designed webview can also easily feel out of place within VS Code.
Before using a webview, please consider the following:
Does this functionality really need to live within VS Code? Would it be better as a separate application or website?
Is a webview the only way to implement your feature? Can you use the regular VS Code APIs instead?
Will your webview add enough user value to justify its high resource cost?
Remember: Just because you can do something with webviews, doesn't mean you should. However, if you are confident that you need to use webviews, then this document is here to help. Let's get started.
Webviews API basics
To explain the webview API, we are going to build a simple extension calledCat Coding. This extension will use a webview to show a gif of a cat writing some code (presumably in VS Code). As we work through the API, we'll continue adding functionality to the extension, including a counter that keeps track of how many lines of source code our cat has written and notifications that inform the user when the cat introduces a bug.
Here's thepackage.json for the first version of theCat Coding extension. You can find the complete code for the example apphere. The first version of our extensioncontributes a command calledcatCoding.start. When a user invokes this command, we will show a simple webview with our cat in it. Users will be able to invoke this command from theCommand Palette asCat Coding: Start new cat coding session or even create a keybinding for it if they are so inclined.
{ "name":"cat-coding", "description":"Cat Coding", "version":"0.0.1", "publisher":"bierner", "engines": { "vscode":"^1.74.0" }, "activationEvents": [], "main":"./out/extension.js", "contributes": { "commands": [ { "command":"catCoding.start", "title":"Start new cat coding session", "category":"Cat Coding" } ] }, "scripts": { "vscode:prepublish":"tsc -p ./", "compile":"tsc -watch -p ./", "postinstall":"node ./node_modules/vscode/bin/install" }, "dependencies": { "vscode":"*" }, "devDependencies": { "@types/node":"^9.4.6", "typescript":"^2.8.3" }}Note: If your extension targets a VS Code version prior to 1.74, you must explicitly list
onCommand:catCoding.startinactivationEvents.
Now let's implement thecatCoding.start command. In our extension's main file, we register thecatCoding.start command and use it to show a basic webview:
import * as vscode from 'vscode';export function activate(context:vscode.ExtensionContext) { context.subscriptions.push( vscode.commands.registerCommand('catCoding.start', ()=> { // Create and show a new webview const panel =vscode.window.createWebviewPanel( 'catCoding',// Identifies the type of the webview. Used internally 'Cat Coding',// Title of the panel displayed to the user vscode.ViewColumn.One,// Editor column to show the new webview panel in. {}// Webview options. More on these later. ); }) );}Thevscode.window.createWebviewPanel function creates and shows a webview in the editor. Here is what you see if you try running thecatCoding.start command in its current state:

Our command opens a new webview panel with the correct title, but with no content! To add our cat to new panel, we also need to set the HTML content of the webview usingwebview.html:
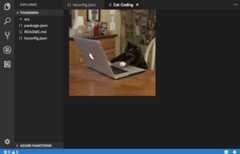
import * as vscode from 'vscode';export function activate(context:vscode.ExtensionContext) { context.subscriptions.push( vscode.commands.registerCommand('catCoding.start', ()=> { // Create and show panel const panel =vscode.window.createWebviewPanel( 'catCoding', 'Cat Coding', vscode.ViewColumn.One, {} ); // And set its HTML content panel.webview.html =getWebviewContent(); }) );}function getWebviewContent() { return `<!DOCTYPE html><html lang="en"><head> <meta charset="UTF-8"> <meta name="viewport" content="width=device-width, initial-scale=1.0"> <title>Cat Coding</title></head><body> <img src="https://media.giphy.com/media/JIX9t2j0ZTN9S/giphy.gif" width="300" /></body></html>`;}If you run the command again, now the webview looks like this:

Progress!
webview.html should always be a complete HTML document. HTML fragments or malformed HTML may cause unexpected behavior.
Updating webview content
webview.html can also update a webview's content after it has been created. Let's use this to makeCat Coding more dynamic by introducing a rotation of cats:
import * as vscode from 'vscode';const cats = { 'Coding Cat': 'https://media.giphy.com/media/JIX9t2j0ZTN9S/giphy.gif', 'Compiling Cat': 'https://media.giphy.com/media/mlvseq9yvZhba/giphy.gif'};export function activate(context:vscode.ExtensionContext) { context.subscriptions.push( vscode.commands.registerCommand('catCoding.start', ()=> { const panel =vscode.window.createWebviewPanel( 'catCoding', 'Cat Coding', vscode.ViewColumn.One, {} ); let iteration =0; const updateWebview = ()=> { const cat =iteration++ %2 ?'Compiling Cat' :'Coding Cat'; panel.title =cat; panel.webview.html =getWebviewContent(cat); }; // Set initial content updateWebview(); // And schedule updates to the content every second setInterval(updateWebview,1000); }) );}function getWebviewContent(cat:keyof typeof cats) { return `<!DOCTYPE html><html lang="en"><head> <meta charset="UTF-8"> <meta name="viewport" content="width=device-width, initial-scale=1.0"> <title>Cat Coding</title></head><body> <img src="${cats[cat]}" width="300" /></body></html>`;}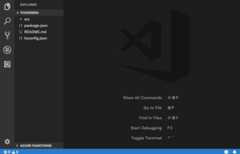
Settingwebview.html replaces the entire webview content, similar to reloading an iframe. This is important to remember once you start using scripts in a webview, since it means that settingwebview.html also resets the script's state.
The example above also useswebview.title to change the title of the document displayed in the editor. Setting the title does not cause the webview to be reloaded.
Lifecycle
Webview panels are owned by the extension that creates them. The extension must hold onto the webview returned fromcreateWebviewPanel. If your extension loses this reference, it cannot regain access to that webview again, even though the webview will continue to show in VS Code.
As with text editors, a user can also close a webview panel at any time. When a webview panel is closed by the user, the webview itself is destroyed. Attempting to use a destroyed webview throws an exception. This means that the example above usingsetInterval actually has an important bug: if the user closes the panel,setInterval will continue to fire, which will try to updatepanel.webview.html, which of course will throw an exception. Cats hate exceptions. Let's fix this!
TheonDidDispose event is fired when a webview is destroyed. We can use this event to cancel further updates and clean up the webview's resources:
import * as vscode from 'vscode';const cats = { 'Coding Cat': 'https://media.giphy.com/media/JIX9t2j0ZTN9S/giphy.gif', 'Compiling Cat': 'https://media.giphy.com/media/mlvseq9yvZhba/giphy.gif'};export function activate(context:vscode.ExtensionContext) { context.subscriptions.push( vscode.commands.registerCommand('catCoding.start', ()=> { const panel =vscode.window.createWebviewPanel( 'catCoding', 'Cat Coding', vscode.ViewColumn.One, {} ); let iteration =0; const updateWebview = ()=> { const cat =iteration++ %2 ?'Compiling Cat' :'Coding Cat'; panel.title =cat; panel.webview.html =getWebviewContent(cat); }; updateWebview(); const interval =setInterval(updateWebview,1000); panel.onDidDispose( ()=> { // When the panel is closed, cancel any future updates to the webview content clearInterval(interval); }, null, context.subscriptions ); }) );}Extensions can also programmatically close webviews by callingdispose() on them. If, for example, we wanted to restrict our cat's workday to five seconds:
export function activate(context:vscode.ExtensionContext) { context.subscriptions.push( vscode.commands.registerCommand('catCoding.start', ()=> { const panel =vscode.window.createWebviewPanel( 'catCoding', 'Cat Coding', vscode.ViewColumn.One, {} ); panel.webview.html =getWebviewContent('Coding Cat'); // After 5sec, programmatically close the webview panel const timeout =setTimeout(()=> panel.dispose(),5000); panel.onDidDispose( ()=> { // Handle user closing panel before the 5sec have passed clearTimeout(timeout); }, null, context.subscriptions ); }) );}Visibility and Moving
When a webview panel is moved into a background tab, it becomes hidden. It is not destroyed however. VS Code will automatically restore the webview's content fromwebview.html when the panel is brought to the foreground again:
The.visible property tells you if the webview panel is currently visible or not.
Extensions can programmatically bring a webview panel to the foreground by callingreveal(). This method takes an optional target view column to show the panel in. A webview panel may only show in a single editor column at a time. Callingreveal() or dragging a webview panel to a new editor column moves the webview into that new column.
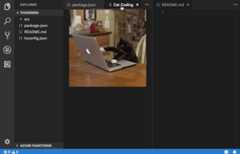
Let's update our extension to only allow a single webview to exist at a time. If the panel is in the background, then thecatCoding.start command will bring it to the foreground:
export function activate(context:vscode.ExtensionContext) { // Track the current panel with a webview let currentPanel:vscode.WebviewPanel |undefined =undefined; context.subscriptions.push( vscode.commands.registerCommand('catCoding.start', ()=> { const columnToShowIn =vscode.window.activeTextEditor ?vscode.window.activeTextEditor.viewColumn :undefined; if (currentPanel) { // If we already have a panel, show it in the target column currentPanel.reveal(columnToShowIn); }else { // Otherwise, create a new panel currentPanel =vscode.window.createWebviewPanel( 'catCoding', 'Cat Coding', columnToShowIn ||vscode.ViewColumn.One, {} ); currentPanel.webview.html =getWebviewContent('Coding Cat'); // Reset when the current panel is closed currentPanel.onDidDispose( ()=> { currentPanel =undefined; }, null, context.subscriptions ); } }) );}Here's the new extension in action:

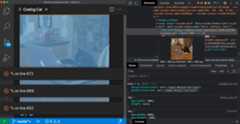
Whenever a webview's visibility changes, or when a webview is moved into a new column, theonDidChangeViewState event is fired. Our extension can use this event to change cats based on which column the webview is showing in:
const cats = { 'Coding Cat': 'https://media.giphy.com/media/JIX9t2j0ZTN9S/giphy.gif', 'Compiling Cat': 'https://media.giphy.com/media/mlvseq9yvZhba/giphy.gif', 'Testing Cat': 'https://media.giphy.com/media/3oriO0OEd9QIDdllqo/giphy.gif'};export function activate(context:vscode.ExtensionContext) { context.subscriptions.push( vscode.commands.registerCommand('catCoding.start', ()=> { const panel =vscode.window.createWebviewPanel( 'catCoding', 'Cat Coding', vscode.ViewColumn.One, {} ); panel.webview.html =getWebviewContent('Coding Cat'); // Update contents based on view state changes panel.onDidChangeViewState( e => { const panel =e.webviewPanel; switch (panel.viewColumn) { case vscode.ViewColumn.One: updateWebviewForCat(panel,'Coding Cat'); return; case vscode.ViewColumn.Two: updateWebviewForCat(panel,'Compiling Cat'); return; case vscode.ViewColumn.Three: updateWebviewForCat(panel,'Testing Cat'); return; } }, null, context.subscriptions ); }) );}function updateWebviewForCat(panel:vscode.WebviewPanel,catName:keyof typeof cats) { panel.title =catName; panel.webview.html =getWebviewContent(catName);}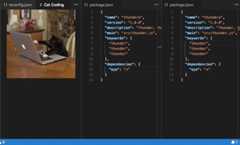
Inspecting and debugging webviews
TheDeveloper: Toggle Developer Tools command opens aDeveloper Tools window that you can use debug and inspect your webviews.
Note that if you are using a version of VS Code older than 1.56, or if you are trying to debug a webview that setsenableFindWidget, you must instead use theDeveloper: Open Webview Developer Tools command. This command opens a dedicated Developer Tools page for each webview instead of using a Developer Tools page that is shared by all webviews and the editor itself.
From the Developer Tools, you can start inspecting the contents of your webview using the inspect tool located in the top left corner of the Developer Tools window:

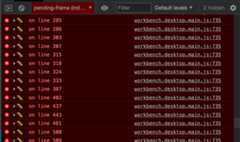
You can also view all of the errors and logs from your webview in the developer tools console:
To evaluate an expression in the context of your webview, make sure to select theactive frame environment from the dropdown in the top left corner of the Developer tools console panel:
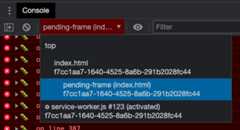
Theactive frame environment is where the webview scripts themselves are executed.
In addition, theDeveloper: Reload Webview command reloads all active webviews. This can be helpful if you need to reset a webview's state, or if some webview content on disk has changed and you want the new content to be loaded.
Loading local content
Webviews run in isolated contexts that cannot directly access local resources. This is done for security reasons. This means that in order to load images, stylesheets, and other resources from your extension, or to load any content from the user's current workspace, you must use theWebview.asWebviewUri function to convert a localfile: URI into a special URI that VS Code can use to load a subset of local resources.
Imagine that we want to start bundling the cat gifs into our extension rather than pulling them from Giphy. To do this, we first create a URI to the file on disk and then pass these URIs through theasWebviewUri function:
import * as vscode from 'vscode';export function activate(context:vscode.ExtensionContext) { context.subscriptions.push( vscode.commands.registerCommand('catCoding.start', ()=> { const panel =vscode.window.createWebviewPanel( 'catCoding', 'Cat Coding', vscode.ViewColumn.One, {} ); // Get path to resource on disk const onDiskPath =vscode.Uri.joinPath(context.extensionUri,'media','cat.gif'); // And get the special URI to use with the webview const catGifSrc =panel.webview.asWebviewUri(onDiskPath); panel.webview.html =getWebviewContent(catGifSrc); }) );}function getWebviewContent(catGifSrc:vscode.Uri) { return `<!DOCTYPE html><html lang="en"><head> <meta charset="UTF-8"> <meta name="viewport" content="width=device-width, initial-scale=1.0"> <title>Cat Coding</title></head><body> <img src="${catGifSrc}" width="300" /></body></html>`;}If we debug this code, we'd see that the actual value forcatGifSrc is something like:
vscode-resource:/Users/toonces/projects/vscode-cat-coding/media/cat.gifVS Code understands this special URI and will use it to load our gif from the disk!
By default, webviews can only access resources in the following locations:
- Within your extension's install directory.
- Within the user's currently active workspace.
Use theWebviewOptions.localResourceRoots to allow access to additional local resources.
You can also always use data URIs to embed resources directly within the webview.
Controlling access to local resources
Webviews can control which resources can be loaded from the user's machine withlocalResourceRoots option.localResourceRoots defines a set of root URIs from which local content may be loaded.
We can uselocalResourceRoots to restrictCat Coding webviews to only load resources from amedia directory in our extension:
import * as vscode from 'vscode';export function activate(context:vscode.ExtensionContext) { context.subscriptions.push( vscode.commands.registerCommand('catCoding.start', ()=> { const panel =vscode.window.createWebviewPanel( 'catCoding', 'Cat Coding', vscode.ViewColumn.One, { // Only allow the webview to access resources in our extension's media directory localResourceRoots: [vscode.Uri.joinPath(context.extensionUri,'media')] } ); const onDiskPath =vscode.Uri.joinPath(context.extensionUri,'media','cat.gif'); const catGifSrc =panel.webview.asWebviewUri(onDiskPath); panel.webview.html =getWebviewContent(catGifSrc); }) );}To disallow all local resources, just setlocalResourceRoots to[].
In general, webviews should be as restrictive as possible in loading local resources. However, keep in mind thatlocalResourceRoots does not offer complete security protection on its own. Make sure your webview also followssecurity best practices, and add acontent security policy to further restrict the content that can be loaded.
Theming webview content
Webview can use CSS to change their appearance based on VS Code's current theme. VS Code groups themes into three categories, and adds a special class to thebody element to indicate the current theme:
vscode-light- Light themes.vscode-dark- Dark themes.vscode-high-contrast- High contrast themes.
The following CSS changes the text color of the webview based on the user's current theme:
body.vscode-light { color:black;}body.vscode-dark { color:white;}body.vscode-high-contrast { color:red;}When developing a webview application, make sure that it works for the three types of themes. And always test your webview in high-contrast mode to make sure it will be usable by people with visual disabilities.
Webviews can also access VS Code theme colors usingCSS variables. These variable names are prefixed withvscode and replace the. with-. For exampleeditor.foreground becomesvar(--vscode-editor-foreground):
code { color:var(--vscode-editor-foreground);}Review theTheme Color Reference for the available theme variables.An extension is available which provides IntelliSense suggestions for the variables.
The following font related variables are also defined:
--vscode-editor-font-family- Editor font family (from theeditor.fontFamilysetting).--vscode-editor-font-weight- Editor font weight (from theeditor.fontWeightsetting).--vscode-editor-font-size- Editor font size (from theeditor.fontSizesetting).
Finally, for special cases where you need to write CSS that targets a single theme, the body element of webviews has a data attribute calledvscode-theme-id that stores the ID of the currently active theme. This lets you write theme-specific CSS for webviews:
body[data-vscode-theme-id="One Dark Pro"] { background:hotpink;}Supported media formats
Webviews support audio and video, however not every media codec or media file container type is supported.
The following audio formats can be used in Webviews:
- Wav
- Mp3
- Ogg
- Flac
The following video formats can be used in webviews:
- H.264
- VP8
For video files, make sure that both the video and audio track's media formats are supported. Many.mp4 files for example useH.264 for video andAAC audio. VS Code will be able to play the video part of themp4, but sinceAAC audio is not supported there won't be any sound. Instead you need to usemp3 for the audio track.
Context menus
Advanced webviews can customize the context menu that shows when a user right-clicks inside of a webview. This is done using acontribution point similarly to VS Code's normal context menus, so custom menus fit right in with the rest of the editor. Webviews can also show custom context menus for different sections of the webview.
To add a new context menu item to your webview, first add a new entry inmenus under the newwebview/context section. Each contribution takes acommand (which is also where the item's title comes from) and awhen clause. Thewhen clause should includewebviewId == 'YOUR_WEBVIEW_VIEW_TYPE' to make sure the context menus only apply to your extension's webviews:
"contributes": { "menus": { "webview/context": [ { "command":"catCoding.yarn", "when":"webviewId == 'catCoding'" }, { "command":"catCoding.insertLion", "when":"webviewId == 'catCoding' && webviewSection == 'editor'" } ] }, "commands": [ { "command":"catCoding.yarn", "title":"Yarn 🧶", "category":"Cat Coding" }, { "command":"catCoding.insertLion", "title":"Insert 🦁", "category":"Cat Coding" }, ... ]}Inside of the webview, you can also set the contexts for specific areas of the HTML using thedata-vscode-contextdata attribute (or in JavaScript withdataset.vscodeContext). Thedata-vscode-context value is a JSON object that specifies the contexts to set when the user right-clicks on the element. The final context is determined by going from the document root to the element that was clicked.
Consider this HTML for example:
<div class="main" data-vscode-context='{"webviewSection": "main", "mouseCount": 4}'> <h1>Cat Coding</h1> <textarea data-vscode-context='{"webviewSection": "editor", "preventDefaultContextMenuItems": true}'></textarea></div>If the user right-clicks on thetextarea, the following contexts will be set:
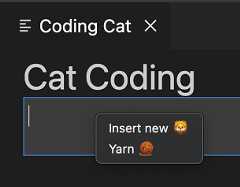
webviewSection == 'editor'- This overrideswebviewSectionfrom the parent element.mouseCount == 4- This is inherited from the parent element.preventDefaultContextMenuItems == true- This is a special context that hides the copy and paste entries that VS Code normally adds to webview context menus.
If the user right-clicks inside of the<textarea>, they will see:
Sometimes it can be useful to show a menu on left/primary click. For example, to show a menu on a split button. You can do this by dispatching thecontextmenu event in anonClick event:
<button data-vscode-context='{"preventDefaultContextMenuItems": true }' onClick='((e) => { e.preventDefault(); e.target.dispatchEvent(new MouseEvent("contextmenu", { bubbles: true, clientX: e.clientX, clientY: e.clientY })); e.stopPropagation(); })(event)'>Create</button>
Scripts and message passing
Webviews are just like iframes, which means that they can also run scripts. JavaScript is disabled in webviews by default, but it can easily re-enable by passing in theenableScripts: true option.
Let's use a script to add a counter tracking the lines of source code our cat has written. Running a basic script is pretty simple, but note that this example is only for demonstration purposes. In practice, your webview should always disable inline scripts using acontent security policy:
import * as path from 'path';import * as vscode from 'vscode';export function activate(context:vscode.ExtensionContext) { context.subscriptions.push( vscode.commands.registerCommand('catCoding.start', ()=> { const panel =vscode.window.createWebviewPanel( 'catCoding', 'Cat Coding', vscode.ViewColumn.One, { // Enable scripts in the webview enableScripts: true } ); panel.webview.html =getWebviewContent(); }) );}function getWebviewContent() { return `<!DOCTYPE html><html lang="en"><head> <meta charset="UTF-8"> <meta name="viewport" content="width=device-width, initial-scale=1.0"> <title>Cat Coding</title></head><body> <img src="https://media.giphy.com/media/JIX9t2j0ZTN9S/giphy.gif" width="300" /> <h1>0</h1> <script> const counter = document.getElementById('lines-of-code-counter'); let count = 0; setInterval(() => { counter.textContent = count++; }, 100); </script></body></html>`;}
Wow! That's one productive cat.
Webview scripts can do just about anything that a script on a normal webpage can. Keep in mind though that webviews exist in their own context, so scripts in a webview do not have access to the VS Code API. That's where message passing comes in!
Passing messages from an extension to a webview
An extension can send data to its webviews usingwebview.postMessage(). This method sends any JSON serializable data to the webview. The message is received inside the webview through the standardmessage event.
To demonstrate this, let's add a new command toCat Coding that instructs the currently coding cat to refactor their code (thereby reducing the total number of lines). The newcatCoding.doRefactor command usepostMessage to send the instruction to the current webview, andwindow.addEventListener('message', event => { ... }) inside the webview itself to handle the message:
export function activate(context:vscode.ExtensionContext) { // Only allow a single Cat Coder let currentPanel:vscode.WebviewPanel |undefined =undefined; context.subscriptions.push( vscode.commands.registerCommand('catCoding.start', ()=> { if (currentPanel) { currentPanel.reveal(vscode.ViewColumn.One); }else { currentPanel =vscode.window.createWebviewPanel( 'catCoding', 'Cat Coding', vscode.ViewColumn.One, { enableScripts: true } ); currentPanel.webview.html =getWebviewContent(); currentPanel.onDidDispose( ()=> { currentPanel =undefined; }, undefined, context.subscriptions ); } }) ); // Our new command context.subscriptions.push( vscode.commands.registerCommand('catCoding.doRefactor', ()=> { if (!currentPanel) { return; } // Send a message to our webview. // You can send any JSON serializable data. currentPanel.webview.postMessage({command: 'refactor' }); }) );}function getWebviewContent() { return `<!DOCTYPE html><html lang="en"><head> <meta charset="UTF-8"> <meta name="viewport" content="width=device-width, initial-scale=1.0"> <title>Cat Coding</title></head><body> <img src="https://media.giphy.com/media/JIX9t2j0ZTN9S/giphy.gif" width="300" /> <h1>0</h1> <script> const counter = document.getElementById('lines-of-code-counter'); let count = 0; setInterval(() => { counter.textContent = count++; }, 100); // Handle the message inside the webview window.addEventListener('message', event => { const message = event.data; // The JSON data our extension sent switch (message.command) { case 'refactor': count = Math.ceil(count * 0.5); counter.textContent = count; break; } }); </script></body></html>`;}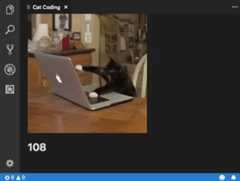
Passing messages from a webview to an extension
Webviews can also pass messages back to their extension. This is accomplished using apostMessage function on a special VS Code API object inside the webview. To access the VS Code API object, callacquireVsCodeApi inside the webview. This function can only be invoked once per session. You must hang onto the instance of the VS Code API returned by this method, and hand it out to any other functions that need to use it.
We can use the VS Code API andpostMessage in ourCat Coding webview to alert the extension when our cat introduces a bug in their code:
export function activate(context:vscode.ExtensionContext) { context.subscriptions.push( vscode.commands.registerCommand('catCoding.start', ()=> { const panel =vscode.window.createWebviewPanel( 'catCoding', 'Cat Coding', vscode.ViewColumn.One, { enableScripts: true } ); panel.webview.html =getWebviewContent(); // Handle messages from the webview panel.webview.onDidReceiveMessage( message => { switch (message.command) { case 'alert': vscode.window.showErrorMessage(message.text); return; } }, undefined, context.subscriptions ); }) );}function getWebviewContent() { return `<!DOCTYPE html><html lang="en"><head> <meta charset="UTF-8"> <meta name="viewport" content="width=device-width, initial-scale=1.0"> <title>Cat Coding</title></head><body> <img src="https://media.giphy.com/media/JIX9t2j0ZTN9S/giphy.gif" width="300" /> <h1>0</h1> <script> (function() { const vscode = acquireVsCodeApi(); const counter = document.getElementById('lines-of-code-counter'); let count = 0; setInterval(() => { counter.textContent = count++; // Alert the extension when our cat introduces a bug if (Math.random() < 0.001 * count) { vscode.postMessage({ command: 'alert', text: '🐛 on line ' + count }) } }, 100); }()) </script></body></html>`;}
For security reasons, you must keep the VS Code API object private and make sure it is never leaked into the global scope.
Using Web Workers
Web Workers are supported inside of webviews but there are a few important restrictions to be aware of.
First off, workers can only be loaded using either adata: orblob: URI. You cannot directly load a worker from your extension's folder.
If you do need to load worker code from a JavaScript file in your extension, try usingfetch:
const workerSource ='absolute/path/to/worker.js';fetch(workerSource) .then(result => result.blob()) .then(blob => { const blobUrl =URL.createObjectURL(blob); new Worker(blobUrl); });Worker scripts also do not support importing source code usingimportScripts orimport(...). If your worker loads code dynamically, try using a bundler such aswebpack to package the worker script into a single file.
Withwebpack, you can useLimitChunkCountPlugin to force the compiled worker JavaScript to be a single file:
const path =require('path');const webpack =require('webpack');module.exports = { target: 'webworker', entry: './worker/src/index.js', output: { filename: 'worker.js', path: path.resolve(__dirname,'media') }, plugins: [ new webpack.optimize.LimitChunkCountPlugin({ maxChunks: 1 }) ]};Security
As with any webpage, when creating a webview, you must follow some basic security best practices.
Limit capabilities
A webview should have the minimum set of capabilities that it needs. For example, if your webview does not need to run scripts, do not set theenableScripts: true. If your webview does not need to load resources from the user's workspace, setlocalResourceRoots to[vscode.Uri.file(extensionContext.extensionPath)] or even[] to disallow access to all local resources.
Content security policy
Content security policies further restrict the content that can be loaded and executed in webviews. For example, a content security policy can make sure that only a list of allowed scripts can be run in the webview, or even tell the webview to only load images overhttps.
To add a content security policy, put a<meta http-equiv="Content-Security-Policy"> directive at the top of the webview's<head>
function getWebviewContent() { return `<!DOCTYPE html><html lang="en"><head> <meta charset="UTF-8"> <meta http-equiv="Content-Security-Policy" content="default-src 'none';"> <meta name="viewport" content="width=device-width, initial-scale=1.0"> <title>Cat Coding</title></head><body> ...</body></html>`;}The policydefault-src 'none'; disallows all content. We can then turn back on the minimal amount of content that our extension needs to function. Here's a content security policy that allows loading local scripts and stylesheets, and loading images overhttps:
<meta http-equiv="Content-Security-Policy" content="default-src 'none'; img-src ${webview.cspSource} https:; script-src ${webview.cspSource}; style-src ${webview.cspSource};"/>The${webview.cspSource} value is a placeholder for a value that comes from the webview object itself. See thewebview sample for a complete example of how to use this value.
This content security policy also implicitly disables inline scripts and styles. It is a best practice to extract all inline styles and scripts to external files so that they can be properly loaded without relaxing the content security policy.
Only load content over https
If your webview allows loading external resources, it is strongly recommended that you only allow these resources to be loaded overhttps and not over http. The example content security policy above already does this by only allowing images to be loaded overhttps:.
Sanitize all user input
Just as you would for a normal webpage, when constructing the HTML for a webview, you must sanitize all user input. Failing to properly sanitize input can allow content injections, which may open your users up to a security risk.
Example values that must be sanitized:
- File contents.
- File and folder paths.
- User and workspace settings.
Consider using a helper library to construct your HTML strings, or at least ensure that all content from the user's workspace is properly sanitized.
Never rely on sanitization alone for security. Make sure to follow the other security best practices, such as having acontent security policy to minimize the impact of any potential content injections.
Persistence
In the standard webviewlifecycle, webviews are created bycreateWebviewPanel and destroyed when the user closes them or when.dispose() is called. The contents of webviews however are created when the webview becomes visible and destroyed when the webview is moved into the background. Any state inside the webview will be lost when the webview is moved to a background tab.
The best way to solve this is to make your webview stateless. Usemessage passing to save off the webview's state and then restore the state when the webview becomes visible again.
getState and setState
Scripts running inside a webview can use thegetState andsetState methods to save off and restore a JSON serializable state object. This state is persisted even after the webview content itself is destroyed when a webview panel becomes hidden. The state is destroyed when the webview panel is destroyed.
// Inside a webview scriptconst vscode =acquireVsCodeApi();const counter =document.getElementById('lines-of-code-counter');// Check if we have an old state to restore fromconst previousState =vscode.getState();let count =previousState ?previousState.count :0;counter.textContent =count;setInterval(()=> { counter.textContent =count++; // Update the saved state vscode.setState({count });},100);getState andsetState are the preferred way to persist state, as they have much lower performance overhead thanretainContextWhenHidden.
Serialization
By implementing aWebviewPanelSerializer, your webviews can be automatically restored when VS Code restarts. Serialization builds ongetState andsetState, and is only enabled if your extension registers aWebviewPanelSerializer for your webviews.
To make our coding cats persist across VS Code restarts, first add aonWebviewPanel activation event to the extension'spackage.json:
"activationEvents": [ ..., "onWebviewPanel:catCoding"]This activation event ensures that our extension will be activated whenever VS Code needs to restore a webview with the viewType:catCoding.
Then, in our extension'sactivate method, callregisterWebviewPanelSerializer to register a newWebviewPanelSerializer. TheWebviewPanelSerializer is responsible for restoring the contents of the webview from its persisted state. This state is the JSON blob that the webview contents set usingsetState.
export function activate(context:vscode.ExtensionContext) { // Normal setup... // And make sure we register a serializer for our webview type vscode.window.registerWebviewPanelSerializer('catCoding',new CatCodingSerializer());}class CatCodingSerializer implements vscode.WebviewPanelSerializer { async deserializeWebviewPanel(webviewPanel:vscode.WebviewPanel,state:any) { // `state` is the state persisted using `setState` inside the webview console.log(`Got state:${state}`); // Restore the content of our webview. // // Make sure we hold on to the `webviewPanel` passed in here and // also restore any event listeners we need on it. webviewPanel.webview.html =getWebviewContent(); }}Now if you restart VS Code with a cat coding panel open, the panel will be automatically restored in the same editor position.
retainContextWhenHidden
For webviews with very complex UI or state that cannot be quickly saved and restored, you can instead use theretainContextWhenHidden option. This option makes a webview keep its content around but in a hidden state, even when the webview itself is no longer in the foreground.
AlthoughCat Coding can hardly be said to have complex state, let's try enablingretainContextWhenHidden to see how the option changes a webview's behavior:
import * as vscode from 'vscode';export function activate(context:vscode.ExtensionContext) { context.subscriptions.push( vscode.commands.registerCommand('catCoding.start', ()=> { const panel =vscode.window.createWebviewPanel( 'catCoding', 'Cat Coding', vscode.ViewColumn.One, { enableScripts: true, retainContextWhenHidden: true } ); panel.webview.html =getWebviewContent(); }) );}function getWebviewContent() { return `<!DOCTYPE html><html lang="en"><head> <meta charset="UTF-8"> <meta name="viewport" content="width=device-width, initial-scale=1.0"> <title>Cat Coding</title></head><body> <img src="https://media.giphy.com/media/JIX9t2j0ZTN9S/giphy.gif" width="300" /> <h1>0</h1> <script> const counter = document.getElementById('lines-of-code-counter'); let count = 0; setInterval(() => { counter.textContent = count++; }, 100); </script></body></html>`;}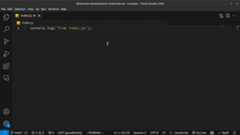
Notice how the counter does not reset now when the webview is hidden and then restored. No extra code required! WithretainContextWhenHidden, the webview acts similarly to a background tab in a web browser. Scripts and other dynamic content keep running even when the tab is not active or visible. You can also send messages to a hidden webview whenretainContextWhenHidden is enabled.
AlthoughretainContextWhenHidden may be appealing, keep in mind that this has high memory overhead and should only be used when other persistence techniques will not work.
Accessibility
The classvscode-using-screen-reader will be added to your webview's main body in contexts where the user is operating VS Code with a screen reader. Additionally, the classvscode-reduce-motion will be added to the document's main body element in cases where the user has expressed a preference to reduce the amount of motion in the window. By observing these classes and adjusting your rendering accordingly, your webview content can better reflect the user's preferences.
Next steps
If you'd like to learn more about VS Code extensibility, try these topics:
- Extension API - Learn about the full VS Code Extension API.
- Extension Capabilities - Take a look at other ways to extend VS Code.