

Migrate Node.js apps from Heroku to Cloud Run
This tutorial describes how to migrate Node.js web apps that are running onHeroku to Cloud Run on Google Cloud. This tutorialis intended for architects and product owners who want to migrate their appsfrom Heroku to managed services on Google Cloud.
Cloud Run is a managed compute platform that lets you runstateless containers that are invocable through HTTP requests. It is built onopen sourceKnative,which enables portability across platforms and supports container workflows andstandards for continuous delivery. The Cloud Run platform is wellintegrated with the Google Cloud product suite and makes it easier for youto design and develop apps that are portable, scalable, and resilient.
In this tutorial, you learn how to migrate an app to Google Cloud that'swritten in Node.js and usesHeroku Postgres as a backing service on Heroku. The web app is containerized and hosted inCloud Run and uses Cloud SQL for PostgreSQL as its persistencelayer.
In the tutorial, you use a simple app called Tasks that lets you view and createtasks. These tasks are stored in Heroku Postgres in the current deployment ofthe app on Heroku.
This tutorial assumes that you are familiar with the basic functionality ofHeroku and that you have a Heroku account (or access to one). It also assumes you arefamiliar withCloud Run,Cloud SQL,Docker,andNode.js.
Objectives
- Build a Docker image to deploy the app to Cloud Run.
- Create a Cloud SQL for PostgreSQL instance to serve as thebackend after migration to Google Cloud.
- Review the Node.js code to understand how Cloud Runconnects to Cloud SQL and to see the code changes (if any) thatare required in order to migrate to Cloud Run from Heroku.
- Migrate data from Heroku Postgres to Cloud SQL for PostgreSQL.
- Deploy the app to Cloud Run.
- Test the deployed app.
Costs
In this document, you use the following billable components of Google Cloud:
To generate a cost estimate based on your projected usage, use thepricing calculator.
You might also be charged for the resources you use on Heroku.
Before you begin
- Sign in to your Google Cloud account. If you're new to Google Cloud, create an account to evaluate how our products perform in real-world scenarios. New customers also get $300 in free credits to run, test, and deploy workloads.
In the Google Cloud console, on the project selector page, select or create a Google Cloud project.
Roles required to select or create a project
- Select a project: Selecting a project doesn't require a specific IAM role—you can select any project that you've been granted a role on.
- Create a project: To create a project, you need the Project Creator role (
roles/resourcemanager.projectCreator), which contains theresourcemanager.projects.createpermission.Learn how to grant roles.
Verify that billing is enabled for your Google Cloud project.
Enable the Cloud SQL, Cloud Build, Cloud Run, Container Registry, Service Networking, Serverless VPC Access APIs.
Roles required to enable APIs
To enable APIs, you need the Service Usage Admin IAM role (
roles/serviceusage.serviceUsageAdmin), which contains theserviceusage.services.enablepermission.Learn how to grant roles.Make sure that you have the following role or roles on the project: Cloud Run > Cloud Run Admin, Cloud Storage > Storage Admin, Cloud SQL > Cloud SQL Admin, Compute Engine > Compute Network Admin, Resource Manager > Project IAM Admin, Cloud Build > Cloud Build Editor, Serverless VPC Access > Serverless VPC Access Admin, Logging > Logs Viewer, Service Accounts > Service Account Admin, Service Accounts > Service Account User, and Service Usage > Service Usage Consumer
Check for the roles
In the Google Cloud console, go to theIAM page.
Go to IAM- Select the project.
In thePrincipal column, find all rows that identify you or a group that you're included in. To learn which groups you're included in, contact your administrator.
- For all rows that specify or include you, check theRole column to see whether the list of roles includes the required roles.
Grant the roles
In the Google Cloud console, go to theIAM page.
Go to IAM- Select the project.
- ClickGrant access.
In theNew principals field, enter your user identifier. This is typically the email address for a Google Account.
- In theSelect a role list, select a role.
- To grant additional roles, clickAdd another role and add each additional role.
- ClickSave.
Set up your environment
Open Cloud Shell.
In Cloud Shell, set environment variables and default values forthe Google Cloud CLI used in this tutorial.
gcloud config set projectPROJECT_IDgcloud config set run/region us-central1
Replace
PROJECT_IDwith your project ID.
Architecture
The following figures outline the web app's architecture on Heroku (as is) andits architectural layout on Google Cloud (that you will build).

The Tasks app that's currently deployed in Heroku consists of one or more webdynos. Web dynos are able to receive and respond to HTTP traffic, unlike workerdynos, which are better suited for background jobs and timed tasks. The appserves an index page that displays tasks stored in a Postgres database, usingthe Mustache templating library for Node.js.
You can access the app at an HTTPS URL. A/tasks route at that URL lets youcreate new tasks.

On Google Cloud, Cloud Run is used as the serverlessplatform to deploy the Tasks app. Cloud Run is designed to runstateless, request-driven containers. It is well suited for when you need yourmanaged service to support containerized apps that autoscale and also scale tozero when they're not serving traffic.
Map components used in Heroku to Google Cloud
The following table maps components in the Heroku platform to Google Cloud.This mapping helps you translate the architecture outlined in this tutorial fromHeroku to Google Cloud.
| Component | Heroku platform | Google Cloud |
|---|---|---|
| Containers | Dynos:Heroku uses the container model to build and scale Heroku apps. These Linuxcontainers are calleddynos and can scale to a number that you specifyto support resource demands for your Heroku app. You can select from a rangeof dyno types based on your app's memory and CPU requirements. | Cloud Run containers: Google Cloudsupports running containerized workloads in stateless containers that can be runin a fully managed environment or in Google Kubernetes Engine (GKE)clusters. |
| Web app | Heroku app: Dynos are the building blocks of Heroku apps.Apps usually consist of one or more dyno types, usually a combination ofweb and worker dynos. | Cloud Run service: A web app can be modeledas a Cloud Run service. Each service gets its own HTTPSendpoint and can automatically scale up or down from 0 to N based on thetraffic to your service endpoint. |
| Database | Heroku Postgres is Heroku's database as a service (DaaS) based onPostgreSQL. | Cloud SQL is a managed databaseservice for relational databases on Google Cloud. |
Deploy the sample Tasks web app to Heroku
The next sections show how to set up the command-line interface (CLI) forHeroku, clone the GitHub source repository, and deploy the app to Heroku.
Set up the command-line interface for Heroku
This tutorial runs the Heroku CLI in Cloud Shell and mustauthenticate using a Heroku API key. When running in Cloud Shell, the Heroku CLI cannot authenticate using a password or web-based authentication.
Alternatively, if you do run the sample on a local terminal, you can use any Heroku CLI authentication method. When running the tutorial on a local terminal, you must also installGoogle Cloud CLI,git, andDocker.
Log in to theweb console for Heroku,and then from your account settings page, copy the value of your API key.
In Cloud Shell,install the Heroku CLI
In Cloud Shell, authenticate the Heroku CLI. When prompted for yourpassword, enter the value of your API key that you copied from the Herokuconsole, not the password you use to sign in to the console.
heroku login --interactive
Clone the source repository
In Cloud Shell, clone the sample Tasks app GitHub repository:
git clone https://github.com/GoogleCloudPlatform/migrate-webapp-heroku-to-cloudrun-node.git
Change directories to the directory created by cloning the repository:
cd migrate-webapp-heroku-to-cloudrun-node
The directory contains the following files:
- A Node.js script called
index.jswith the code for theroutes served by the web app. package.jsonandpackage-lock.jsonfiles thatoutline the web app's dependencies. You must install these dependenciesin order for the app to run.- A
Procfilefile that specifies the command that the app executeson startup. You create aProcfilefile to deploy your app toHeroku. - A
viewsdirectory, with the HTML content served by the webapp on the "/" route. - A
.gitignorefile.
- A Node.js script called
Deploy an app to Heroku
In Cloud Shell, create a Heroku app:
heroku create
Make note of the name created for the app. You need this value inthe next step.
Create an environment variable for the Heroku app name:
export APP_NAME=APP_NAME
Replace
APP_NAMEwiththe app name returned by theheroku createcommand.Add the Heroku Postgres add-on to provision a PostgreSQL database:
heroku addons:create heroku-postgresql:mini
Make sure the add-on was successfully added:
heroku addons
If the Postgres add-on was successfully added, you see a messagesimilar to the following:
Add-on Plan Price State----------------- ----- -------- -----heroku-postgresql mini 5$/month created
Deploy the app to Heroku:
git push heroku master
Run the following command to confirm the value of DATABASE_URL.
heroku config
Make note of the retrieved value for DATABASE_URL. You need this value inthe next step.
Run a Docker container.
docker run -it --rm postgres psql "DATABASE_URL"
Replace
DATABASE_URLwiththe Heroku Postgres URL that you noted in the previous step.In the Docker container, create the
TASKStable by using thefollowing command:CREATE TABLE TASKS(DESCRIPTION TEXT NOT NULL);
Exit the container:
exitIn Cloud Shell, get the Web URL for your Heroku app by running the following command:
heroku info
Open the web URL in a browser window. The app looks the followingscreenshot (although your version won't have the tasks listed):
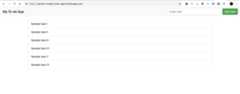
Create sample tasks in your app from the browser. Make sure the tasksare retrieved from the database and visible in the UI.
Prepare the web app code for migration to Cloud Run
This section details the steps that you need to complete to prepare your web appfor deployment to Cloud Run.
Build and publish your Docker container to Container Registry
You need a Docker image to build the app container so it can run inCloud Run. You can build the container manually or by usingBuildpacks.
Build container manually
In Cloud Shell, create a Dockerfile in the directory created bycloning the repository for this tutorial:
cat<<"EOF" > Dockerfile# Use the official Node image.# https://hub.docker.com/_/nodeFROM node:10-alpine# Create and change to the app directory.WORKDIR /app# Copying this separately prevents re-running npm install on every code change.COPY package*.json ./RUN npm install# Copy local code to the container image.COPY . /app# Configure and document the service HTTP port.ENV PORT 8080EXPOSE $PORT# Run the web service on container startup.CMD ["npm", "start"]EOF
Build your container withCloud Build and publish the image toContainer Registry:
gcloud builds submit --tag gcr.io/PROJECT_ID/APP_NAME:1 \ --gcs-log-dir=gs://PROJECT_ID_cloudbuild
Create an environment variable to hold the name of the Dockerimage that you created:
export IMAGE_NAME="gcr.io/PROJECT_ID/APP_NAME:1"
Build container with Buildpacks
In Cloud Shell,install thepack CLI.
Set the pack CLI to use the Heroku builder by default:
pack config default-builder heroku/buildpacks:22
Create an environment variable to hold the Docker image name:
export IMAGE_NAME=gcr.io/PROJECT_ID/APP_NAME:1
Build the image using the
packcommand and push or publish the imageto Container Registry:pack build --publish $IMAGE_NAME
Create a Cloud SQL for PostgreSQL instance
You create a Cloud SQL for PostgreSQL instance to serve as the backendfor the web app. In this tutorial, PostgreSQL is best suited as the sample appdeployed on Heroku, which uses a Postgres database as its backend. For purposesof this app, migrating to Cloud SQL for PostgreSQL from a managedPostgres service requires no schema changes.
Note: Database migration from on-premises or hosted environments toGoogle Cloud is a multi-step process that requires careful planning,schema and data migration, and testing. For more information, see theCloud Run documentation andimporting data into Cloud SQL.Prepare your network for Cloud SQL with a private IP address.
gcloud compute addresses create google-managed-services-default \ --global \ --purpose=VPC_PEERING \ --prefix-length=16 \ --description="peering range for CloudSQL Private Service Access" \ --network=defaultgcloud services vpc-peerings connect \ --service=servicenetworking.googleapis.com \ --ranges=google-managed-services-default \ --network=default \ --project=PROJECT_ID
Create an environment variable called
CLOUDSQL_DB_NAMEto hold the name of the database instance that you create in the next step:export CLOUDSQL_DB_NAME=tasks-db
Create the database:
gcloud sql instances create $CLOUDSQL_DB_NAME \--cpu=1 \--memory=4352Mib \--database-version=POSTGRES_15 \--region=us-central1 \--network default \--no-assign-ip
The instance might take a few minutes to initialize.
Set a password for the Postgres user:
gcloud sql users set-password postgres \ --instance=$CLOUDSQL_DB_NAME \ --password=POSTGRES_PASSWORD
Replace
POSTGRES_PASSWORDwith the password thatyou want to use for the Postgres database.
Import data into Cloud SQL from Heroku Postgres
There are multiple migration patterns that you can use to migrate data intoCloud SQL. Generally, the best approach that requires littleor no downtime is to configure Cloud SQL as a replica to the databasebeing migrated, and making Cloud SQL the primary instance aftermigration. Heroku Postgres doesn't support external replicas (followers), so inthis tutorial, you use open source tools to migrate the app's schema.
For the Tasks app in this tutorial, you use thepg_dump utility to export data from Heroku Postgres to a Cloud Storage bucketand then import it into Cloud SQL. This utility can transfer dataacross homogeneous versions or when the destination database's version is newerthan the source database.
In Cloud Shell, get the database credentials for your HerokuPostgres database that's attached to the sample app. You need thesecredentials in the next step.
heroku pg:credentials:url
This command returns the connection information string and connectionURL for your application. The connection information string has thefollowing format:
"dbname=DATABASE_NAMEhost=FQDNport=5432user=USER_NAMEpassword=PASSWORD_STRINGsslmode=require"
You need the values shown in the connection string in the next step.
For an example of anFQDN(fully qualified domain name)value in a connection information string, see theHeroku documentation.
Set environment variables to hold Heroku values that you use insubsequent steps:
export HEROKU_PG_DBNAME=DATABASE_NAMEexport HEROKU_PG_HOST=FQDNexport HEROKU_PG_USER=USER_NAMEexport HEROKU_PG_PASSWORD=PASSWORD_STRING
Replace the following:
DATABASE_NAME: the database name shown in theinformation string.FQDN: the FQDN shown in theinformation string.USER_NAME: the user name shown in theinformation string.PASSWORD_STRING: the password string shown in theinformation string.
Create a SQL format backup of your Heroku Postgres database:
docker run \ -it --rm \ -e PGPASSWORD=$HEROKU_PG_PASSWORD \ -v $(pwd):/tmp \ --entrypoint "pg_dump" \ postgres \ -Fp \ --no-acl \ --no-owner \ -h $HEROKU_PG_HOST \ -U $HEROKU_PG_USER \ $HEROKU_PG_DBNAME > herokudump.sql
Create an environment variable to hold the name of yourCloud Storage bucket:
export PG_BACKUP_BUCKET=gs://PROJECT_ID-pg-backup-bucket
Create a Cloud Storage bucket:
gcloud storage buckets create $PG_BACKUP_BUCKET \ --location=us-central1 \ --public-access-prevention \ --uniform-bucket-level-access
Upload the SQL file to this bucket:
gcloud storage cp herokudump.sql $PG_BACKUP_BUCKET/herokudump.sql
Authorize your Cloud SQL instance with thenecessary roles to import the SQL filefrom the Cloud Storage bucket:
gcloud projects add-iam-policy-bindingPROJECT_ID \ --member=serviceAccount:$(gcloud sql instances describe $CLOUDSQL_DB_NAME --format='get("serviceAccountEmailAddress")') \ --role=roles/storage.objectAdmingcloud projects add-iam-policy-bindingPROJECT_ID \ --member=serviceAccount:$(gcloud sql instances describe $CLOUDSQL_DB_NAME --format='get("serviceAccountEmailAddress")') \ --role=roles/cloudsql.editorImport the SQL file to the Cloud SQL instance:
gcloud sql import sql $CLOUDSQL_DB_NAME $PG_BACKUP_BUCKET/herokudump.sql \ --database=postgres \ --user=postgres
When prompted
do you want to continue (y/n), enter "y".
How Cloud Run accesses the Cloud SQL database
Just as the web app deployed to Heroku needs to connect to the managed instanceof Heroku Postgres, Cloud Run requires access toCloud SQL in order to be able to read and write data.
Cloud Run communicates with Cloud SQL using theCloud SQL proxy that's automatically activated and configured when youdeploy the container to Cloud Run. The database doesn't need tohave external IP addresses approved because all the communication that itreceives is from the proxy using secure TCP.
Your code needs to invoke database operations (such as fetching data from thedatabase or writing to it) by invoking the proxy over a UNIX socket.
Because this web app is written in Node.js, you use thepg-connection-stringlibrary to parse a database URL and create aconfig object. The advantage ofthis approach is that it makes connecting to the backend database seamlessacross Heroku and Cloud Run.
In the next step, you pass the database URL as an environment variable when youdeploy the web app.
Deploy the sample app to Cloud Run
In Cloud Shell, configureserverless vpc accessto allow private traffic from Cloud Run to Cloud SQL:
gcloud compute networks subnets create serverless-connector-subnet \--network=default \--range=10.0.0.0/28 \--region=us-central1gcloud compute networks vpc-access connectors create serverless-connector \--region=us-central1 \--subnet=serverless-connector-subnet
In Cloud Shell, create an environment variable that holds theconnection name of the Cloud SQL instance that you created:
export DB_CONN_NAME=$(gcloud sql instances describe $CLOUDSQL_DB_NAME --format='value(connectionName)')
Create an environment variable called
DATABASE_URLto hold the connectionstring to connect to the Cloud SQL Proxy over a UNIX port.export DATABASE_URL="socket:/cloudsql/${DB_CONN_NAME}?db=postgres&user=postgres&password=POSTGRES_PASSWORD"Create a service account for Cloud Run with an IAM role to connect to the database:
gcloud iam service-accounts create sa-run-db-clientgcloud projects add-iam-policy-bindingPROJECT_ID \ --member=serviceAccount:sa-run-db-client@PROJECT_ID.iam.gserviceaccount.com \ --role=roles/cloudsql.client
Deploy the web app to Cloud Run:
gcloud run deploy tasksapp-PROJECT_ID \ --image=$IMAGE_NAME \ --service-account=sa-run-db-client@PROJECT_ID.iam.gserviceaccount.com \ --set-env-vars=DATABASE_URL=$DATABASE_URL \ --add-cloudsql-instances $DB_CONN_NAME \ --vpc-connector serverless-connector \ --allow-unauthenticated
The preceding command also links your Cloud Run container tothe Cloud SQL database instance that you created. The command setsan environment variable for Cloud Run to point to the
Note: Because this sample tasks app is a public facing web app and uses theDATABASE_URLstring that you created in the previous step.--allow-unauthenticatedflag, deployment will fail if your organizationhas theOrganization Policy iam.allowedPolicyMemberDomainsenforced. To deploy a Cloud Run sample app that ispublic-facing and unauthenticated, disable the policy on your tutorialproject. For a real app that requires authentication for end users,reviewauthenticating end users.
Test the application
In Cloud Shell, get the URL at which Cloud Runserves traffic:
gcloud run services list
You can also review the Cloud Run Service in theGoogle Cloud console.
Make sure that your web app is accepting HTTP requests by navigating to yourCloud Run Service URL.
Cloud Run creates, orspins up, a new container when an HTTPrequest is sent to the serving endpoint and if a container is not alreadyrunning. This means that the request that causes a new container to spin upmight take a bit longer to be served. Given that extra time, take into accountthe number of concurrent requests that your app can support and any specificmemory requirements it might have.
For this app, you use the default concurrency settings, which allow for aCloud Run service to serve 80 requests concurrently from a singlecontainer.
Clean up
To avoid incurring charges to your Google Cloud account for the resourcesused in this tutorial. You might also want to delete the resources created inHeroku for this tutorial.
Delete the Google Cloud project
Delete the Heroku App
To delete the sample app you deployed to Heroku and the associated PostgreSQLadd-on, run the following command:
heroku apps:destroy -aAPP_NAME
What's next
- Learn aboutimporting data into Cloud SQL.
- Explore theCloud Run documentation.
Except as otherwise noted, the content of this page is licensed under theCreative Commons Attribution 4.0 License, and code samples are licensed under theApache 2.0 License. For details, see theGoogle Developers Site Policies. Java is a registered trademark of Oracle and/or its affiliates.
Last updated 2025-12-15 UTC.