
Use Cloud SQL for PostgreSQL with Rails 7 on App Engine
Get started developing Ruby on Rails apps that run on theApp Engine flexible environment.The apps you create run on the same infrastructure that powersall of Google's products, so you can be confident that they can scale to serve allof your users, whether there are a few or millions of them.
This tutorial assumes you are familiar with Rails web development. It walks youthrough setting upCloud SQL for PostgreSQL with a new Rails app. You can also use this tutorial as a reference forconfiguring existing Rails apps to use Cloud SQL for PostgreSQL.
This tutorial supports and requiresRuby 3.0 or later.
Before you begin
- Sign in to your Google Cloud account. If you're new to Google Cloud, create an account to evaluate how our products perform in real-world scenarios. New customers also get $300 in free credits to run, test, and deploy workloads.
In the Google Cloud console, on the project selector page, select or create a Google Cloud project.
Roles required to select or create a project
- Select a project: Selecting a project doesn't require a specific IAM role—you can select any project that you've been granted a role on.
- Create a project: To create a project, you need the Project Creator role (
roles/resourcemanager.projectCreator), which contains theresourcemanager.projects.createpermission.Learn how to grant roles.
Verify that billing is enabled for your Google Cloud project.
Enable the Cloud SQL Admin API.
Roles required to enable APIs
To enable APIs, you need the Service Usage Admin IAM role (
roles/serviceusage.serviceUsageAdmin), which contains theserviceusage.services.enablepermission.Learn how to grant roles.Install the Google Cloud CLI.
If you're using an external identity provider (IdP), you must first sign in to the gcloud CLI with your federated identity.
Toinitialize the gcloud CLI, run the following command:
gcloudinit
Preparing a Cloud SQL for PostgreSQL instance
Set up a Cloud SQL for PostgreSQL instance for this tutorial.
Create aPostgreSQL instance.In this tutorial, the name of the instance is
rails-cloudsql-instance.Create adatabase in the instance.In this tutorial, the name of the production database is
cat_list_production.
Setting up your local environment for Rails
To set up your local environment for this tutorial:
Note: Alternatively, you can useCloud Shell,which comes with Ruby, Rails, Bundler, and the Google Cloud CLI already installed.For additional information on installing Rails and its dependencies, see theofficialGetting started with Rails guide.
After you complete the prerequisites, create and deploy a Rails app byusing Cloud SQL for PostgreSQL. The following sections guide youthrough configuring, connecting to Cloud SQL for PostgreSQL,and deploying an app.
Create a new app to list cats
Run the
rails newcommand to create a new Rails app. This app stores alist of cats in Cloud SQL for PostgreSQL.railsnewcat_sample_appGo to the directory that contains the generated Rails app.
cdcat_sample_app
Run the app locally
To run the new Rails app on your local computer:
Start a local web server:
bundleexecbin/railsserverIn a browser, go tohttp://localhost:3000/
The sample app displays the Rails logo with the Rails and Ruby versions.
Ctrl+C to exit the web server.Generate scaffolding for a list of cats
Generate scaffolding for a resource namedCat that is used to form a listof cats with their name and age.
Generate the scaffolding.
bundleexecrailsgeneratescaffoldCatname:stringage:integerThe command generates a model, controller, and views for the
Catresource.invokeactive_recordcreatedb/migrate/20230922063608_create_cats.rbcreateapp/models/cat.rbinvoketest_unitcreatetest/models/cat_test.rbcreatetest/fixtures/cats.ymlinvokeresource_routerouteresources:catsinvokescaffold_controllercreateapp/controllers/cats_controller.rbinvokeerbcreateapp/views/catscreateapp/views/cats/index.html.erbcreateapp/views/cats/edit.html.erbcreateapp/views/cats/show.html.erbcreateapp/views/cats/new.html.erbcreateapp/views/cats/_form.html.erbcreateapp/views/cats/_cat.html.erbinvokeresource_routeinvoketest_unitcreatetest/controllers/cats_controller_test.rbcreatetest/system/cats_test.rbinvokehelpercreateapp/helpers/cats_helper.rbinvoketest_unitinvokejbuildercreateapp/views/cats/index.json.jbuildercreateapp/views/cats/show.json.jbuildercreateapp/views/cats/_cat.json.jbuilderOpen the file
config/routes.rbto see the following generated content.Rails.application.routes.drawdoresources:catsget'cats/index'# For details on the DSL available within this file, see http://guides.rubyonrails.org/routing.htmlendAdd
root 'cats#index'to the file.Rails.application.routes.drawdoresources:catsget'cats/index'# For details on the DSL available within this file, see http://guides.rubyonrails.org/routing.htmlroot'cats#index'endSave the file and close it.
Test the Rails app asinstructed before.
Using Cloud SQL for PostgreSQL with App Engine
Cloud SQL for PostgreSQL is a fully-managed database service to set up,maintain, manage, and administer your relational PostgreSQL databases inGoogle Cloud. You can use Cloud SQL ina Rails app like any other relational database.
Set up Cloud SQL for PostgreSQL
To begin using Cloud SQL with your Rails app in production:
Add the
pgandappenginegems to theGemfilefile.bundleaddpgbundleaddappengineThe Rails
Gemfilecontains the following additionalgementries:Note: Thegem"appengine","~> 0.6"gem"pg","~> 1.2"appenginegem provides a Rake task to run database migrations inproduction.To configure the Rails app to connect with Cloud SQL, open the
config/database.ymlfile. The followingboilerplate database settings for SQLite are displayed:# SQLite version 3.x# gem install sqlite3## Ensure the SQLite 3 gem is defined in your Gemfile# gem 'sqlite3'#default:&defaultadapter:sqlite3pool:5timeout:5000development:<<:*defaultdatabase:db/development.sqlite3# Warning: The database defined as "test" will be erased and# re-generated from your development database when you run "rake".# Do not set this db to the same as development or production.test:<<:*defaultdatabase:db/test.sqlite3production:<<:*defaultdatabase:db/production.sqlite3Configure the Cloud SQL instance connection name for theApp Engine production environment.
Retrieve the instance connection name.
gcloudsqlinstancesdescriberails-cloudsql-instanceCopy the value next to
connectionName.
Modify the
database.ymlproduction database configuration to the following:production:adapter:postgresqlencoding:unicodepool:5timeout:5000username:"[YOUR_POSTGRES_USERNAME]"password:"[YOUR_POSTGRES_PASSWORD]"database:"cat_list_production"host:"/cloudsql/[YOUR_INSTANCE_CONNECTION_NAME]"Where:
[YOUR_POSTGRES_USERNAME]represents your Cloud SQL for PostgreSQL instance username.[YOUR_POSTGRES_PASSWORD]represents your Cloud SQL for PostgreSQL instance password.[YOUR_INSTANCE_CONNECTION_NAME]represents the instance connection namethat you copied in the previous step.
The Rails app is now set up to use Cloud SQL when deploying toApp Engine flexible environment.
Deploying the app to the App Engine flexible environment
App Engine flexible environment uses a file calledapp.yaml to describe an app's deployment configuration. If this file isn'tpresent, the gcloud CLI tries to guess the deployment configuration.However, you should define the file to provide required configuration settingsfor the Rails secret key and Cloud SQL.
To configure the sample app for deployment to App Engine, create a newfile namedapp.yaml at the root of the Rails app directory and add thefollowing:
entrypoint:bundle exec rackup --port $PORTenv:flexruntime:rubyConfigure the Rails secret key in theapp.yaml file
When a Rails app is deployed to theproduction environment, set theenvironment variableSECRET_KEY_BASE with a secret key to protect user sessiondata. This environment variable is read from theconfig/secrets.yml file inyour Rails app.
Generate a new secret key.
bundleexecbin/railssecretCopy the generated secret key.
Open the
app.yamlfile that you created earlier, and add anenv_variablessection. Theenv_variablesdefines environment variablesin the App Engine flexible environment. Theapp.yamlfile shouldlook similar to the following example with[SECRET_KEY]replaced with yoursecret key.entrypoint:bundle exec rackup --port $PORTenv:flexruntime:rubyenv_variables:SECRET_KEY_BASE:[SECRET_KEY]
Configure the Cloud SQL instance in theapp.yaml file
Next, configure the App Engine flexible environment to use a specifiedCloud SQL instance by providing the Cloud SQL instanceconnection name in theapp.yaml configuration file.
Open the
app.yamlfile, and add a new section namedbeta_settings.Define a nested parameter
Note: You can retrieve the Cloud SQL instance connection name byrunningcloud_sql_instanceswith the instance connectionname as the value.gcloud sql instances describe rails-cloudsql-instance.The
app.yamlshould look similar to the following:entrypoint:bundle exec rackup --port $PORTenv:flexruntime:rubyenv_variables:SECRET_KEY_BASE:[SECRET_KEY]beta_settings:cloud_sql_instances:[YOUR_INSTANCE_CONNECTION_NAME]
Create an App Engine flexible environment app
If this is the first time you are deploying an app, you need to create anApp Engine flexible environment app and select theregion where you want to run the Rails app.
Create an App Engine app.
gcloudappcreateSelect a region that supports App Engine flexible environment forRuby apps. Read more aboutRegions and zones.
Deploy a new version
Next, deploy a new version of the Rails app described in theapp.yaml filewithout redirecting traffic from the current default serving version by running this command:
gcloudappdeploy--no-promoteIt can take several minutes to finish the deployment. Wait for a successmessage. You can view deployed versions in the App Engineversion list.
Warning: The older versions of your app remain, as do their associated VMinstances. Be aware that all of these app versions and VM instances are billableresources.After you deploy the new version, if you attempt to access this new version, itshows the following error message because you haven't migrated the database.
Grant required permission for theappengine gem
Next, grant access to the cloudbuild service account to run production databasemigrations with theappengine gem.
List available projects.
gcloudprojectslistIn the output, find the project you want to use to deploy your app, and copythe project number.
Add a new member to your project IAM policy for the role
roles/editortorun database migrations. ReplacePROJECT_IDwith your Google Cloud project ID and replacePROJECT_NUMBERwith the project number you copied inthe previous step.gcloudprojectsadd-iam-policy-bindingPROJECT_ID\--member=serviceAccount:PROJECT_NUMBER@cloudbuild.gserviceaccount.com\--role=roles/editor
Migrate your Rails database
Rails database migrations are used to update the schema of your database withoutusing SQL syntax directly. Next you migrate yourcat_list_production database.
Theappengine gem provides the Rake taskappengine:exec to run a commandagainst the most recent deployed version of your app in the productionApp Engine flexible environment.
Migrate the Cloud SQL for PostgreSQL
cat_list_productiondatabase inproduction.bundleexecrakeappengine:exec--bundleexecrakedb:migrateYou should see output similar to:
----------EXECUTECOMMAND----------bundleexecrakedb:migrateDebuggeegcp:787021104993:8dae9032f8b02004successfullyregistered==20230922063608CreateCats:migrating=======================================--create_table(:cats)->0.0219s==20230922063608CreateCats:migrated(0.0220s)==============================----------CLEANUP----------PROJECT_NUMBER@cloudbuild.gserviceaccount.comhas theroles/editorrole.To verify the database migration, enter the following URL in your browser:
https://VERSION_ID-dot-PROJECT_ID.REGION_ID.r.appspot.comReplace the following:
VERSION_ID: The new version of the app that you deployed previously.To get a list of versions, usegcloud app versions list. The lastdefault service version item is the latest deployment.PROJECT_ID: Your Google Cloud project IDREGION_ID: Acode that App Engine assignsto your app
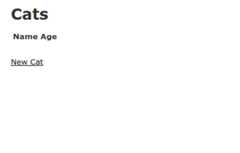
The following is displayed for a successful deployment:
Migrate traffic to new version
Finally, direct traffic to your newly deployed version by using the followingcommand:
gcloudappservicesset-trafficdefault--splitsVERSION=1The new version of the app is now accessible from the following URL:
https://PROJECT_ID.REGION_ID.r.appspot.comReading App Engine logs
Now that you have deployed your Rails app, you might want to read the logs. Youcan read the app logs by using theLogs Explorer located in the Google Cloud console.
You can learn more aboutreading logs using the gcloud CLI.
Clean up resources
After you finish the tutorial, you can clean up the resources that you created so that they stop using quota and incurring charges. The following sections describe how to delete or turn off these resources.
Delete project
The easiest way to eliminate billing is to delete the project that you created for the tutorial.
To delete the project:
Delete an App Engine version
To delete an app version:
- In the Google Cloud console, go to theVersions page for App Engine.
- Select the checkbox for the non-default app version that you want to delete.Note: The only way you can delete the default version of your App Engine app is by deleting your project. However, you canstop the default version in the Google Cloud console. This action shuts down all instances associated with the version. You can restart these instances later if needed.
In the App Engine standard environment, you can stop the default version only if your app has manual or basic scaling.
- To delete the app version, clickDelete.
Delete a Cloud SQL instance
To delete a Cloud SQL instance:
- In the Google Cloud console, go to theInstances page.
- Click the name of the SQL instance you that want to delete.
- To delete the instance, clickDelete, and then follow the instructions.
What's next
Except as otherwise noted, the content of this page is licensed under theCreative Commons Attribution 4.0 License, and code samples are licensed under theApache 2.0 License. For details, see theGoogle Developers Site Policies. Java is a registered trademark of Oracle and/or its affiliates.
Last updated 2025-12-17 UTC.