

Build and export test resources
This pageapplies toApigee andApigee hybrid.
View Apigee Edge documentation.
Before youtest APIs, you may need to build a set of test resources, such as API products, developers, or apps, that represent those same resources that might exist in the production environment in your Apigee organization.
Build and export test resources as described in the following sections. See alsoManage folders and files in an Apigee workspace.
Before you begin: Familiarize yourself with the concepts described in the following topics:- What is an API product?
- Registering app developers
- Controlling access to your APIs by registering apps
- Using key value maps
Build test resources
To build test resources,create a test bundle and edit the test resources defined in the following table.
| Test resource | Description |
|---|---|
API products (products.json) | Define the API products used to bundle APIs and make them available to developers. |
Developers (developers.json) | Register the developers that will access your APIs. |
Developer apps (developerapps.json) | Register apps to control access to your APIs. |
Key value maps (maps.json) | Define the key value maps (KVMs) used by your APIs to store data for retrieval at runtime. |
Create a test bundle
To create a test bundle in Cloud Code:
Perform one of the following actions:
Position your cursor over thetest data folder in your Apigee workspace and click
 .
.
SelectView > Command Palette to open the Command palette and selectCloud Code: Create Apigee test bundle.
Enter a unique name for the test bundle and pressEnter.
The test bundle is added to thetest data folder in the Apigee section.

Configure the test resources, as described in the following sections.
Define API products (products.json)
Define the API products used to bundle APIs and make them available to developers. For more information about API products, seeWhat is an API product?
To define API products, update theproducts.json file using the configuration wizard or byediting theproducts.json configuration file directly. For a description of the fields in theproducts.json file, seeResource: ApiProduct.
To define API products using the configuration wizard:
Position your cursor over theproducts.json file for the test bundle and click
. TheCreate API product wizard opens.
Enter a name for the API product and step through the configuration wizard to autopopulate fields in the
products.jsonfile. Theproducts.jsonfile is opened in the editor.Edit the configuration information, as required.
SelectFile > Save or ⌘S to save your edits.
The following example defines themyapiproduct API product that contains thehelloworld API proxy.
[ { "apiResources": [ "/", "/*", "/**" ], "quota": "100", "quotaInterval": "1", "quotaTimeUnit": "minute", "name": "myapiproduct", "displayName": "My first API product", "proxies": [ "helloworld" ] }]Register developers (developers.json)
Register the developers that will access your APIs. For more information about developers, seeRegistering app developers.
To register developers, update thedevelopers.json file using the configuration wizard or byediting thedevelopers.json configuration file directly. For a description of the fields in thedevelopers.json file, seeResource: Developer.
To register developers using the configuration wizard:
- Position your cursor over thedevelopers.json file for the test bundle and click.
- Enter the developer email and other values in the configuration wizard to autopopulate fields in the
developers.jsonfile.Thedevelopers.jsonfile is opened in the editor. - Edit the configuration, as required.
- SelectFile > Save or ⌘S to save your edits.
The following example defines the developerahamilton@example.com:
[ { "email": "ahamilton@example.com", "userName": "ahamilton", "firstName": "Alex", "lastName": "Hamilton" }]Register developer apps (developerapps.json)
Register developer apps to control access to your APIs. For more information about registering developer apps, seeControlling access to your APIs by registering apps.
Note: We recommend that youdefine API products andregister developers before you register a developer app.To register developers apps, update thedeveloperapps.json file using the configuration wizard or byediting thedeveloperapps.json configuration file directly. For a description of the fields in thedeveloperapps.json file, seeResource: DeveloperApp.
To register developer apps using the configuration wizard:
- Position your cursor over thedeveloperapps.json file for the test bundle and click.
Select the developer and other values to autopopulate fields in the
developerapps.jsonfile. Thedeveloperapps.jsonfile is opened in the editor.Edit the configuration, as required.
SelectFile > Save or ⌘S to save your edits.
The following example registers the developer appmyapp forahamilton@example.com and associatesmyproduct:
[ { "attributes": [ { "name": "sample_attribute_0", "value": "sample_attribute_value_0" } ], "developerEmail": "ahamilton@example.com", "name": "myapp", "callbackUrl": "", "keyExpiresIn": "", "apiProducts": [ "myproduct" ] }]Define key value maps (maps.json)
Define the key value maps (KVMs) used by your APIs to store data for retrieval at runtime. For more information about KVMs, seeUsing key value maps.
To define key value maps, update themaps.json file using the configuration wizard or byediting themaps.json configuration file directly. For a description of the fields in themaps.json file, seeKeyValueMap resource.
To define KVMs using the configuration wizard:
- Position your cursor over themaps.json file for the test bundle and click.
- Select the scope and other values to autopopulate fields in the
maps.jsonfile. Themaps.jsonfile is opened in the editor. - Edit the configuration, as required.
- SelectFile > Save or ⌘S to save your edits.
The following example defines themykvm encrypted KVM:
[ { "name": "mykvm", "encrypted": true }]Export test resources to the Apigee Emulator
To export the test resources to the Apigee Emulator:
- Position the cursor over the test bundle that you want to export and click
 .
.
- If multiplecontainers for the Apigee Emulator are running, select the container to which you want to deploy the environment.
The active test resources appear in the Apigee Emulator, as shown in the following figure.
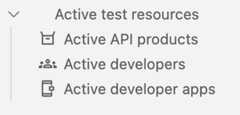
View the test resource contents to obtain specific resource information, such as anAPI key for testing which is generated automatically and included in the developer app test resource.
Except as otherwise noted, the content of this page is licensed under theCreative Commons Attribution 4.0 License, and code samples are licensed under theApache 2.0 License. For details, see theGoogle Developers Site Policies. Java is a registered trademark of Oracle and/or its affiliates.
Last updated 2025-12-17 UTC.