Refine Edges
Images that have noisy, low contrast, or blurry boundaries can end up with jagged results. After you’ve used the Scalpel, adjust further with the Edges: menu to deal with this. This video will walk through both the automatic and the customizable ways Clipping Magic handles the edges of your result. Then read about each one in full detail below!
Edge Refinement Features
Edge GuardAutomatic Edge Detail Recovery
Clipping Magic features automatic detail recovery along the edges. This makes your clipping boundary look more natural and produces much better results than just applying an alpha-mask.
Edge Guard is only used when the offset is 0 (the default).
Halo ScrubberAutomatic Halo Removal
In most images the background colors bleed into the foreground a little bit. When removing the background from an image this can cause the clipping boundary to look weird, especially when the image is put onto a new background with a different color. Clipping Magic automatically detects and removes these halos to produce a clean result that doesn't suffer the shape distortions that just offsetting the clipping boundary causes.
Corner GuardAutomatic Corner Detection For Crisper Results
Clipping Magic features automatic corner detection to keep your result nice and crisp even when there's a lot of smoothing applied. It's on by default, but you can turn it off if you prefer.
Original + Marks

Result

Original + Marks

Result

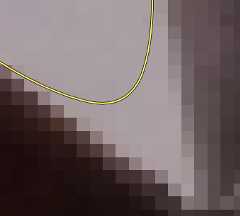
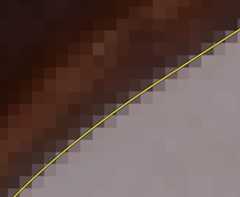
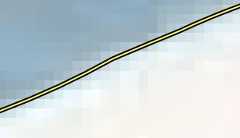
SmoothingHandle Jagged Clipping Paths
You normally want to use the lowest smoothness setting that gets rid of the jaggedness sufficiently. This is to preserve the feel of the outline and to avoid rounding out undetected corners unnecessarily.
Smart Smoothing uses a smoothing level that adapts to the local character of the foreground, so sharp edges are followed more closely, and fuzzy edges are smoothed out more.
Fixed Smoothing uses the user-specified smoothing level along the entire boundary.
Smart Smoothing and a setting of 1 usually achieves a nice foreground boundary.However, the best setting will depend on your particular image.
You may need to turn off Corner Detection to allow the smoothing to take full effect as the corners may otherwise make the result faceted.
Original + Marks

Result

Original + Marks

Result

Original + Marks

Result

Original + Marks

Result

Corner MarksRecover Overly Smoothed Corners
Some corners will inevitably go undetected by the algorithm, or you may have turned off Corner Detection. And sometimes the image requires a smoothing setting that is so high that the missed corners get rounded out. You can reclaim these corners by adding key green / red marks to force the clipping path to respect the corner:
×
Original + Marks
×
Result

✓
Original + Marks

✓
Result
Feathering RadiusSofter Boundaries, Less Halos
The feathering radius controls how many pixels it takes to transition from fully opaque foreground to fully transparent background. A small radius creates a sharp edge that is suitable for hard objects; a large radius gives an appearance of softness that works well for certain textiles and other soft or fuzzy objects.
While the algorithm normally produces clean foregrounds that are not polluted by so called 'halos' (background bleeding into the foreground), increasing the feathering radius can help in severe cases.
Auto Feathering uses a feathering radius that is automatically computed to match the average blur along the entire boundary between foreground and background.
(Default Setting)
Local Feathering uses a feathering radius that adapts to the local character of the foreground, so sharp edges stay sharp and fuzzy edges stay fuzzy. Works great on shots with varying levels of focus blur along the foreground edges, such as photographs with a shallow depth of field that exhibit bokeh.
Fixed Feathering uses the user-specified feathering radius along the entire boundary.
Auto Feathering and a setting of 1px usually achieves a very faithful reconstruction of the foreground boundary, and is the recommended setting.
Here is a sample case as illustration:
✓
Original + Marks

✓
Result

✓
Original + Marks
✓
Result

✓
Original + Marks

✓
Result

OffsetCrop Out Severe Halos
The algorithm normally produces clean foregrounds that are not polluted by so called 'halos' where the background bleeds into the foreground. However, in severe cases, or when a very tight feathering radius is desired, you can crop out any halos by offsetting the boundary inwards.
The best setting will depend on your particular image and intended use - here is a sample case as illustration:
×
Original + Marks
×
Result

✓
Original + Marks

✓
Result