- Notifications
You must be signed in to change notification settings - Fork60
Calendly integration for React apps
License
tcampb/react-calendly
Folders and files
| Name | Name | Last commit message | Last commit date | |
|---|---|---|---|---|
Repository files navigation
Calendly integration for React apps
Depending on the package manager you are using for your project, usenpm install oryarn add to include react-calendly in your react app.
npm install --save react-calendly
yarn add react-calendly
Ensure that React has been included into your page or component. Then, you can import any of the following components from the "react-calendly" package:
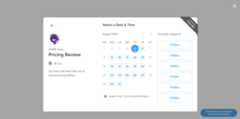
importReactfrom"react";import{InlineWidget}from"react-calendly";constApp=()=>{return(<divclassName="App"><InlineWidgeturl="https://calendly.com/your_scheduling_page"/></div>);};exportdefaultApp;
importReactfrom"react";import{PopupWidget}from"react-calendly";constApp=()=>{return(<divclassName="App"><PopupWidgeturl="https://calendly.com/your_scheduling_page"/* * react-calendly uses React's Portal feature (https://reactjs.org/docs/portals.html) to render the popup modal. As a result, you'll need to * specify the rootElement property to ensure that the modal is inserted into the correct domNode. */rootElement={document.getElementById("root")}text="Click here to schedule!"textColor="#ffffff"color="#00a2ff"/></div>);};exportdefaultApp;
importReactfrom"react";import{PopupButton}from"react-calendly";constApp=()=>{return(<divclassName="App"><PopupButtonurl="https://calendly.com/your_scheduling_page"/* * react-calendly uses React's Portal feature (https://reactjs.org/docs/portals.html) to render the popup modal. As a result, you'll need to * specify the rootElement property to ensure that the modal is inserted into the correct domNode. */rootElement={document.getElementById("root")}text="Click here to schedule!"/></div>);};exportdefaultApp;
importReactfrom"react";import{useCalendlyEventListener,InlineWidget}from"react-calendly";constApp=()=>{useCalendlyEventListener({onProfilePageViewed:()=>console.log("onProfilePageViewed"),onDateAndTimeSelected:()=>console.log("onDateAndTimeSelected"),onEventTypeViewed:()=>console.log("onEventTypeViewed"),onEventScheduled:(e)=>console.log(e.data.payload),onPageHeightResize:(e)=>console.log(e.data.payload.height),});return(<divclassName="App"><InlineWidgeturl="https://calendly.com/your_scheduling_page"/></div>);};exportdefaultApp;
You can also take advantage of using optional props on the component(s) such as including a defined height, color customization options (available on Pro plan only), utm parameters, pre-filling custom questions, etc. Here are the optional props you can use with the inline embed:
styles={{height:'1000px'}}
pageSettings={{backgroundColor:'ffffff',hideEventTypeDetails:false,hideLandingPageDetails:false,primaryColor:'00a2ff',textColor:'4d5055'}}
prefill={{email:'test@test.com',firstName:'Jon',lastName:'Snow',name:'Jon Snow',guests:['janedoe@example.com','johndoe@example.com'],customAnswers:{a1:'a1',a2:'a2',a3:'a3',a4:'a4',a5:'a5',a6:'a6',a7:'a7',a8:'a8',a9:'a9',a10:'a10'},date:newDate(Date.now()+86400000)}}
utm={{utmCampaign:'Spring Sale 2019',utmContent:'Shoe and Shirts',utmMedium:'Ad',utmSource:'Facebook',utmTerm:'Spring'}}
For the page settings to work, you'll need to pass in aurl prop that is associated with a Calendly account on thePro plan.
import{PopupModal}from"react-calendly";classCustomButtonExampleextendsReact.Component{constructor(props){super(props);this.state={isOpen:false,};}render(){return(<div><buttonstyle={{display:"block",margin:"0 auto"}}onClick={()=>this.setState({isOpen:true})}> Custom Button</button><PopupModalurl="https://calendly.com/acmesales"pageSettings={this.props.pageSettings}utm={this.props.utm}prefill={this.props.prefill}onModalClose={()=>this.setState({isOpen:false})}open={this.state.isOpen}/* * react-calendly uses React's Portal feature (https://reactjs.org/docs/portals.html) to render the popup modal. As a result, you'll need to * specify the rootElement property to ensure that the modal is inserted into the correct domNode. */rootElement={document.getElementById("root")}/></div>);}}
TheuseCalendlyEventListeneronEventScheduled prop receives an event with the following data structure:
{event:"calendly.event_scheduled",payload:{event:{uri:"https://calendly.com/api/v2/scheduled_events/AAAAAAAAAAAAAA"},invitee:{uri:"https://calendly.com/api/v2/scheduled_events/AAAAAAAAAAAAAA/invitees/AAAAAAAAAAAAAA"}}}
If you are usingCalendly's v2 api you can reference the event/invitee URIs included in the event payload to retrieve additional information about the event and/or invitee record.
Yes, see#105 for additional details.
MIT ©tcampb
About
Calendly integration for React apps
Topics
Resources
License
Uh oh!
There was an error while loading.Please reload this page.
Stars
Watchers
Forks
Packages0
Uh oh!
There was an error while loading.Please reload this page.
Contributors15
Uh oh!
There was an error while loading.Please reload this page.
