- Notifications
You must be signed in to change notification settings - Fork241
amanjeetsingh150/UberCarAnimation
Folders and files
| Name | Name | Last commit message | Last commit date | |
|---|---|---|---|---|
Repository files navigation
A demo application which demonstrates movement of car on map developed after inspiration from Uber.
Youtube Link:https://www.youtube.com/watch?v=JIs4kLZ8qQI
APIs and Libraries used
- Google Maps Api
- Google Maps Directions API
- Volley
Steps:
- Parse the "overview_polyline" from the JSON by providing the appropriate GET parameters. For eg:
"https://maps.googleapis.com/maps/api/directions/json?" + "mode=driving&" + "transit_routing_preference=less_driving&" + "origin=" + latitude + "," + longitude + "&" + "destination=" + destination + "&" + "key=" + getResources().getString(R.string.google_directions_key) - Decode the polyline which will provide you with list of latitudes and longitudes that is List<LatLng> to be apt.
- Setting up of Value animator:Create a value animator by providing the ofFloatValue, setting duration and adding update listener in Handler
ValueAnimator valueAnimator = ValueAnimator.ofFloat(0, 1);valueAnimator.setDuration(3000);valueAnimator.setInterpolator(new LinearInterpolator());valueAnimator.addUpdateListener(new ValueAnimator.AnimatorUpdateListener() { @Override public void onAnimationUpdate(ValueAnimator valueAnimator) { //CODE}); - In the value animator Update listener get the Animation fraction and evaluate the latitudes and longitudes as shown:where v is animation fractionand startposition and endPostion refer to each pair of LatLng from the decoded list from polyline for eg (0,1) then (1,2) then(2,3)and so on.
v=valueAnimator.getAnimatedFraction();lng = v * endPosition.longitude + (1 - v)* startPosition.longitude;lat = v * endPosition.latitude + (1 - v)* startPosition.latitude;
According to linear interpolation:The parameter 'v' defines where to estimate the value on the interpolated line, it is 0 at the first point and 1 and the second point. For interpolated values between the two points v ranges between 0 and 1.We evaluate values one by one between each pair of LatLng by traversing through the list. - Finally set position of marker to the new position, also evaluating the bearing between the consecutive points so that it seems car is turning literallyand finally update camera as:
marker.setPosition(newPos);marker.setAnchor(0.5f, 0.5f);marker.setRotation(getBearing(startPosition, newPos));mMap.moveCamera(CameraUpdateFactory .newCameraPosition (new CameraPosition.Builder() target(newPos) .zoom(15.5f) .build()));
The application usesGoogle Maps Api Key andGoogle Map Directions key. Get these api key on google developers console after enabling them for your project. Replace your google maps directions api key instrings.xml and google maps key ingoogle_maps_api.xml. For convenience a TODO has been added there just follow them.
Youtube Link:https://www.youtube.com/watch?v=-gTGJF7mZQI
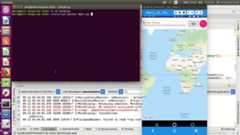
Here thepython script is acting like a driver for the user app.
- Establish a MQTT broker by logging into one of the MQTT providers. I usedCloudMQTT.
- Create the instance for MQTT and generate credentials.
- Integrate theMQTT Paho Client for android by including following in your app module
build.gradle:implementation 'org.eclipse.paho:org.eclipse.paho.client.mqttv3:1.1.0'implementation 'org.eclipse.paho:org.eclipse.paho.android.service:1.1.1'
- Fill your credentials in
MQTTHelperclass. The username, password and the server URI which is of form tcp://uri:port. - Similarly add them in
UberMQTT.pyfile. - The Python script will be acting as driver and publishing the location on MQTT server inflex interval of 1 seconds using topic of
location/track.The android app will connect to the broker and subscribe to the topic of kindlocation/+. As soon as the MQTT server receives the location it will push it to the android client. - We will receive location in form of String which will be converted to LatLng type by function
convertStringToLatLng. - Then RxRelay is used to create stream of the LatLng's. Now as we need pair of LatLng for dispatching animation we will be takingbuffer operator with count 2. This is shown below:In
messageReceivedcallback:@Overridepublic void messageArrived(String topic, MqttMessage message) throws Exception { String payload = new String(message.getPayload()); LatLng currentLatLng = convertStringToLatLng(payload); Log.d(TAG, topic + " " + currentLatLng); latLngPublishRelay.accept(currentLatLng);}And subscribing to this relay with buffer 2:latLngPublishRelay .buffer(2) .observeOn(AndroidSchedulers.mainThread()) .subscribe(new Consumer>() {@Override public void accept(List<LatLng> latLngs) throws Exception { emission++; animateCarOnMap(latLngs); }});
- As soon as the Relay will emit two LatLng the
animateCarOnMapfunction will dispatch animation through ValueAnimator. This animation will be based on same logic as was explained above.
If you found this code demo helpful or you learned something today and want to thank me, consider buying me a cup of ☕ atPayPal
About
A demo app showing movement of car on map like in Uber.
Topics
Resources
Uh oh!
There was an error while loading.Please reload this page.
Stars
Watchers
Forks
Releases
No releases published
Packages0
No packages published

